Cobra Pose (Bhujangasana): 10 Powerful Benefits for Spine, Back Pain & Health
The complete human body needs the spine as base support, which leads to stronger posture and decreased pain, and enhanced vitality through spinal strength and flexibility. Cobra Pose constitutes a fundamental yoga position that offers beneficial effects for your spinal strength. The traditional Bhujangasana enables both a strong back and many vital advantages for your health.
The following content investigates what is Bhujangasana as a pose while demonstrating its procedures, steps, together with variations Purna Bhujangasana and Tiryaka Bhujangasana followed by a list of its top 10 benefits of Bhujangasana.
Improve Spinal Health with Bhujangasana – The Powerful Cobra Pose
Your body relies on the backbone as its main support structure to move properly and stand upright while controlling the nervous system. The physical realignment that results from a sturdy spine creates beneficial energy flows along with pain reduction that leads to higher overall bodily vitality. Bhujangasana, also known as the Cobra Pose, enables you to build and refresh the strength of your spine through its practice.
Within traditional Hatha Yoga practice, Dead Bug Pose represents an improved posture because it strengthens both the posture along with enhanced flexibility while stimulating the adrenal glands vital for stress management and hormonal regulation. The correct practice of Bhujangasana leads to better spinal blood flow, together with shoulder relaxation, while resolving back pain symptoms and tight shoulder muscles from inactive living. Cobra pose yoga brings noticeable permanent results to your health, no matter if you experience spinal difficulties or want to strengthen your body.
This extensive educational piece will explain what is Bhujangasana, and benefits of Bhujangasana, Bhujangasana yoga benefits, Cobra pose for back pain, Bhujangasana for digestion, How to do Bhujangasana step-by-step along with its health advantages, and multiple Bhujangasana variations of this pose, namely Purna Bhujangasana, Tiryaka Bhujangasana, and Shashank Bhujangasana that provide unique wellness advantages.
This article explains how cobra pose supports core strengthening along with mental focus while assisting digestion, so it is commonly included in 200 Hour Yoga Teacher Training in Rishikesh. Bhujangasana practice at the Best Yoga School in Rishikesh enables students to learn about classic and modern medical uses of this posture, particularly for back health and emotional release. This blog provides comprehensive information about the picture of Bhujangasana and its benefits for helping reduce belly fat, together with a thorough discussion of all Bhujangasana yoga benefits.
What is Bhujangasana? Understanding the Cobra Pose Yoga
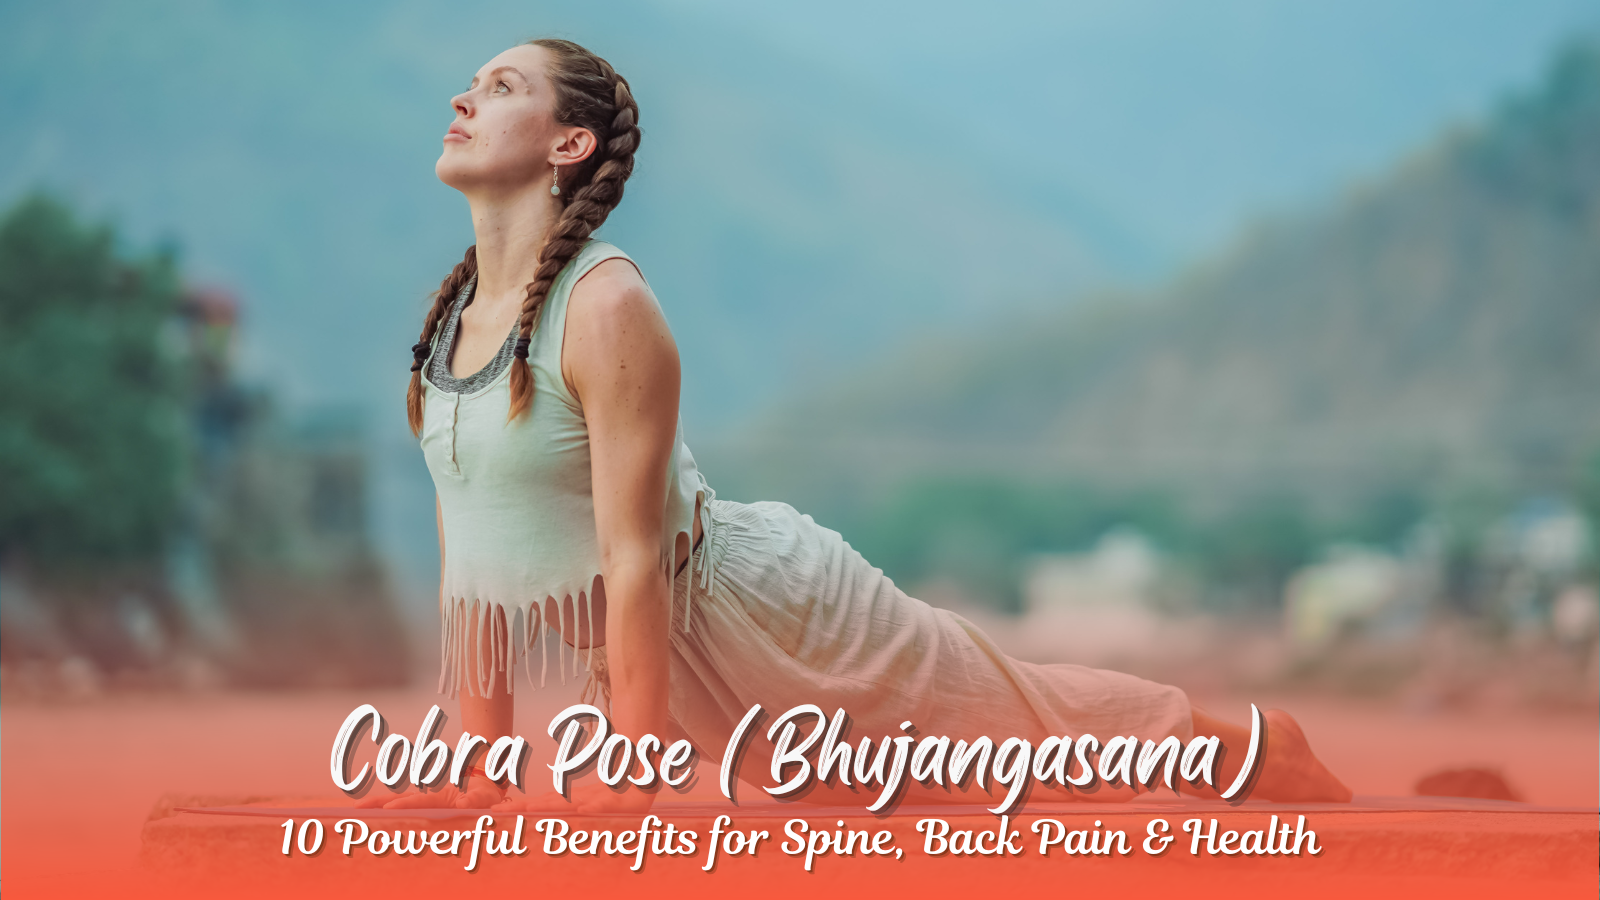
Bhujangasana derives its name from two Sanskrit elements: Bhujanga, meaning cobra, and asana, representing pose. Bhujangasana meaning receives its name due to its interpretation as Cobra Pose.
During cobra pose yoga, your spine graciously extends upward as your chest expands fully to perform a deep stretch that engages numerous muscles of your body. The practice of yoga enhances physical adaptability as well as corrects spinal positioning and brain clarity. Bhujangasana yoga comprises this back-bending posture, which students learn during 200 Hour Yoga Teacher Training in Rishikesh and many foundational yoga classes.
Bhujangasana Procedure: Step-by-Step Guide for Beginners
For understanding Bhujangasana practice procedures, you should read the following sequential steps:
- Begin the posture while resting on your belly.
- Stretch your legs forward while pointing your feet.
- Place your hands under the position of your shoulders.
- Raise your upper body from the floor while breathing in while you purposefully activate your back muscles.
- The shoulder blades need to stay away from the ears as you maintain bent elbows.
- Take 15 to 30 seconds’ breaths while deeply inhaling and exhaling.
- End your breath before lowering yourself down to the beginning position.
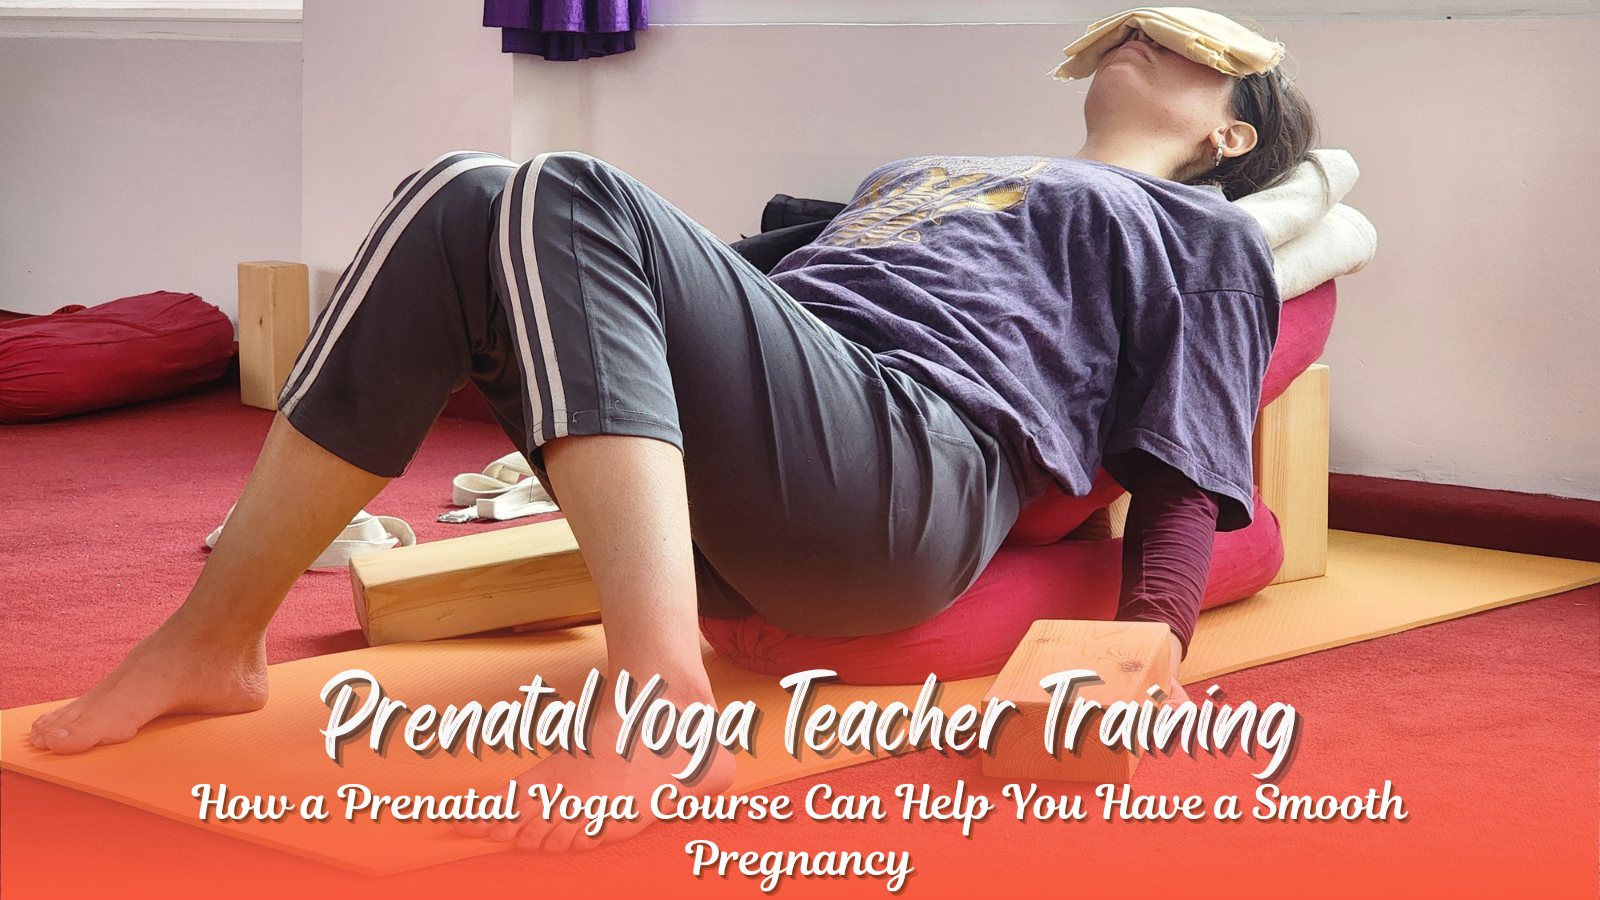
Novice practitioners should seek guidance when doing this exercise either at Yoga School in Rishikesh or within a Pre Natal Yoga Teacher Training in Rishikesh.
Top 10 Health Benefits of Bhujangasana (Cobra Pose)
1. Strengthens the Spine
Among the many Bhujangasana benefits, yoga participants achieve stronger spinal muscles. Practicing this yoga pose enhances blood circulation through spinal activation, which makes the spinal column stronger against both mental stress and normal aging effects.
2. Improves Posture
Slouching is a modern-day epidemic. Bhujangasana practice regularly counteracts slouching through its movement to expand the chest while drawing the shoulders backward to rebalance the spine.
3. Relieves Lower Back Pain
By performing cobra pose yoga, one can relieve lower back tension and chronic pain through a gentle back-bending motion which targets the lumbar region. Practicing this exercise according to proper technique enables users to use it as a therapeutic treatment for lower back problems.
4. Enhances Flexibility
Struggling with stiffness? Through its stretching action on chest areas and abdominal sections, and hip flexors, Bhujangasana makes the body more flexible, which stands as a crucial factor for injury prevention as well as enhanced movement capabilities.
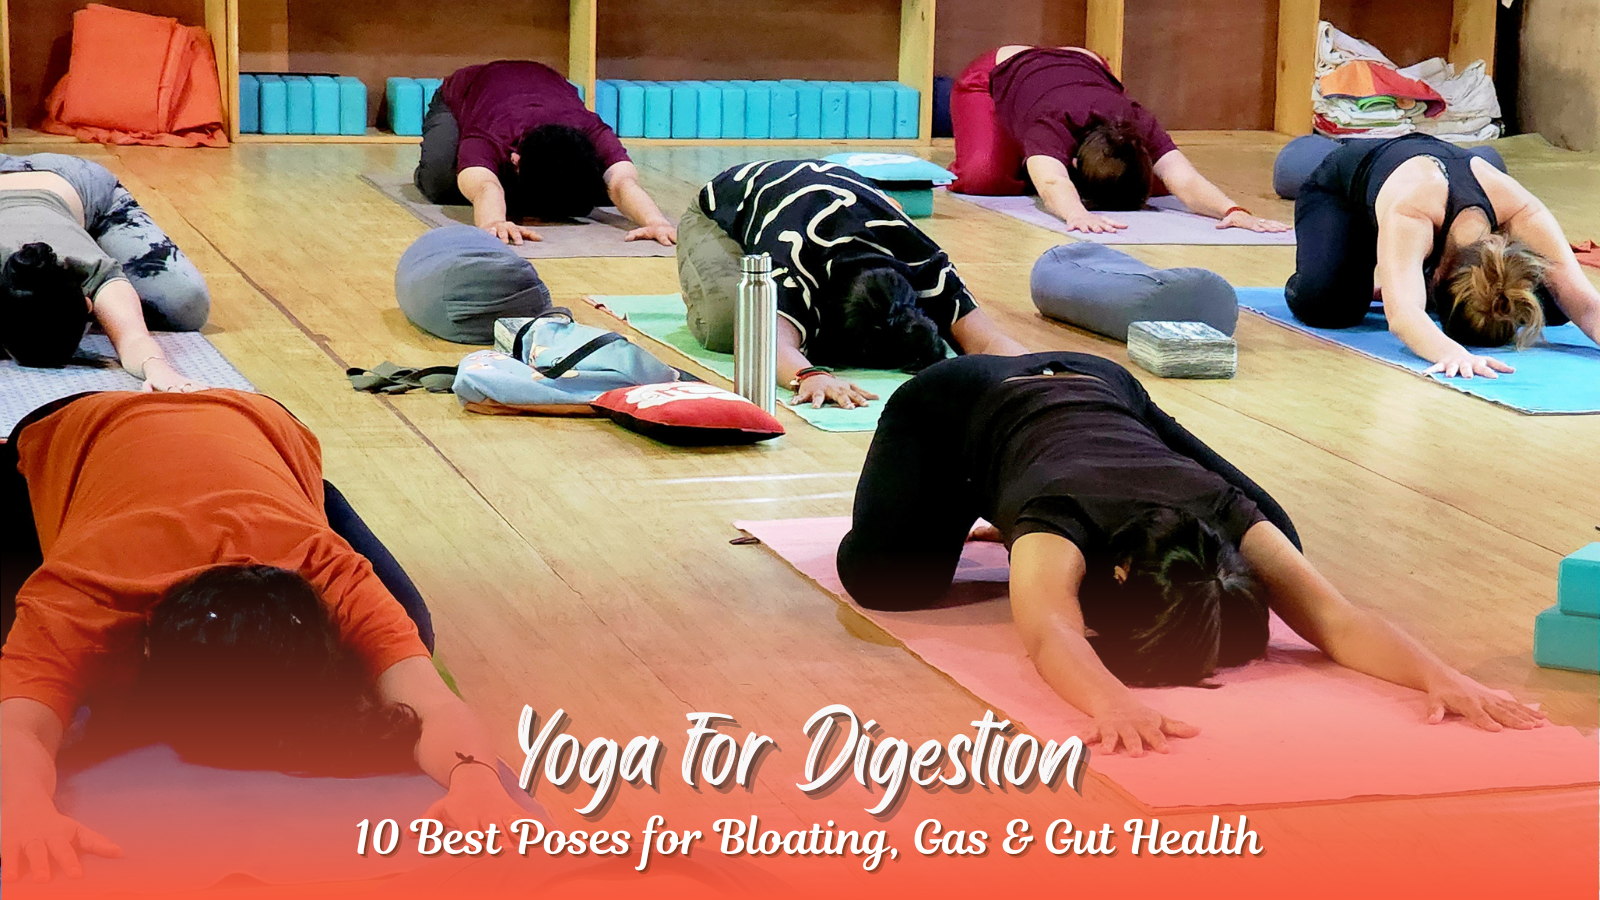
5. Stimulates Digestive Organs
Through its extension of the abdominal region, Bhujangasana can trigger better digestive performance and alleviate constipation, together with bloating symptoms.
6. Supports Weight Management
Many people wonder whether Bhujangasana provides effective belly fat reduction. Yes! Bhujangasana activates core muscles, which help tone abdominal regions while accelerating your metabolism, so it serves as an excellent weight management exercise.
7. Tones the Reproductive Organs
Daily performance of Bhujangasana strengthens both the uterus and ovaries therefore offering women substantial beneficial results. The yoga training known as Pre Natal Yoga Teacher Training in Rishikesh includes this pose as one of its fundamental elements.
8. Activates the Heart Chakra
Practicing Lotus Posture activates the Anahata (Heart) Chakra, thus enabling emotional openness, together with compassion to emerge. This posture allows deep emotional release, which makes it a position that brings spiritual healing benefits.
Bhujangasana Variations You Should Try
Looking to deepen your practice? Try these powerful Bhujangasana variations:
1. Purna Bhujangasana (Full Cobra Pose)
Advanced Bhujangasana requires you to move both your legs and your chest while extending your spine fully and engaging your core muscles.
2. Tiryaka Bhujangasana (Twisting Cobra Pose)
This modified variation completes a side bend to boost kidney and liver stimulation as it enhances spinal flexibility.
3. Shashank Bhujangasana (Rabbit-Cobra Pose Combo)
This combo, after Shashankasana Bhujangasana Benefits (Child’s Pose) and Bhujangasana benefits merges restful poses with a kinesthetic spinal extension.
The practice of Shashank Bhujangasana produces two main effects, which are spinal fluid stimulation combined with emotional release.
FAQs About Bhujangasana (Cobra Pose)
What is Bhujangasana and its benefits?
Bhujangasana Cobra Pose enables spinal strength, together with chest openness and better digestive performance. This posture, along with its health benefits, produces stress reduction and corrects body alignment and builds up abdominal strength.
What is the procedure of Bhujangasana step by step?
Lie face down, then position your hands below your shoulders before pulling your torso upward by engaging your back muscles during inhalation while maintaining the pose for several breath cycles then make an exhale on your way back to the initial position.
Can Bhujangasana increase height?
Bhujangasana does not extend your bone length, but it enhances both spinal flexibility and posture, which results in improved body stature.
Is Bhujangasana good for belly fat?
This exercise develops abdominal strength as well as waistline definition and better digestive health, which results in an ideal combination for belly fat reduction with proper diet control.
How to increase breast size in 7 days?
The practice of Bhujangasana strengthens chest muscles and corrects posture to potentially complement breast aesthetics, but cannot independently lead to breast size expansion.
Who should avoid Bhujangasana?
Individuals with severe back injuries, together with peptic ulcers or hernia, or those in their final pregnancy trimester, should refrain from practicing this particular pose. Request instructions from a professional instructor or enroll in a 200 Hour Yoga Teacher Training in Rishikesh for suitable directions.
Why Bhujangasana is Taught in Yoga Teacher Training Programs
The journey to achieve full mastery of Bhujangasana cobra pose, must begin in India because this sacred country holds the birthplace and purest form of yoga since its origins. Rishikesh, located in the Himalayas foothills appears as the “Yoga Capital of the World” because it exists near the Ganges River in this peaceful city.
The 200 Hour Yoga Teacher Training in Rishikesh provides students a complete exploration of Bhujangasana practice as they learn both the procedure and sequencing methods involving this pose. At the Best Yoga School in Rishikesh both novices and experienced practitioners will gain access to certified yoga gurus who guide them through traditional teachings and modern therapeutic applications of Bhujangasana yoga.
The special aspect of these programs lies in their multifaceted teaching approach to the cobra pose. Under this training program, you will enhance your breath control and alignment along with learning the various health impacts that Bhujangasana has on your spine and hormones and core activation, and emotional state. The Bhujangasana yoga benefits will form the basis of your study as you also examine three advanced poses: Tiryaka Bhujangasana and Purna Bhujangasana and Shashank Bhujangasana that accommodate different individual needs.
The training programs teach students about Bhujangasana’s ability to relieve stress as well as its effects to enhance digestion and decrease fatigue, alongside its benefits for women’s health needs. Attending the best yoga school in india transforms your life through an experience that unites your physical and spiritual practices with teaching abilities and healing capabilities.
The answer to “what is cobra pose” with its complete potential exists at recognized Yoga Schools located in India. Your yogic transformation starts in the birthplace of yogic tradition, and Bhujangasana serves as your initial key toward physical and emotional, and spiritual growth.
Final Thoughts: Should You Include Bhujangasana in Your Practice?
The yoga posture of Bhujangasana provides much more than mere body posturing since it creates both physical and emotional benefits, which support the spine and enhance flexibility as well as posture while balancing emotions. Bhujangasana provides stretching benefits that develop your back-muscle strength, together with neural system rejuvenation and organ stimulation while achieving energy equilibrium. Bhujangasana yoga serves as an effective system for both advancing personal yoga practice and treating persistent back pain by providing organized advantages that support physical, mental, and spiritual health.
The Bhujangasana asana adds spinal flexibility when practiced daily, along with core activation and Anahata (Heart) Chakra activation, making it a remarkable spiritual yoga pose. Individuals seeking knowledge about “what is Bhujangasana” will discover that this position provides two essential benefits by helping people lessen stress and shed tiredness while fostering focus.
A 200 Hour Yoga Teacher Training in Rishikesh allows you to reveal the full therapeutic depth and complete anatomical knowledge of Bhujangasana, which is located in the birthplace of yoga. Students of Yoga Teacher Training in India can master Bhujangasana step-by-step, along with studying different variations, including Purna Bhujangasana, Tiryaka Bhujangasana, Shashank Bhujangasana, and their individual therapeutic effects and safe practices. The program educates students about how Bhujangasana helps people achieve their health objectives through belly fat reduction and enhanced digestion, and core strengthening.
At the Best Yoga School in Rishikesh, you can earn certification to receive authentic training from traditional sources combined with scientific knowledge that covers various health objectives, including core conditioning and awareness development, and specific female health benefits from performing Bhujangasana.
Ready to begin your transformation? Launch your yogic path through expert teachers at the Best Yoga School in Rishikesh, supported by an encouraging community. Experience all Bhujangasana yoga benefits by deepening your expertise while perfecting your practice step by step through each breath and pose of each day.