Top 10 Benefits of Halasana for Weight Loss & How to Do Ardha Halasana
Constant efforts to fight off abdominal fat along with metabolic slowness continue to challenge you. Ancient yogic wisdom presents two postures that provide a profound yet unrecognized solution: Halasana Plough Pose and its introductory pose Ardha Halasana. These stretching positions serve two purposes: boosting flexibility and supporting your digestive system and hormonal balance, as well as aiding in weight management.
This article provides complete information about achieving Ardha Halasana and Halasana’s life-changing advantages to students of yoga at any practice level, also yoga for digestion, weight loss yoga poses, yoga poses for gut health, best yoga poses for metabolism, yoga for core strength. Halasana variations refer to different postures for health development.
What is Halasana (Plow Pose)?
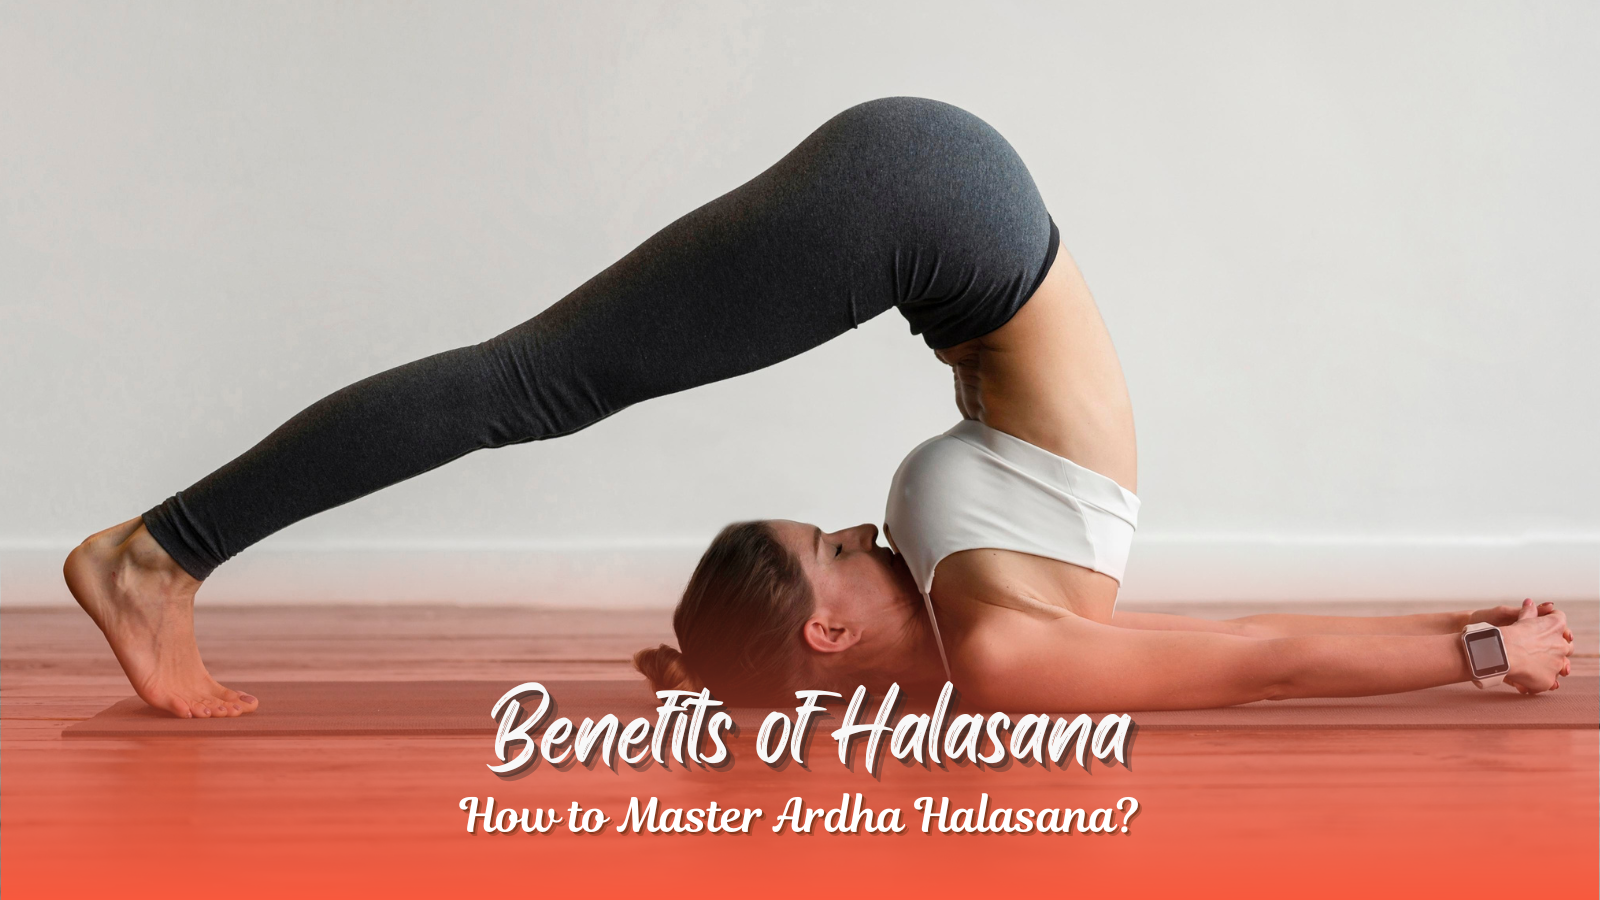
The Halasana Plough pose involves stretching the legs behind the head while resting on your back. This Hindu posture uses “Hala” which represents the “tilling” process of deep-rooted detoxification through traditional farming equipment called “plough”. What is halasana? Halasana information in english plays an important role in traditional finishing sequences because it helps cool down the body and activates inner body systems simultaneously.
Through yoga halasana pose individuals receive opportunities to find inner stillness simultaneously with the chance for introspective growth along with renewal of their essence. Halasana benefits in hindi deeply stimulates all internal body systems with special emphasis on the thyroid gland pancreas and the entire abdominal viscera region. Among various yoga poses this position stands out as a combination of core-strengthening and inversion which provides ideal conditions for body detoxification as well as fat reduction and this is halasana meaning to develop our health.
Ardha Halasana vs. Full Halasana: What’s the Difference?
Ardha Halasana (Half Plough Pose) modifies yoga Halasana by lifting the legs to form a 90-degree position without disrupting the ground angle of the back and head. Its design offers beginners as well as persons with restricted spinal flexibility an easier way to perform the pose. The yoga sequence for novices starts with Ardha Halasana images because it helps develop the required core abilities and spinal alignment to move towards advanced inverted postures.
Ardha Halasana serves several beneficial effects because it activates core muscle groups while stretching hamstring muscles in addition to increasing blood circulation to upper regions of the body. People who experience lower back conditions can use this exercise because it strengthens their lumbar muscles without causing additional tension to their spinal structures.
10 Health Benefits of Halasana for Weight Loss & Wellness
There are different halasana advantages which refer to benefits of halasana for weight loss. Halasana is used for curing which of the following deformities.
1. Boosts Metabolism
The neck area thyroid and parathyroid glands receive compression through the practice of Ardha Halasana. Halasana yoga pose benefits to control metabolism rates. A slow thyroid function causes weight gain alongside tiredness and problems related to hormones. The practice of yoga halasana pose activates the glands to produce hormones that break down fat and convert energy while detoxifying cells.
2. Improves Digestion
Whenever one performs yoga pose Ardha Halasana the posture efficiently stimulates the stomach organs together with the pancreas and intestines. Through mechanical pressure during the pose, peristalsis expands and digestion functions better while serving to expel toxins from the body. Standardized yoga practice results in improvements in constipation symptoms and reduces both bloating and indigestion complaints for practitioners during their first weeks of dedicated practice.
3. Reduces Belly Fat
People who practice Ardha Halasana yoga poses repeatedly observe significant reductions in abdominal fat becoming visible on their bodies. Through this posture, deep core muscles activate while intra-abdominal pressure increases simultaneously to start fat metabolism processes. The combination of appropriate breathing practice turns this pose into an exceptional method for burning belly fat that exercises typically struggle to eliminate.
4. Relieves Back and Shoulder Tension
When you perform the elongated stretch in the halasana position it effectively treats people who have chronic backaches along with tense shoulders. The slow stretching movement during this position both decompresses your discs and raises your posture while easing the tension that builds up when you stay seated too long.
5. Calms the Nervous System
Traditional research has confirmed that halasana plow pose activates the parasympathetic nervous system. An inverted body posture makes blood travel toward the brain and encourages activation of the pineal and pituitary glands. The poses help nervous system regulation together with anxiety reduction and better sleep which indirectly helps manage weight and maintain emotional balance.
6. Improves Blood Circulation
The polyurethane inventive posture yoga pose halasana enhances blood flow back toward the heart which returns deoxygenated fluids from the legs and abdomen. The posture improves oxygen distribution as it removes waste products throughout the body which results in internal organ rejuvenation. Halasana yoga benefits blood circulation yields positive effects that benefit skin health and bring about better focus while providing increased energy.
7. Stimulates Thyroid Function
Placing the chin inside the throat area of the body during the yogic gesture Jalandhara Bandha stimulates the thyroid gland in yoga Halasana. The function struck by hypothyroidism is essential because it fights weight gain and creates lethargy yet helps those who experience thyroid imbalance.
8. Strengthens Core Muscles
When moving the legs against gravity while maintaining control the body recruits core strength obtained from rectus abdominis obliques and transversus abdominis muscles. Halasana yoga benefits core muscles which creates a stronger abdominal wall that also provides spine stability.
9. Tones the Legs and Hips
Halasana images with extended legs followed by Ardha Halasana create tension in the calves’ gluteal muscles and lower thigh muscles. The exercise develops muscle strength while also decreasing cellulite appearance and enhancing lower body muscular definition.
10. Aids in Hormonal Balance
Practicing Halasana helps the body maintain endocrine system balance which delivers multiple health benefits to the hormones. In answering the question, what are the benefits of halasana? When hormones maintain balance, it becomes simpler to digest food along experience better moods as well as regular menstrual cycles while your metabolism works effectively which supports healthy weight loss.
Step-by-Step Guide to Perform Ardha Halasana
How to Do Halasana (Step-by-Step)
Halasana steps and benefits are as follows:
- Lay on your back on a yoga mat while extending your legs together with your arms resting by your side on the mat.
- Perform an inhale as you raise your legs until they reach a position at 90 degrees.
- Use your abdominal muscles to raise your hips while simultaneously sustaining the lower back with your hands.
- Progressively move your legs toward a full-overhead position until the toes reach the back of the floor.
- Maintain a steady engagement of the thighs while keeping the back straight at all times.
- Maintain the posture position between 15 to 30 seconds by deepening your breaths.
- The spine should be lowered one vertebra at a time after exhaling while performing the movement.
Steps of halasana help to manage proper ways to practice this posture. The procedure of halasana refers to these points. Novice practitioners along with people with medical concerns should receive instruction from a certified yoga instructor before performing Halasana plough pose.
How to Master Ardha Halasana – Perfect for Beginners
Ardha Halasana works as an effective pose that teaches poses for performing full Halasana. This following method provides a secure approach for practicing this pose.
- Start from a lying position with extensions of your legs and your sides in a rest position.
- During inhalation, lift your leg to reach 90 degrees unless our lower body remains on the floor.
- Holding this posture for some breaths you should change your leg position.
- After feeling comfortable you should raise both legs as one unit to reach a 90-degree position.
- You should activate your core muscles and keep your spine fixed to the floor.
- Sustain the posture from 30 seconds to 1 minute while breathing calmly.
- Slowly lower down your body following an exhale.
Regular practice of ardha halasana enables both abdominal walls strengthening and the development of confidence needed to perform complete upside-down poses.
Complementary Asanas to Maximize Halasana Benefits
Your daily yoga routine should include the following postures to enhance the effects of Halasana and Ardha Halasana:
- Vakrasana: Through the practice of Vakrasana you gain both detoxified internal organs and increased spinal flexibility.
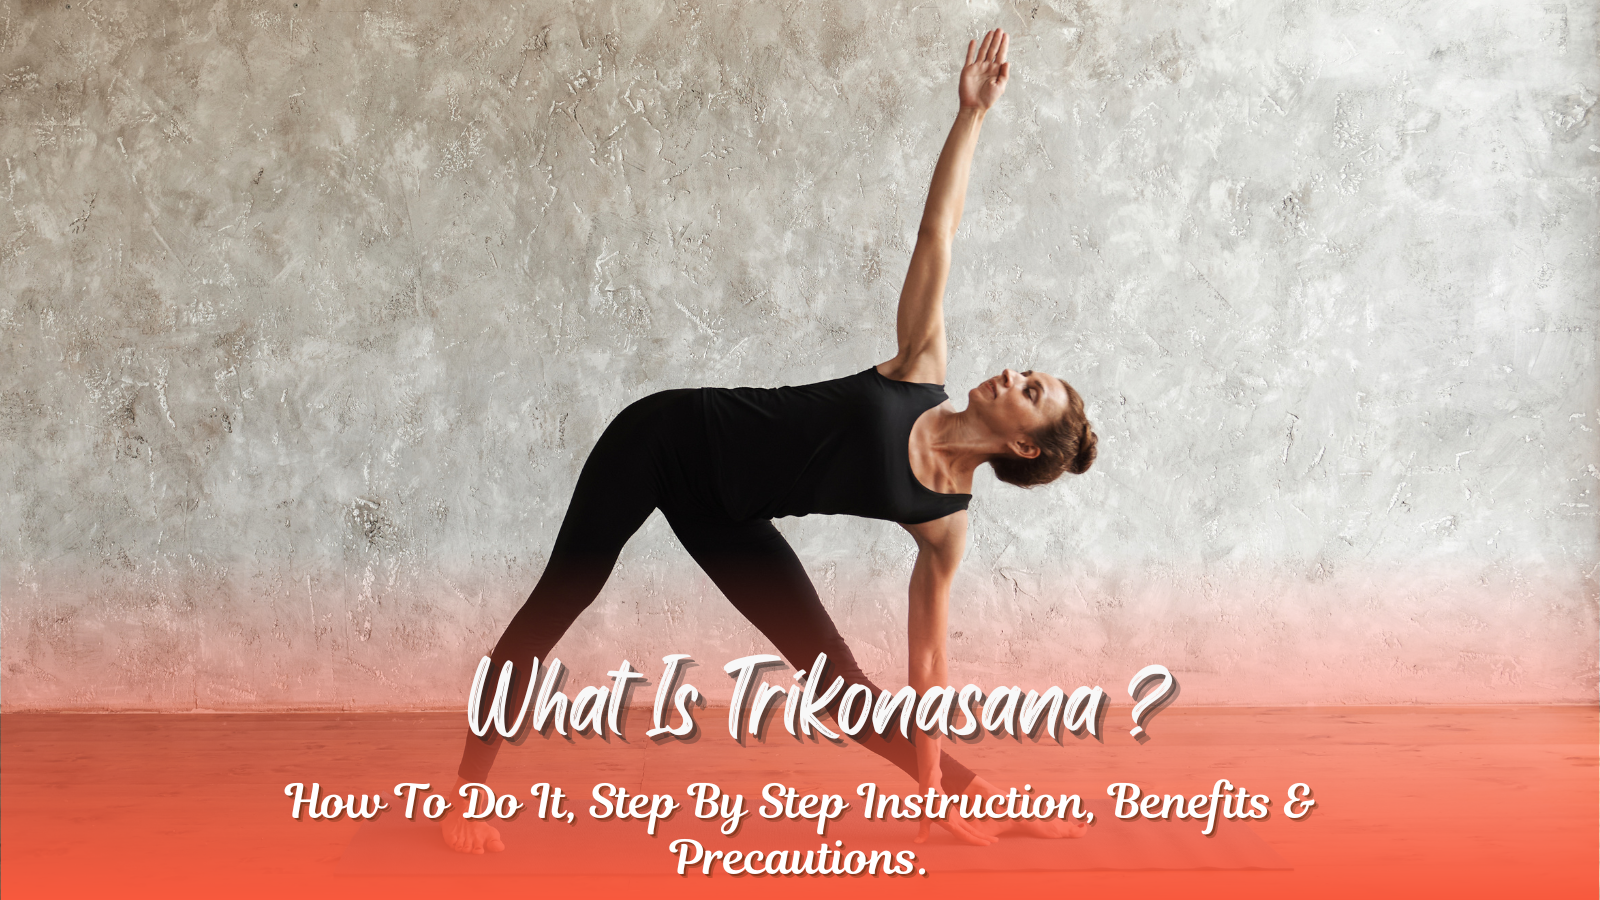
- Trikonasana: This Trikonasana posture provides core muscle strength while also promoting waist toning.
- Padmasana: This asana named Padmasana helps both meditation practice and attain mental serenity.
- Virabhadrasana: The practice of Virabhadrasana develops body stamina while it strengthens the lower body regions.
- Tadasana: Tadasana improves posture and balance.
- Dhanurasana: Through Dhanurasana practice both the chest receives opening movement and the back muscles receive strengthening development.
- Vrikshasana: Vrikshasana improves focus and leg strength.
There are different halasana benefits for our human body.
Common Mistakes in Halasana (Plough Pose) and How to Avoid Them
Practicing Halasana and Ardha Halasana provides multiple advantages including weight loss but beginners need to practice these postures with exact precision because improper execution leads to injury. New practitioners commonly fail to recognize essential alignment points which makes their poses less impactful and possibly painful. Common mistakes in performing these postures can be easily avoided through the following steps.
1. It is important not to forcefully attempt to move your legs toward the floor.
The majority of new practitioners attempt harsh foot movements to reach the floor during their Halasana practice. Forcefully pressing the legs toward the floor may result in spinal or neck overstretching. Set your feet on a supportive block or bolster unless they reach the floor without any discomfort. The result of regular practice will lead to the natural enhancement of flexibility.
2. The mistake involves lifting or twisting your head in this pose.
Halasana position requires the head to stay straight while being performed because turning it puts dangerous amounts of stress on cervical spinal areas which may damage body tissues seriously. A straight and relaxed position of your head must be maintained on the yoga mat.
3. Bending the Knees
When performing halasana poses with bent knees it weakens the stretch efficiency. The posture puts unwanted stress on the lower back region. Perform core activation before your legs eventually extend into full straightness.
4. Holding the Breath
People commonly make the error of breath retention while performing inversions. People subscribing to this practice typically stop breathing since they either need to pay attention or need to find relief from discomfort. Deep steady inhalations maintain oxygenation and relax muscles during an exercise. Inhalation should occur while performing the movements and exhalation should happen when you enter the new pose.
5. Collapsing the Chest
The downward movement of the chest during Halasana triggers reduced breathing capacity while it also produces shoulder tension. Lifting and extending the sternum while pressing shoulder blades toward the floor opens your chest in this posture.
6. The right transition through and out of Pose should be completed at a controlled pace.
Decelerating between movements frequently leads to dizziness as well as physical stress. Slowly perform both entry and exit of the halasana plough pose by controlling the descent of your spine with one vertebra at a time. These are the benefits halasana can improve.
Contraindications of Halasana (Who Should Avoid It)
The health benefits of Halasana yoga pose are remarkable yet this posture should be avoided by some individuals for halasana procedure benefits and contraindications. Contraindications of halasana should be avoided by people dealing with specific medical conditions or physical disabilities. Before performing this yoga, posture seek specialist review from either a certified yoga teacher or medical professional.
1. Neck or Spine Injuries
The cervical spinal flexion required in Halasana should be avoided by individuals who suffer from neck pain or possess spondylitis herniated discs or spinal injuries unless they use approved assistance with proper medical oversight.
2. High Blood Pressure or Heart Conditions
The upside-down position of halasana yoga tends to raise the pressure inside the head as well as the chest. The inverted position during halasana yoga must be prevented by individuals who have unmanaged hypertension or heart diseases.
3. Glaucoma or Ear Disorders
The pressure rise in intraocular and inner ear spaces because of halasana can be dangerous for people who have glaucoma retinal diseases or ear infections.
4. Pregnancy and Menstruation
The practice of inversions should be generally avoided during pregnancy because hormonal transformations and natural body modifications create safety concerns. The practice of restorative sequences through menstruation takes precedence over vigorous inversions when performed by practitioners.
5. Asthma or Respiratory Issues
A restricted breathing experience could occur from chest compression when performing the halasana pose. This pose needs careful consideration from people who have asthma or breathing difficulties.
6. Enlarged Thyroid (Goiter)
The neck pressure in Halasana stimulates the thyroid gland but at the same time intensifies discomfort symptoms when you have a goiter. Ardha Halasana should possibly serve as an alternative pose because of its modifications.
Real-Life Testimonials from Our Yoga Students
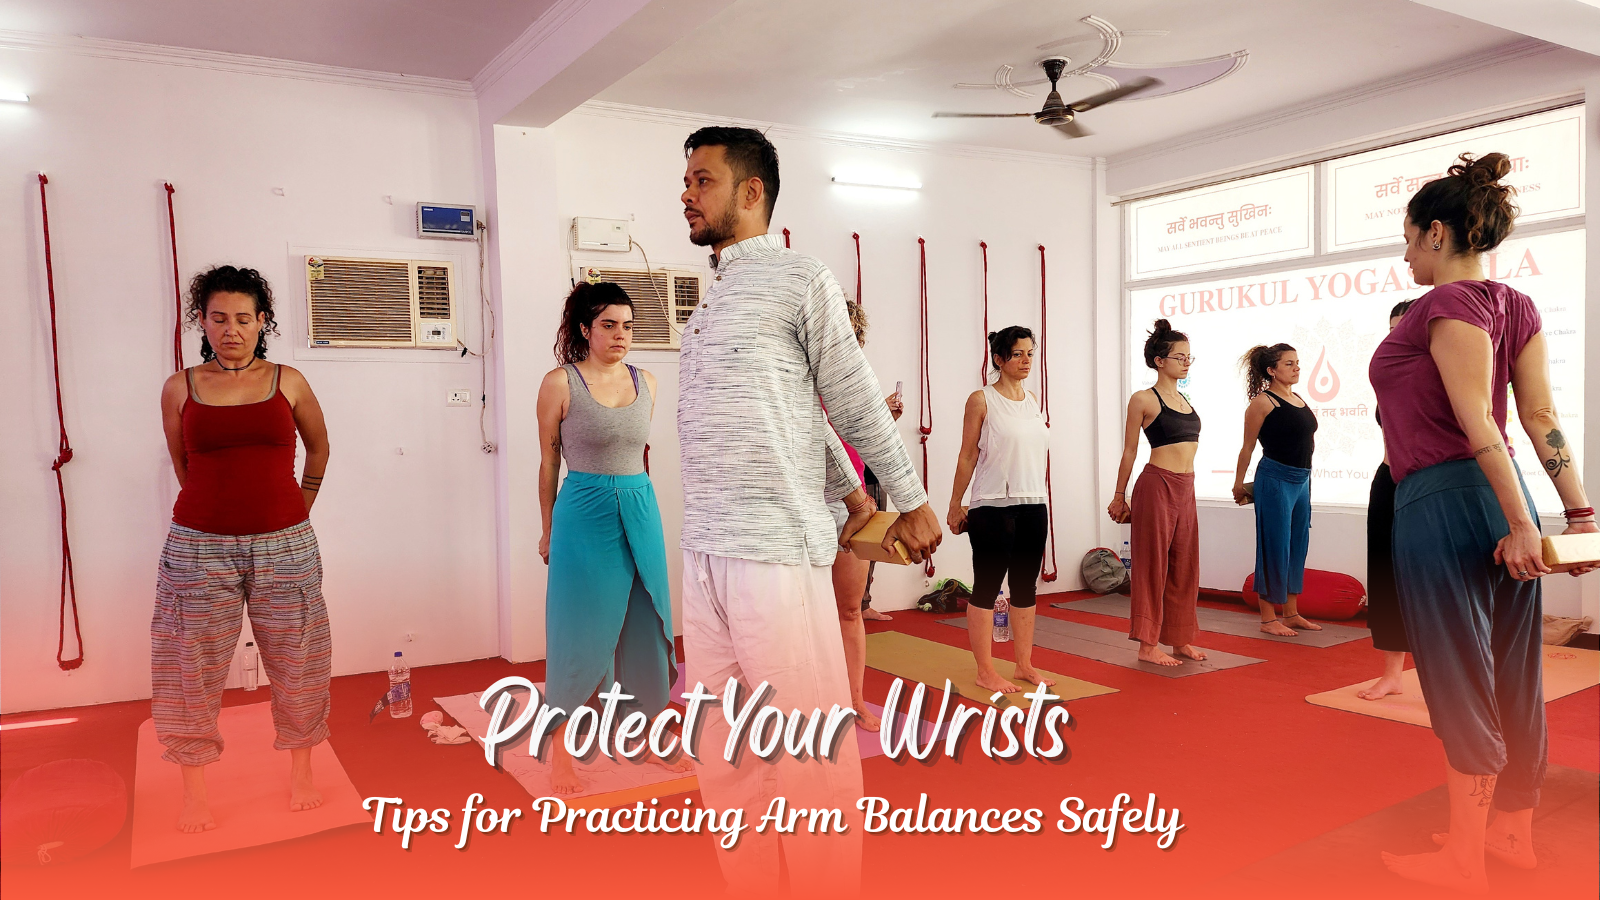
Various students from India and Foreign countries are involved with Gurukul Yogashala, yoga school in India, to practice yoga and pranayama with the best yoga teachers in India.
One student who was involved with 200 Hour Yoga TTC graduates stated “I battled with being overweight throughout numerous years. Reliable practice of Halasana helped me lose 7 kg weight within 2 months during my training period at Gurukul Yogashala. My digestive system and mental focus cleared up together with the weight loss”
Another student from the USA stated “I was brand new to yoga yet Ardha Halasana proved itself as an excellent exercise which helped me achieve better flexibility while controlling my thyroid condition. The instructors were incredibly supportive”.
Check Out More Reviews and Testimonials of Gurukul Yogashala
Frequently Asked Questions (FAQs) About Halasana and Ardha Halasana
1. Does Halasana reduce belly fat?
Belly fat reduction becomes possible through the regular practice of both halasana and ardha halasana since these postures effectively work abdominal muscles while improving digestion and metabolism.
2. Can Halasana be done after dinner?
The practice of halasana yoga pose needs to be avoided after eating a meal. Practitioners should perform halasana yoga poses after their body is empty from food or if several hours have passed since meals for maximum comfort during practice and digestive system health maintenance.
3. When to inhale and exhale during Halasana?
Breathe in while preparing and raising your legs before the exhalation transition leads to the halasana position. About halasana, proper execution requires deep breathing control during the entire performance of this particular asana.
4. What is Halasana and its benefits?
In Halasana practice also known as plough pose individuals experience stretching of their spine as the pose enables mind relaxation while enhancing digestion and thyroid stimulation and aiding weight management. People perform this pose for multiple reasons such as stretching their body, detoxifying their system, and maintaining their hormone levels.
5. How to do a Halasana pose?
Begin by lying on your back before lifting your legs until they reach a 90-degree angle while simultaneously supporting your lower back and lowering them towards your head until your legs touch the ground. The surface of your hands should remain flat or be used to support your hips. Beginners should perform ardha halasana before trying this posture.
6. Is Halasana good for the skin?
Halsana yoga poses promote bloodstream circulation and stress reduction and hormone regulation which collectively improve skin health. The skin benefits from both vrikshasana and padmasana yoga poses.
7. Can I do Halsana every day?
Body readiness together with no medical restrictions allows practicing halasana one time per day. The initiation stage should begin with ardha halasana while seeking proper guidance for gradual advancement.
8. Which yoga is the best for face glow?
Face skin can benefit from better blood circulation through practicing the standing poses halasana, vakrasana, and tadasana together with trikonasana. Deep breathing techniques when performed alongside these poses will improve their positive effects.
9. What are the disadvantages of Halasana?
Neither correct nor wrong execution of halasana results in neck strain or breathing difficulties but may exacerbate current medical problems. Those with glaucoma when high blood pressure or spinal problems exist should only practice this pose under qualified instruction.
Why Practice Halasana at a Yoga School in Rishikesh, India?
Gurukul Yogashala exists as a vital center of authentic yogic knowledge which resides in the Himalayan heartlands. At our position as a top-rated Yoga School in Rishikesh, we maintain the original yoga essence through contemporary teaching approaches directed to modern students. A prime spot near the Ganga River and Himalayan energy lets our center become the perfect sanctuary for profound spirituality along with physical transformation.
Gurukul Yogashala brings the right yoga training program to meet the needs of beginners alongside advanced practitioners of all levels. The globally accredited Yoga Teacher Training School in Rishikesh uses its teachings to empower thousands of students through their training which builds confident and skilled compassionate yoga instructors. Learners participating in our training receive a holistic education that includes students of philosophy and practical skills such as asanas, pranayama, alignment, anatomy, and meditation which enables authentic leadership.
People experiencing beneficial effects from this strong inversion technique in their daily activities notice dramatic improvements encompassing core strength development hormonal equilibrium and skin condition improvement together with mental awareness elevation. Your practice of asanas trikonasana, vakrasana, tadasana, padmasana, dhanurasana, virabhadrasana, and vrikshasana together will form a comprehensive yoga technique.
Yoga exists as a continuous process that never reaches a terminal point. Aligning your body correctly while demonstrating patience and focused breathing constitutes the essential principles for this practice. Avoid common mistakes, always listen to your body and honor contraindications.
Join Gurukul Yogashala at the authentic yoga source to learn while building lifestyle change through deep knowledge acquisition. Gurukul Yogashala functions as a leading Yoga School in Rishikesh by facilitating several unique programs such as the Yoga Teacher Training School in Rishikesh, Ashtanga Yoga Teacher Training in Rishikesh as well as the 3 Days Yoga Retreat in Rishikesh.
Want to master Halasana under expert guidance? Join our Best Yoga Teacher Training in Rishikesh at Gurukul Yogashala.
Experience the vitality of our yoga community to learn about the physical asana benefits of Halasana and Dhanurasana along with the yogic life transformation. The atmosphere at Gurukul Yogashala transforms the school into more than an educational facility because it delivers transformative experiences during your yoga journey.