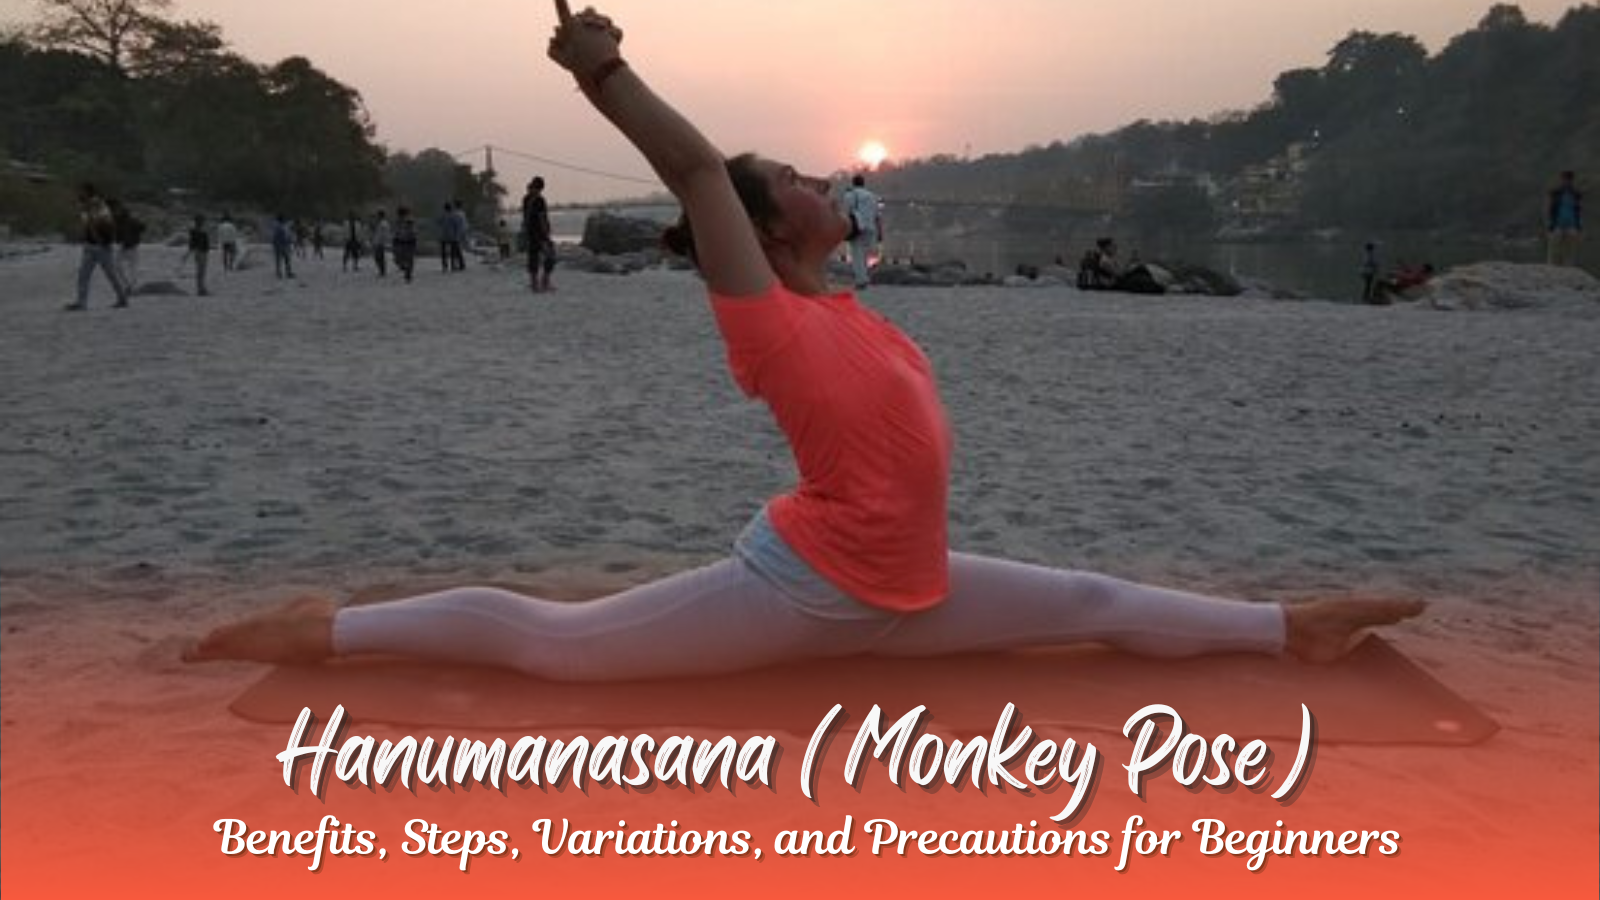
Dolphin Plank Pose

Dolphin Plank Pose (Forearm Plank) : How To Do IT, Benefits & Precautions

The Dolphin Plank Pose, also known as Forearm Plank, is a powerful yoga posture that strengthens the core, tones muscles, and enhances overall stability. It is a variation of the traditional plank pose, offering additional challenges while reducing strain on the wrists. This pose is widely practiced in Hatha Yoga, Vinyasa Yoga, and Power Yoga, making it a fundamental part of many fitness and yoga routines.

In this comprehensive guide, we will explore:

  • What is Dolphin Plank Pose?
  • Step-by-step instructions on how to do Dolphin Plank Pose
  • Benefits of Dolphin Plank Pose for the body and mind
  • Forearm Plank to Dolphin Pose transition
  • Common mistakes and how to fix them
  • Precautions and who should avoid this pose
  • Best Yoga Teacher Training in Rishikesh to master this pose

What is Dolphin Plank Pose?

The Dolphin Plank Pose is a strengthening asana that targets multiple muscle groups, including the core, shoulders, arms, and legs. It is a combination of Forearm Plank and Dolphin Pose, making it an excellent way to develop balance, endurance, and flexibility.

This pose is also known as Makara Adho Mukha Svanasana, derived from Sanskrit:

  • “Makara” – Dolphin
  • “Adho Mukha” – Downward Facing
  • “Svanasana” – Dog Pose

The Dolphin Plank Pose is ideal for building core strength and serves as a preparatory pose for advanced yoga postures, including headstands and arm balances.


How to Do Dolphin Plank Pose (Step-by-Step Instructions)

1. Start in Forearm Plank Position

  • Place your forearms parallel on the mat, shoulder-width apart.
  • Keep your elbows directly under your shoulders.
  • Extend your legs straight back, resting on the balls of your feet.

2. Engage Your Core and Align Your Body

  • Tighten your abdominal muscles to prevent sagging.
  • Keep your spine neutral and your hips aligned with your shoulders.
  • Maintain a straight line from head to heels.

3. Hold the Position

  • Keep your gaze slightly forward while maintaining steady breathing.
  • Engage your quadriceps and glutes to stabilize your lower body.
  • Hold for 30-60 seconds, increasing duration with practice.

4. Transition to Dolphin Pose (Optional)

  • If practicing Forearm Plank to Dolphin Pose, lift your hips upward into an inverted “V” shape.
  • Keep your forearms grounded while pressing your chest towards your thighs.

5. Release the Pose

  • Slowly lower your knees to the mat and rest in Child’s Pose.
  • Take deep breaths before repeating the pose.

Benefits of Dolphin Plank Pose

Physical Benefits

  • Strengthens the Core: Activates the abdominal muscles, lower back, and obliques, improving overall core stability.
  • Tones Arms and Shoulders: Works on the deltoids, biceps, triceps, and upper back muscles, helping to build upper body strength.
  • Improves Balance and Endurance: Holding the pose engages stabilizing muscles, enhancing posture and coordination.
  • Enhances Flexibility: Opens up the shoulders, chest, and hamstrings, improving mobility.
  • Increases Spinal Strength: Encourages proper spinal alignment and back support, reducing lower back pain.

Mental and Emotional Benefits

  • Reduces Stress and Anxiety: Holding the pose while focusing on breathwork helps to calm the mind and relieve tension.
  • Improves Concentration: Requires mental focus and awareness, enhancing mindfulness.
  • Boosts Energy Levels: Increases circulation and oxygen flow, leaving practitioners feeling rejuvenated and alert.

Forearm Plank to Dolphin Pose Transition

One of the best variations of Dolphin Plank Pose is the transition between Forearm Plank and Dolphin Pose. This movement strengthens the shoulders, arms, and core while also improving flexibility.

How to Do It:

  1. Begin in Dolphin Plank Pose, keeping your forearms and toes grounded.
  2. Inhale and lift your hips towards the ceiling, forming an inverted “V”.
  3. Exhale and lower back into Dolphin Plank Pose, maintaining core engagement.
  4. Repeat for 5-10 reps, controlling the movement throughout.

This transition is particularly helpful for preparing the body for headstands and advanced inversions.

Dolphin Plank Pose

Common Mistakes and How to Fix Them

🚫 Dropping the Hips Too Low → Keep them aligned with shoulders and heels to prevent lower back strain.
🚫 Overarching the Lower Back → Engage the core to avoid pressure on the spine.
🚫 Elbows Too Wide Apart → Keep them directly under the shoulders for better support.
🚫 Holding the Breath → Breathe deeply to maintain stability and endurance.


Precautions and Who Should Avoid This Pose

✔️ Avoid if you have:

  • Wrist, shoulder, or lower back injuries
  • High or low blood pressure
  • Recent abdominal surgery

✔️ Modify if needed:

  • Place knees on the floor for extra support.
  • Use a yoga block under the forearms to reduce strain.

Best Yoga Teacher Training in Rishikesh for Mastering Dolphin Plank Pose

For those looking to deepen their yoga practice, enrolling in a Yoga Teacher Training School in Rishikesh is an excellent option. Rishikesh, known as the Yoga Capital of the World, offers authentic and traditional yoga education.

Recommended Yoga Teacher Training Courses:

A Yoga Teacher Training School in Rishikesh provides structured learning, experienced instructors, and an immersive environment to refine asana practice.


Conclusion: Why You Should Practice Dolphin Plank Pose Regularly

The Dolphin Plank Pose is an essential yoga posture that enhances core strength, stability, and flexibility. Whether you want to build endurance, improve balance, or prepare for advanced inversions, this pose offers significant benefits.

Key Takeaways:

✔ Strengthens and tones core, shoulders, and arms
✔ Improves flexibility and spinal alignment
✔ Reduces stress and enhances concentration
✔ Perfect for beginners and advanced practitioners

By incorporating Dolphin Plank Pose into your yoga routine, you can experience greater strength, improved posture, and mental clarity. For those serious about advancing their practice, joining a Yoga Teacher Training School in Rishikesh can provide expert guidance and structured learning.

Start practicing Dolphin Plank Pose today and unlock the benefits of this powerful yoga posture.

Bridge Pose

Bridge Pose (Setu Bandha Sarvangasana): How To Do It, Benefits & Precautions

Bridge Pose, also known as Setu Bandha Sarvangasana, is a versatile and rejuvenating yoga posture that offers profound benefits for the body and mind. Whether you’re a beginner exploring supported poses or an advanced practitioner delving into challenging variations, Bridge Pose yoga has something to offer for everyone. In this blog, we’ll dive deep into the benefits of Bridge Pose, step-by-step instructions, variations, and precautions to ensure you practice it effectively.


What is Bridge Pose?

  • Bridge Pose Defined
    • Sanskrit Name: Setu Bandha Sarvangasana.
    • The pose resembles the structure of a bridge, hence its name.
    • It is a backbend posture that promotes strength, flexibility, and relaxation.
  • Why It’s Popular
    • Known for its calming and energizing effects, the yoga Bridge Pose is a favorite in restorative and dynamic sequences alike.

How to Do Bridge Pose: Step-by-Step Guide

Mastering the Bridge Pose requires proper alignment and breath control. Here’s how to do it:

  1. Start with the Basics
    • Lie down on your back on a yoga mat.
    • Bend your knees and place your feet hip-width apart, with your heels close to your glutes.
    • Keep your arms by your sides, palms facing down.
  2. Engage the Feet and Core
    • Press firmly into your feet, ensuring equal distribution of weight across the big toe mound, little toe mound, inner heel, and outer heel.
    • Engage your core muscles to support the lift.
  3. Lift the Hips
    • Inhale deeply and slowly raise your hips toward the ceiling.
    • Maintain alignment by keeping your knees above your ankles.
  4. Interlace the Fingers
    • Roll your shoulders underneath your body and interlace your fingers beneath your hips for extra lift.
  5. Open the Chest and Hold the Pose
    • Expand your chest and create space in the throat.
    • Hold the pose for 5–10 breaths, focusing on even, steady breathing.
  6. Release Safely
    • Exhale as you slowly lower your hips back to the mat.
    • Rest for a few breaths before transitioning to the next pose.

Benefits of Bridge Pose Yoga

Practicing the yoga Bridge Pose regularly brings a plethora of benefits for the mind and body:

  • Physical Benefits
    • Strengthens the Back and Glutes: Engages and tones the lower back, hamstrings, and glutes.
    • Improves Spinal Flexibility: Helps maintain a healthy, flexible spine.
    • Opens the Chest and Shoulders: Counteracts the effects of poor posture caused by sitting for long hours.
    • Enhances Hip Flexor Mobility: Provides a deep stretch to tight hip flexors, promoting greater mobility.
    • Supports Thyroid Health: Stimulates the thyroid gland through gentle throat compression.
  • Mental Benefits
    • Relieves Stress: Acts as a gentle inversion, calming the nervous system and reducing stress.
    • Boosts Energy: Improves blood circulation, leaving you feeling revitalized.
    • Promotes Focus: Encourages mindfulness by synchronizing movement with breath.

Bridge Pose Variations for All Levels

To make your practice more engaging and cater to different skill levels, try these variations:

  • Supported Bridge Pose:
    • Place a yoga block under your sacrum for support.
    • Ideal for beginners or those with lower back discomfort.
  • Advanced Bridge Pose:
    • Deepen the backbend by lifting your chest higher and clasping your hands more firmly.
    • Suitable for experienced yogis looking for a challenge.
  • One-Legged Bridge Pose:
    • Lift one leg straight toward the ceiling while holding the traditional Bridge Pose.
    • Enhances balance, strength, and core stability.
  • Dynamic Bridge Pose:
    • Flow between lifting and lowering your hips in sync with your breath.
    • Adds a cardio element to your practice.
  • Revolved Bridge Pose:
    • Incorporate a gentle twist by moving your hips slightly to one side.
    • Stimulates the digestive system and increases spinal mobility.

Benefits of Bridge Pose in Yoga Teacher Training

For those pursuing yoga teacher training programs, mastering Bridge Pose is essential:


Precautions and Modifications for Bridge Pose

Precautions:

  • Avoid the pose if you have neck, shoulder, or spinal injuries.
  • Pregnant women should opt for supported variations or avoid the pose entirely after the first trimester.
  • Practice caution if you have high blood pressure or migraines.

Modifications:

  • Use a yoga block for added support under the sacrum.
  • Keep your feet wider apart for better stability.
  • Place a folded blanket under your shoulders to ease the strain on your neck.
Bridge Pose

Incorporating Poses on a Bridge Into Your Yoga Routine

Bridge Pose fits seamlessly into various yoga routines:

  • Morning Yoga:
    • Kickstart your day with a gentle flow, including Bridge Pose for an energy boost.
  • Evening Practice:
    • Use the Supported Bridge Pose to relax and wind down after a long day.
  • Strengthening Sequences:
    • Combine it with poses like Plank and Warrior II for a full-body workout.
  • Restorative Yoga:
    • Include the one legged bridge pose with props for a calming, meditative experience.

FAQs About Bridge Pose

  • What are the yoga Bridge Pose benefits?
    • It strengthens the back, glutes, and legs, improves spinal flexibility, and calms the mind.
  • Can beginners practice Bridge Pose?
    • Yes! Start with Supported Bridge Pose and gradually progress to more advanced versions.
  • What are the benefits of Bridge Pose in yoga for advanced practitioners?
    • Enhances core strength, balance, and flexibility when practiced with variations like the One-Legged Bridge Pose.
  • What are the precautions for practicing Bridge Pose?
    • Avoid the pose if you have neck or back injuries, and always practice with proper alignment.

Conclusion: Why Bridge Pose Should Be in Your Yoga Routine

Bridge Pose (Setu Bandha Sarvangasana) is a timeless yoga posture that bridges the gap between strength and relaxation. From supported Bridge Pose for beginners to advanced Bridge Pose variations, this pose is adaptable for every yogi. Its physical and mental benefits make it a cornerstone in routines across all levels. Whether you’re pursuing a 200 Hour Yoga Teacher Training Course in Rishikesh or simply enhancing your home practice, incorporating Bridge Pose can elevate your yoga journey.

So, roll out your mat, breathe deeply, and let Bridge Pose open new pathways to strength, flexibility, and mindfulness!

Virabhadrasana Pose

What Is Virabhadrasana Warrior Pose 2? – How To Do It, Benefits, Method & Precautions.

Mastering Virabhadrasana Warrior Pose II: A Complete Guide

Are you looking to deepen your yoga practice and cultivate inner strength? Virabhadrasana Warrior Pose II is a powerful and dynamic asana that symbolizes focus, balance, and courage. This guide will walk you through the pose, its benefits, and how it connects to broader yoga practices like the 200 Hour Yoga Teacher Training Course in Rishikesh.

Let’s explore the steps, variations, and benefits of this transformative pose while naturally incorporating insights into related practices like Virabhadrasana I, Virabhadrasana Yoga Pose, and Viparita Virabhadrasana.


What is Virabhadrasana II?

Virabhadrasana II, or Warrior Pose II, is named after Virabhadra, the fierce warrior created by Lord Shiva in Hindu mythology. This pose embodies strength, resilience, and mental focus.

It is a foundational asana in many yoga sequences taught during programs like the 300 Hour Yoga Teacher Training in Rishikesh.


How to Pronounce Virabhadrasana

If you’re new to yoga, you might wonder, “How to pronounce Virabhadrasana?” Break it down as follows:

  • Vira = Hero
  • Bhadra = Friend or Auspicious
  • Asana = Pose

Step-by-Step Guide to Virabhadrasana II

Follow these steps to practice the Virabhadrasana Yoga Pose safely and effectively:

  1. Start in Tadasana (Mountain Pose):
    • Stand tall with your feet hip-width apart, grounding evenly.
    • Relax your shoulders and engage your core.
  2. Take a Wide Stance:
    • Step one foot back, ensuring your feet are about 3-4 feet apart.
    • Align the front heel with the arch of the back foot.
  3. Adjust Foot Position:
    • Turn the back foot slightly outward (45° angle) while keeping the front foot facing forward.
  4. Bend the Front Knee:
    • Bend your front knee to a 90° angle, ensuring it doesn’t extend beyond the ankle.
    • Keep the back leg straight and strong.
  5. Extend Your Arms:
    • Stretch your arms out to the sides at shoulder height, palms facing down.
    • Reach actively in opposite directions.
  6. Focus Your Gaze:
    • Look over your front fingertips, maintaining a steady gaze for balance.
  7. Hold and Breathe:
    • Stay in the pose for 5-10 deep breaths, feeling the stretch and strength in your body.
  8. Switch Sides:
    • Straighten your front leg and repeat on the opposite side.

Benefits of Virabhadrasana

Physical Benefits

  • Strengthens Lower Body: Builds strength in the legs, glutes, and core.
  • Improves Flexibility: Opens the hips, shoulders, and chest.
  • Enhances Balance: Develops stability through focused alignment.
  • Boosts Endurance: Holding the pose increases stamina.
  • Tones the Abdomen: Engages and strengthens the core muscles.

Mental Benefits

  • Builds Focus: The gaze point (Drishti) enhances concentration.
  • Promotes Confidence: The posture embodies empowerment and courage.
  • Reduces Stress: Deep breathing in this pose helps calm the mind.

Whether you’re preparing for a 500 Hour Yoga Teacher Training in Rishikesh or practicing at home, the benefits of Virabhadrasana extend to both body and mind.


Precautions and Modifications

To ensure safety while practicing the Virabhadrasana Pose, keep these tips in mind:

  • Avoid if you have knee or hip injuries.
  • Use props like a wall for support if needed.
  • Pregnant practitioners should modify the pose for stability.
Virabhadrasana Pose

Variations of Virabhadrasana

  1. Virabhadrasana I (Warrior Pose I):
  2. Viparita Virabhadrasana (Reverse Warrior Pose):
    • Involves a backbend, stretching the side body and improving flexibility.
  3. Dynamic Flow:
    • Transition between Virabhadrasana I, II, and Viparita Virabhadrasana for a flowing sequence.

Why Learn Virabhadrasana in Rishikesh?

Rishikesh, the Yoga Capital of the World, is renowned for its traditional yoga teacher training courses. Programs like the 300 Hour Yoga Teacher Training in Rishikesh offer in-depth guidance on asanas, pranayama, and meditation.

The Best Yoga Teacher Training in Rishikesh emphasizes alignment, breathing, and the philosophy behind poses like Virabhadrasana Yoga Pose.


Tips for Practicing Virabhadrasana

  • Warm up before attempting the pose to avoid strain.
  • Focus on breathing deeply to maintain stability.
  • Practice under a certified teacher, especially if you’re new to yoga or exploring the 500 Hour Yoga Teacher Training in Rishikesh.

Conclusion

Virabhadrasana II is more than just a physical pose; it’s a journey into strength, focus, and balance. By incorporating this powerful asana into your practice, you’ll unlock its profound benefits while preparing for advanced training like the 300 Hour Yoga Teacher Training in Rishikesh.

Take the first step towards mastering the Virabhadrasana Benefits and embracing the warrior within you.

32-1600x900

Ustrasana/Ushtrasana (Camel Pose): How to Perform, Benefits & Precautions

Introduction to Ustrasana (Camel Pose)

Ustrasana, commonly known as the Camel Pose, is a deeply rejuvenating yoga posture practiced worldwide for its transformative physical and mental benefits. Derived from the Sanskrit words “ustra” (camel) and “asana” (pose), this backbend resembles the curved shape of a camel’s body.

Practiced in traditional yoga routines and modern wellness programs, Ustrasana strengthens, stretches, and balances the body while calming the mind. Whether you’re a yoga enthusiast or a beginner, understanding what Ustrasana is and its benefits can inspire you to include it in your practice.


Benefits of Ustrasana (Camel Pose)

The Ustrasana benefits extend beyond physical health, promoting mental and emotional well-being. Here’s a detailed look:

  • Improves Spine Health
    Regular practice of Ustrasana pose strengthens the back and enhances spinal flexibility. It provides relief from tension and reduces back pain by stretching the vertebrae.
  • Boosts Digestion
    The compression in the abdomen during the pose stimulates digestion and massages internal organs, aiding nutrient absorption and relieving constipation.
  • Opens Chest and Shoulders
    Camel Pose Ustrasana counteracts poor posture by opening tight chest muscles and strengthening shoulders, combating the effects of prolonged sitting.
  • Enhances Flexibility
    From the back to the thighs, Ustrasana camel pose stretches major muscle groups, improving mobility and reducing stiffness over time.
  • Relieves Stress and Anxiety
    This backbend activates the energy centers, promoting a sense of calm. Practicing Ustrasana fosters emotional release and helps alleviate stress and fatigue.
  • Stimulates Endocrine System
    The stretch across the throat area impacts the thyroid gland, helping regulate metabolism and hormonal balance.

These benefits make Ustrasana an essential asana in yoga programs like the Best Yoga Teacher Training in Rishikesh, where students learn its techniques and therapeutic uses.


How to Do Ustrasana Step-by-Step

Follow these steps to safely master the Ustrasana pose:

  1. Start with Preparation
    Kneel on a yoga mat with your knees hip-width apart and thighs perpendicular to the floor. Point your toes backward.
  2. Position Hands
    Place your hands on your lower back with fingers pointing down. Lengthen your spine as you take a deep breath.
  3. Engage Core
    Tuck your tailbone slightly and engage your abdominal muscles to protect your lower back.
  4. Lean Back Gradually
    Lift your chest and begin to arch backward gently. Reach one hand at a time to touch your heels.
  5. Achieve the Full Pose
    Once comfortable, rest both hands on your heels with fingers pointing toward the toes. Keep your head neutral or gently drop it back if your neck allows.
  6. Hold and Breathe
    Stay in the pose for 5–10 breaths, focusing on deep, steady breathing.
  7. Release Safely
    Bring your hands back to your hips one at a time. Slowly rise back to a kneeling position, maintaining spinal alignment.
Ustrasana/Ushtrasana

Precautions and Modifications

To practice Ustrasana camel pose safely, consider these tips:

  • Warm-Up is Essential
    Perform gentle stretches like Bhujangasana (Cobra Pose) before attempting Ustrasana to prepare your spine.
  • Use Props for Support
    Beginners can use blocks under their hands or a strap for stability.
  • Avoid Overarching
    Keep your core engaged to protect the lower back and avoid collapsing into the pose.
  • Modify for Neck Strain
    If dropping the head back feels uncomfortable, keep your gaze forward to reduce strain.
  • Seek Guidance
    If you’re new, practice under the supervision of a certified yoga teacher, especially in structured programs like a 200-hour yoga teacher training course in Rishikesh.

Why Practice Ustrasana in Rishikesh?

Rishikesh, the yoga capital of the world, is an ideal destination to explore the depths of Ustrasana. Joining programs like the 300 Hour Yoga Teacher Training in Rishikesh or the 500 Hour Yoga Teacher Training in Rishikesh provides a supportive environment to master asanas, pranayama, and meditation.

In these training courses, Ustrasana is taught as part of a holistic curriculum, emphasizing its therapeutic and spiritual aspects.


Conclusion

Ustrasana, or Camel Pose, holds transformative potential for those willing to embrace its challenges. From improving flexibility and digestion to relieving stress, its benefits are multifaceted. By incorporating this pose into your practice and seeking guidance from the Best Yoga Teacher Training in Rishikesh, you can unlock physical vitality and mental clarity.

So, roll out your yoga mat, follow the steps, and discover what Ustrasana is and its benefits for yourself. Whether you’re a beginner or advancing your yoga journey, Ustrasana offers a gateway to strength, openness, and inner peace.

Matsyasana

Matsyasana Or Fish Pose : How To Do It, Benefits & Precautions

Matsyasana (Fish Pose): Unlock the Benefits for Body & Mind

Matsyasana, commonly known as Fish Pose, is a transformative yoga asana that offers a host of physical and mental benefits. The Sanskrit term “Matsya” translates to “fish,” and “asana” means “pose.” The name derives from the shape of the body while performing this posture, resembling a fish swimming gracefully in water.

This powerful yoga pose is commonly practiced in Hatha and Vinyasa yoga classes and is known for its ability to promote physical flexibility, mental clarity, and overall well-being. With its many benefits, Matsyasana is a perfect addition to any yoga routine.

How to Do Matsyasana (Fish Pose) Step by Step

Matsyasana, also referred to as Fish Pose, can be intimidating for beginners, but it is a rewarding pose with consistent practice. Here’s a step-by-step guide on how to do Matsyasana effectively:

  1. Start on Your Back: Begin by lying flat on your back with your legs extended straight and your arms at your sides. Ensure your body is relaxed.
  2. Prepare the Feet: Bend your knees and bring your heels towards your hips. Keep the soles of your feet flat on the ground.
  3. Place Your Palms: Position your palms under your buttocks with your fingers pointing towards your toes. This provides support as you move into the pose.
  4. Lift Your Chest: Inhale deeply and press into your forearms to lift your chest off the floor. Arch your back gently while keeping your legs firm on the floor.
  5. Tilt Your Head: Slowly tilt your head back, bringing the crown of your head to the ground, allowing for a gentle stretch in your neck. Hold this position for about five breaths.
  6. Release and Relax: To come out of the pose, gently lift your chest and lower your head. Relax your body and lie flat for a moment before moving on to your next asana.

Matsyasana (Fish Pose) Benefits for Body and Mind

Practicing Matsyasana offers numerous physical and mental advantages, making it a valuable addition to your yoga practice. Here are some of the key benefits:

  • Improves Spinal Flexibility: The gentle backbend helps open up the chest, neck, and spine, stretching tight muscles that accumulate from poor posture, particularly from sitting at desks or working on computers.
  • Strengthens Core Muscles: While lifting the chest and keeping your body arched, you engage your abdominal muscles, strengthening your core and improving overall stability.
  • Boosts Digestive Health: Matsyasana compresses the digestive organs, which enhances digestion, alleviates bloating, and supports metabolism. This posture also promotes regular bowel movements and reduces constipation.
  • Stimulates the Thyroid: The slight pressure placed on the throat during the pose stimulates the thyroid gland, which regulates metabolism and energy levels, making Matsyasana great for boosting energy and overall vitality.
  • Enhances Respiratory Function: The chest-opening effect of the pose encourages deeper breathing, expanding lung capacity and improving oxygen intake, which is especially beneficial for those suffering from respiratory issues such as asthma or bronchitis.
  • Relieves Stress and Anxiety: Deep breathing combined with the stretch helps calm the nervous system, alleviating tension and reducing stress. It can also improve sleep quality by relaxing the mind and body.
  • Improves Posture: Regular practice of Matsyasana strengthens the muscles along the spine, which can counteract the effects of poor posture caused by prolonged sitting or desk jobs.
  • Promotes Mental Clarity: By expanding the chest and focusing on the breath, Matsyasana fosters mental clarity and concentration, making it an excellent pose for mindfulness.

Precautions to Keep in Mind While Practicing Matsyasana

As with any yoga pose, it’s essential to practice Matsyasana with caution to avoid injury. Here are some important precautions to consider:

  • Warm-Up First: Begin your practice with gentle stretches or Sun Salutations to loosen up your muscles before attempting this deeper stretch.
  • Listen to Your Body: Never push yourself into the pose if you feel pain or discomfort. If the neck feels strained, gently release and come out of the pose.
  • Avoid Forceful Movements: Move into the pose slowly and avoid jerking or forcing your body into the position, especially when you’re still building flexibility.
  • Use Support if Necessary: If you’re a beginner or have neck or back issues, use props like a yoga block or blanket to support your head and body.
  • Pregnancy Consideration: Pregnant women should avoid performing Matsyasana as it may put too much pressure on the abdomen. Similarly, if you have neck or shoulder injuries, it’s advisable to avoid this pose.
  • Be Mindful of Blood Pressure: If you have high or low blood pressure, consult a healthcare professional before practicing Matsyasana, as it may cause a sudden change in blood flow.
 Matsyasana

Matsyasana Fish Pose in Yoga Teacher Training

If you’re passionate about yoga and want to dive deeper into its practice, consider joining a Best Yoga Teacher Training in Rishikesh. Whether you choose a 200-hour Yoga Teacher Training course in Rishikesh, a 300-hour Yoga Teacher Training in Rishikesh, or the extensive 500-hour Yoga Teacher Training in Rishikesh, Rishikesh offers comprehensive training to deepen your understanding of postures like Matsyasana, their benefits, and their proper execution.

With expert guidance, you will master poses like Matsyasana, learn how to teach them effectively, and understand their therapeutic uses. A yoga teacher training course will provide you with the tools to enhance your personal practice and equip you to inspire others.

Conclusion

Matsyasana, or Fish Pose, is a transformative asana that enhances flexibility, strengthens muscles, stimulates vital organs, and calms the mind. By practicing this posture regularly, you can enjoy its physical and mental benefits, from better posture to reduced stress and improved digestion.

For those looking to deepen their yoga practice, enrolling in a Yoga Teacher Training in Rishikesh is an excellent opportunity to explore asanas like Matsyasana Fish Pose, learn their full benefits, and gain the skills to share yoga with others.

Always remember to listen to your body, practice patience, and modify the pose as needed to safely enjoy the profound benefits that Matsyasana offers. Namaste!

Halasana

Halasana Or Plough Pose : How To Do It, Benefits, Instructions & Precautions

Halasana Pose: Everything You Need to Know

If you’re looking to enhance your yoga practice, the Halasana pose, also known as the Plough Pose, is a fantastic addition. This intermediate-level inversion yoga pose offers a deep stretch, strengthens various muscle groups, and provides mental relaxation. In this blog, we will dive into the benefits, step-by-step guide, and precautions for performing Halasana effectively.

What is Halasana?

Halasana, or the Plough Pose, derives its name from the Sanskrit words hala meaning “plow” and asana meaning “pose.” It mimics the shape of a traditional Indian plow, hence the name.

This yoga pose involves a deep backbend, requiring flexibility in the spine, shoulders, arms, and hamstrings. It is an excellent pose for stretching and toning the entire body, especially the back and core. Though it may seem challenging at first, with consistent practice, it can be mastered, offering incredible benefits for both the body and mind.

Benefits of Halasana

The Halasana yoga pose is more than just a physical stretch. Here are some of the many benefits of Halasana:

  • Stretches the Spine: This yoga pose stretches the spine, providing relief from tension caused by long hours of sitting or poor posture. It promotes spinal flexibility, improving mobility.
  • Stimulates Digestion: The compression on the abdomen while performing Halasana massages internal organs, enhancing digestion, nutrient absorption, and waste elimination.
  • Relieves Stress: As an inversion pose, Halasana helps increase blood circulation to the brain. This boost in blood flow triggers the release of endorphins, promoting relaxation and reducing stress levels.
  • Tones the Abdominal Muscles: The Halasana position engages the abdominal muscles, helping to strengthen and tone the core, especially the obliques and transverse abdominis.
  • Improves Flexibility: This pose increases the flexibility of the spine, hamstrings, and shoulders, making it beneficial for overall body mobility.
  • Calms the Mind: Halasana induces a calming effect on the nervous system, reducing anxiety and promoting a sense of peace.

Step-by-Step Guide: How to Perform Halasana

Here’s a detailed, step-by-step guide to help you master the Halasana pose:

  1. Starting Position: Begin by lying flat on your back with your arms by your sides, palms facing down. Keep your feet together and your body relaxed.
  2. Lift Your Legs: Inhale deeply and lift both legs toward the ceiling, keeping them straight. Your body should form a 90-degree angle from the floor. Engage your core to support the lift.
  3. Lower Legs Behind You: As you exhale, slowly lower your legs over your head, bringing them to the floor behind you. Keep your knees straight. The goal is to touch the ground with your feet, but if this isn’t possible initially, aim to get as close as you can.
  4. Support Your Back: For extra support, place your hands on the floor beside you or interlace your fingers behind your back. If you’re more advanced, keep your arms straight to deepen the stretch.
  5. Hold the Position: Breathe deeply and hold the position for 15-30 seconds, focusing on relaxing your neck and shoulders.
  6. Coming Out of the Pose: To release, gently roll your spine down onto the mat, vertebra by vertebra, until you return to the starting position.

Precautions While Practicing Halasana

While Halasana offers numerous advantages, it’s important to be mindful of some precautions:

  • Warm-Up: Before attempting Halasana, warm up your body with stretches that focus on your back, legs, and shoulders to prevent injury.
  • Avoid Jerky Movements: Move into and out of the pose slowly. Sudden movements can strain the neck, shoulders, and spine.
  • Listen to Your Body: Halasana can be intense, especially if you’re a beginner. If you feel any discomfort or pain, ease out of the pose immediately.
  • Props for Support: If you find Halasana challenging, you can place a folded blanket or yoga block under your shoulders for extra support.
  • Avoid During Menstruation: Women should avoid Halasana during menstruation, as inverted poses can disrupt the natural flow of blood.
  • Don’t Force the Pose: Halasana requires flexibility in your spine and hamstrings. Don’t force your body to reach the full expression of the pose. Over time, your flexibility will improve, and the pose will become easier.
  • Seek Professional Guidance: If you’re new to yoga or have medical conditions, it’s best to consult a certified instructor for proper form and adjustments.

Ardha Halasana: A Modified Version

For beginners or those with limited flexibility, Ardha Halasana (Half Plough Pose) is a great alternative. In this modified version, instead of bringing your legs all the way to the floor, you only lower them halfway. This version still provides many of the benefits, including stretching the spine and toning the core.

Does Halasana Reduce Belly Fat?

While Halasana does engage the abdominal muscles, it is not specifically designed to target belly fat. However, when practiced regularly, it contributes to overall fat loss as part of a balanced fitness routine. Combining Halasana with a healthy diet and other fat-burning exercises can help reduce belly fat over time.

Why Choose Yoga Teacher Training in Rishikesh?

If you’re looking to deepen your yoga practice and learn how to teach poses like Halasana, Rishikesh offers some of the best Yoga Teacher Training programs globally. Rishikesh is known as the “Yoga Capital of the World,” attracting yoga practitioners and teachers from all over.

Conclusion

Incorporating Halasana (Plough Pose) into your yoga practice can bring incredible physical and mental benefits, including improved flexibility, stress relief, and a toned core. Whether you’re a beginner or an experienced yogi, Halasana is a pose worth adding to your routine. Remember to practice with caution, listen to your body, and gradually work towards perfecting the pose. And, if you’re interested in advancing your yoga journey, consider enrolling in one of the best Yoga Teacher Training programs in Rishikesh to deepen your understanding and skills.

Tadasana

Tadasana (Mountain Pose): How To Do It, Benefits, Step By Step Instructions & Precautions

Tadasana, also known as the Mountain Pose, is a foundational yoga asana that serves as the starting point for many standing poses. Despite its simplicity, Tadasana offers numerous physical and mental benefits. This powerful pose helps align the body and encourages mindfulness, making it ideal for practitioners at all levels. In Sanskrit, the word “Tada” means “mountain,” symbolizing stability and stillness—qualities embodied in the Mountain Pose.

What is Tadasana (Mountain Pose)?

Tadasana is a standing yoga pose where the body is aligned in a straight line from head to toe, creating a sense of grounding. This pose is often used as a starting position for other standing yoga poses and can be practiced by beginners as well as experienced yogis.

Tadasana Benefits:

The Mountain Pose offers a variety of physical and mental benefits. Here are some of the key advantages:

  • Strengthens the Legs:
    • Practicing Tadasana regularly helps strengthen the muscles of the thighs, knees, and calves.
    • Engaging the thighs and lifting the kneecaps while holding the pose contributes to building strong legs.
  • Improves Posture:
    • Tadasana helps realign the spine, improving posture and addressing imbalances in the body caused by poor alignment.
    • The pose encourages a straightened back, which reduces slouching and supports better overall posture.
  • Increases Focus:
    • Holding Tadasana requires mindful breathing and focus, enhancing concentration and mental clarity.
    • By tuning into your breath, you can improve your ability to focus both on and off the mat.
  • Calms the Mind:
    • Tadasana encourages stillness and can calm an overactive mind by reducing mental clutter.
    • This pose is beneficial for stress relief, as it facilitates deep, slow breathing.
  • Enhances Body Awareness:
    • Practicing Tadasana helps develop a deeper awareness of your body’s alignment and balance.
    • It encourages a greater understanding of how different parts of the body work together to maintain stability.

Step-by-Step Instructions for Tadasana:

Follow these steps to practice Mountain Pose correctly:

  1. Feet Placement:
    • Stand with your feet hip-width apart, toes pointing forward. Keep your feet grounded and parallel to each other.
  2. Activate the Legs:
    • Engage your thigh muscles and lift your kneecaps to activate the legs.
  3. Neutral Pelvis:
    • Lengthen your tailbone towards the floor, creating a neutral pelvis position.
  4. Roll the Shoulders:
    • Roll your shoulders back and down, opening up the chest and lifting the sternum.
  5. Arms and Hands:
    • Keep your arms relaxed at your sides, with palms facing forward.
  6. Neck and Head:
    • Gently tuck your chin to lengthen the back of the neck and maintain a straight alignment.
  7. Gaze:
    • Keep your gaze forward, with a soft and relaxed facial expression.
Tadasana (Mountain Pose)

Precautions for Practicing Tadasana:

While Tadasana is generally a safe pose, there are a few precautions to keep in mind:

  • Low Blood Pressure: Avoid this pose if you have low blood pressure or suffer from dizziness.
  • Injuries: Consult a healthcare professional before practicing Tadasana if you have knee or ankle injuries.
  • Pregnancy: Pregnant women should practice this pose only under the guidance of a certified yoga instructor.

Frequently Asked Questions about Tadasana:

Here are some common questions regarding Tadasana:

  1. Is Tadasana suitable for beginners?
    • Yes, Tadasana is a great starting pose for beginners as it helps build strength, flexibility, and proper alignment.
  2. How long should I hold Tadasana?
    • Hold Tadasana for 30 seconds to 1 minute, gradually increasing the time as you gain strength and confidence.
  3. Can pregnant women practice Tadasana?
    • Pregnant women can practice Tadasana with proper guidance. Consult with a doctor before starting yoga during pregnancy.
  4. Can Tadasana improve my posture?
    • Yes, Tadasana improves posture by aligning the spine and strengthening the back, shoulders, and neck muscles.
  5. Are there variations of Tadasana?
    • Some popular variations include the Raised Hands Pose (Urdhva Hastasana) and Extended Triangle Pose (Utthita Trikonasana).
  6. Can Tadasana help reduce anxiety?
    • Yes, the calming effect of deep, controlled breathing in Tadasana can help alleviate stress and anxiety.
  7. Is it normal to feel discomfort while practicing Tadasana?
    • Mild discomfort is common, especially if you are new to yoga. However, intense pain should not be ignored.

Tadasana for Yoga Teacher Training:

For those looking to deepen their practice, Tadasana serves as an essential foundation. Whether you are enrolling in a 200 Hour Yoga Teacher Training Course in Rishikesh, a 300 Hour Yoga Teacher Training in Rishikesh, or a 500 Hour Yoga Teacher Training in Rishikesh, mastering the Mountain Pose is crucial for understanding proper alignment and balance.

Tadasana Yoga Teacher Training in Rishikesh is perfect for those looking to learn the core principles of yoga asanas and deepen their knowledge in a spiritual setting.

Conclusion: Incorporating Tadasana into Your Daily Routine

Practicing Tadasana regularly can be immensely beneficial for improving posture, strengthening the body, and calming the mind. By incorporating this foundational pose into your daily routine, you not only align the body physically but also enhance your mental clarity and focus. Tadasana helps build a strong foundation for more advanced yoga poses and is perfect for anyone, from beginners to seasoned practitioners.

Incorporate Tadasana into your routine to experience the physical and mental benefits that can help you lead a more balanced and mindful life.

Rishikesh Tour

Rishikesh Tour Guide: A Complete Travel Itinerary for an Unforgettable Experience

Rishikesh Tour Guide

Why Visit Rishikesh?

Rishikesh, the Yoga Capital of the World, is a mesmerizing destination that blends spirituality, adventure, and nature. Whether you seek a serene retreat, thrilling water sports, or cultural exploration, a Rishikesh tour package offers something for every traveler.

Spiritual & Cultural Significance

  • Home to sacred temples like Neelkanth Mahadev Temple, Bharat Mandir, and Trimbakeshwar Temple.
  • Pilgrims take a holy dip in the Ganges River, believed to wash away sins.
  • The mesmerizing Ganga Aarti at Triveni Ghat is a must-experience spiritual ritual.
  • Explore ancient ashrams and meditation centers, perfect for soul seekers.
Rishikesh Tour

The Yoga Capital of the World

  • Best Yoga Teacher Training in Rishikesh attracts practitioners from across the globe.
  • Renowned centers offer 200 Hour Yoga Teacher Training Course in Rishikesh, 300 Hour, and 500 Hour programs.
  • Learn traditional yoga, meditation, and Ayurveda amidst the serene Himalayas.
  • Ideal for beginners and advanced yogis seeking inner peace and wellness.

Adventure Activities in Rishikesh Tour

  • White Water Rafting – Experience the thrill of rafting in the fast-flowing Ganges.
  • Bungee Jumping – Take a daring leap from the Mohan Chatti Bridge.
  • Trekking – Explore scenic trails through the Himalayan foothills.
  • Camping – Spend nights under the stars by the riverside.
  • Mountain Biking – Ride through rugged terrains with breathtaking views.

Scenic Beauty & Tranquility

  • Surrounded by lush greenery, towering mountains, and the serene Ganges.
  • Breathtaking sunrise and sunset views make it an ideal retreat from city life.
  • Experience peace while practicing yoga by the river or meditating in the Himalayas.

Rishikesh Food Tour

  • Indulge in delicious local vegetarian cuisine.
  • Try authentic dishes at Chotiwala Restaurant, The Beatles Café, and Ayurpak.
  • Enjoy organic, sattvic meals and Ayurvedic herbal teas.

Rich Cultural Heritage

  • The city’s colorful markets, traditional music, and vibrant festivals showcase its unique culture.
  • Participate in festivals like Mahashivratri, International Yoga Festival, and Diwali.
  • Witness the magical evening Aarti, with hundreds of lamps floating on the river.

Healing & Wellness Retreats

  • Rishikesh is home to Ayurvedic spas, naturopathy centers, and wellness resorts.
  • Experience Ayurvedic massages, detox programs, and holistic treatments.
  • A perfect escape for mental, physical, and spiritual rejuvenation.

Top Places to Visit in Rishikesh

1. Lakshman Jhula & Ram Jhula

  • Iconic suspension bridges with breathtaking views of the Ganges.
  • Surrounded by temples, yoga centers, and bustling markets.

2. Neelkanth Mahadev Temple

  • A sacred shrine dedicated to Lord Shiva.
  • Located amidst dense forests and scenic mountains.

3. Triveni Ghat

  • The most sacred bathing ghat in Rishikesh.
  • Experience the grand Ganga Aarti at sunset.

4. Beatles Ashram

  • The famous ashram where The Beatles practiced meditation.
  • A peaceful place with colorful graffiti and serene vibes.

5. Rajaji National Park

  • Spot elephants, tigers, and exotic birds in this wildlife sanctuary.
  • Enjoy jeep safaris and nature walks.

Things to Do in Rishikesh

1. Experience River Rafting

  • Rishikesh tour places offer world-class white water rafting.
  • Choose from multiple rafting routes based on difficulty levels.

2. Try Bungee Jumping

  • India’s highest bungee jump at Mohan Chatti.
  • Feel the adrenaline rush as you free-fall from 83 meters.

3. Take a Rishikesh Food Tour

  • Savor local flavors, street food, and organic delicacies.
  • Enjoy traditional North Indian dishes, Thalis, and fusion cuisine.

4. Join a Yoga Retreat

5. Camp by the Ganges

  • Spend the night under the stars with a bonfire.
  • Enjoy riverside camping, trekking, and adventure activities.

How to Reach Rishikesh from Delhi

By Bus

  • Multiple buses run daily from Delhi to Rishikesh.
  • Board from Kashmere Gate ISBT – choose from Volvo, semi-deluxe, or ordinary buses.
  • Travel time: 6-7 hours.

By Train

  • Several trains connect Delhi to Rishikesh daily.
  • The journey takes around 6-7 hours.
  • Nearest railway station: Haridwar Junction (25 km from Rishikesh).

By Flight

  • Nearest airport: Jolly Grant Airport, Dehradun (35 km from Rishikesh).
  • Hire a cab or taxi for a 1-hour drive to Rishikesh.

Best Time to Visit Rishikesh

  • September to November – Ideal for adventure activities.
  • February to April – Best for relaxing tours, yoga, and spiritual retreats.
  • Winter (December to February) – Perfect for those who enjoy chilly weather.

Conclusion

A Rishikesh tour package is the perfect blend of spirituality, adventure, nature, and culture. Whether you’re looking for a yoga retreat, thrilling river rafting, or a peaceful escape, Rishikesh has something for everyone.

If you’re traveling from the capital, opt for a Delhi to Rishikesh tour package to make your journey seamless. Plan your trip now and experience the magic of Rishikesh!

Strengthen Your Immune System

Boost Your Immune System Naturally with These 5 Nutrient-Rich Juices

Immune System and Its Role

Our immune system is constantly at work, protecting us from harmful microbes found in the air, water, and soil. It defends against pathogens like bacteria, fungi, viruses, and parasites. However, certain factors can weaken immunity, leading to frequent illnesses.

At Gurukul Yogashala, one of the best yoga teacher training centers in Rishikesh, you will gain insights into the human immune system through yoga anatomy and physiology classes. Here, you’ll learn about:

Signs of a Strong Immune System

  • How the immune system fights infections
  • Which cells activate your immune system
  • What causes immune system weakening with age
  • How immune system disorders affect the body
  • How lifestyle choices impact immunity
  • Immune System And Inflammation Ayruda
  • Patients With Immune System Disorders Lsat

If your immune system is functioning optimally, you may notice:

✅ Fewer infections and faster recovery from illnesses
✅ Quick healing of wounds
✅ Increased energy levels and overall vitality
✅ Reduced inflammation and improved body functions

Can COVID Cause a Dysregulated Immune System?

Many patients with immune system disorders post-COVID-19 have experienced immune dysregulation ___occur when the immune system attacks healthy tissue quizlet. This means that the body’s defense mechanism becomes overactive or underactive, leading to increased susceptibility to infections or autoimmune conditions.

Does Your Immune System Know About Your Eyes?

Interestingly, certain parts of the body, such as the eyes, are considered immune-privileged. This means they are protected from excessive immune responses to prevent inflammation and damage.

How Nutrition Enhances Your Immune System

A well-balanced diet plays a crucial role in strengthening immunity. At Gurukul Yogashala, students undergoing 200-hour, 300-hour, and 500-hour yoga teacher training in Rishikesh learn about the connection between diet and immune function.

Key Nutrients That Boost Immunity

Include the following in your diet to support a healthy immune response:

  • Vitamin C – Found in oranges, lemons, strawberries, and tomatoes
  • Vitamin D – Present in mushrooms, fortified dairy, and sunlight exposure
  • Antioxidants – Found in spinach, kale, beets, and green tea
  • Probiotics – Present in yogurt, kefir, and fermented foods

Top Homemade Juices to Strengthen Your Immune System

🍏 Green Apple, Carrot, and Orange Juice

  • Benefits: High in Vitamin C, A, and B6, which help activate the immune system
  • How It Helps: Strengthens white blood cell production and boosts overall immunity

🥕 Beet, Carrot, Ginger, and Apple Juice

  • Benefits: Anti-inflammatory properties reduce immune system-related inflammation
  • How It Helps: Supports people with immune system disorders like rheumatoid arthritis

🥬 Kale, Tomato, and Celery Juice

  • Benefits: Packed with magnesium, potassium, and Vitamin C for immune support
  • How It Helps: Prevents immune system attacks on healthy tissue (autoimmune reactions)

🍓 Strawberry and Kiwi Juice

  • Benefits: High in Vitamin C and probiotics for gut health
  • How It Helps: Improves digestion and supports a strong immune defense

🥭 Strawberry and Mango Juice

  • Benefits: Rich in Vitamin D, which is crucial for immunity
  • How It Helps: Reduces the risk of immune system weakening with age

🍉 Watermelon Mint Juice

  • Benefits: Hydrating and high in arginine for immune cell activation
  • How It Helps: Helps maintain the fastest immune system ever with hydration and essential nutrients

🌱 Celery Juice

  • Benefits: Hydrating and rich in antioxidants
  • How It Helps: Prevents dehydration, which can weaken immune responses

🍅 Tomato Mint Juice

  • Benefits: High in folate and Vitamin C, supporting immune cell function
  • How It Helps: Boosts recovery from infections and enhances energy levels

🥒 Cucumber, Kale, and Spinach Juice

  • Benefits: Packed with folate, iron, and zinc, essential for immunity
  • How It Helps: Reduces inflammation and improves the body’s ability to fight infections

🍊 Orange and Basil Juice

  • Benefits: Basil is known for its antibacterial and antiviral properties
  • How It Helps: Helps prevent fevers and infections, enhancing immunity naturally
Strengthen Your Immune System

How to Incorporate These Juices into Your Daily Routine

To get the best results, follow these simple tips:

✔ Start your day with a fresh juice instead of coffee or tea
✔ Replace unhealthy snacks with nutrient-rich juices
✔ Use immune-boosting juices as marinades for meals
✔ Drink a variety of juices to get a range of essential nutrients

Conclusion

At Gurukul Yogashala, one of the most renowned yoga schools in Rishikesh, you will not only learn yoga but also develop a holistic lifestyle that strengthens your immune system. By incorporating these nutrient-dense juices into your daily routine and practicing yoga regularly, you can achieve better health, vitality, and inner balance.

If you are looking for a transformative experience, consider enrolling in a 200-hour yoga teacher training course in Rishikesh or advance to a 300-hour or 500-hour yoga teacher training in Rishikesh to deepen your knowledge of yoga and wellness.

Daily Yoga Practice

The Ultimate Guide to Daily Yoga Practice: Benefits & Best Training Programs

Over the past decade, yoga has gained immense popularity worldwide. The ancient practice, once limited to spiritual seekers, is now recommended by medical professionals for its preventive and therapeutic benefits. Many people turn to daily yoga practice for better health, stress relief, and overall well-being.

Rishikesh, the Yoga Capital of the World, has become a hub for yoga enthusiasts. Whether you seek a short retreat or aim to become a certified yoga instructor, you’ll find various options, including:

Let’s explore the importance of yoga daily practice, its benefits, and how you can integrate it into your lifestyle.


What Is Yoga?

Yoga is more than just physical postures. It is a holistic practice that integrates:

  • Asanas (Physical Postures) – Enhance flexibility and strength
  • Pranayama (Breathing Techniques) – Improve lung capacity and mental clarity
  • Meditation & Kriyas – Promote relaxation and spiritual awakening

The ultimate goal of yoga is to unite the mind, body, and soul, creating harmony within oneself.


Benefits of Daily Yoga Practice

1. Physical Benefits of Daily Yoga Practice

Practicing yoga daily can lead to noticeable improvements in physical health, including:

  • Increased Flexibility – Reduces stiffness and enhances mobility
  • Strength Building – Engages muscles effectively, replacing the need for heavy workouts
  • Posture Correction – Helps counteract the effects of prolonged sitting
  • Improved Digestion – Certain poses stimulate digestion and detoxification
  • Enhanced Immunity – Boosts the body’s ability to fight infections

Joining a structured program like the Best Yoga Teacher Training in Rishikesh ensures proper guidance and maximum benefits.

2. Mental & Psychological Benefits

A consistent yoga daily practice has profound effects on mental health, such as:

  • Reduces Stress & Anxiety – Deep breathing techniques calm the nervous system
  • Boosts Mood & Happiness – Yoga stimulates serotonin and dopamine production
  • Improves Sleep Patterns – Helps combat insomnia and enhances sleep quality
  • Enhances Focus & Clarity – Meditation strengthens cognitive abilities
  • Aids in Emotional Balance – Encourages self-awareness and emotional stability

Many individuals enroll in daily yoga practice online courses to experience these benefits from the comfort of their homes.

3. Spiritual Benefits of Yoga

Beyond physical and mental health, yoga also nurtures the soul:

  • Develops Self-Awareness – Encourages mindfulness and inner reflection
  • Strengthens Connection with the Universe – Fosters spiritual growth
  • Encourages Positive Intentions – Helps align personal goals with universal energy
  • Deepens Meditation Practices – Facilitates a more profound spiritual experience

For those seeking a more immersive experience, advanced programs like the 300 Hour Yoga Teacher Training in Rishikesh offer deeper insights into yoga philosophy.


How to Practice Yoga Daily at Home?

Wondering how to practice yoga daily at home? Here’s a simple guide to get started:

  1. Set a Fixed Time – Mornings are ideal for energy and focus
  2. Create a Dedicated Space – A quiet, clutter-free area enhances practice
  3. Start with Basic Poses – Gradually progress to more advanced asanas
  4. Include Pranayama & Meditation – Balance breathwork with mindfulness
  5. Stay Consistent – Even 20 minutes a day can yield results

If you’re unsure about how long should I practice yoga daily, start with 15-30 minutes and gradually extend based on your comfort level.

Daily Yoga Practice

Daily Yoga Practice Results: What to Expect?

If you maintain a daily yoga practice, expect significant transformations:

  • Week 1: Improved flexibility, better posture, and mental calmness
  • Week 4: Noticeable strength, reduced stress, and improved digestion
  • 3 Months: Enhanced focus, deeper sleep, and emotional stability
  • 6+ Months: A complete lifestyle shift towards holistic well-being

For structured learning, consider enrolling in a 200 Hour Yoga Teacher Training Course in Rishikesh, which provides a strong foundation in both practice and philosophy.


Best Yoga Teacher Training in Rishikesh

If you’re looking for the best yoga teacher training in Rishikesh, Gurukul Yogashala is a top choice. They offer:

Their courses provide in-depth training in Ashtanga yoga daily practice, Hatha yoga, meditation, and philosophy, ensuring a holistic learning experience.


Final Thoughts

A daily yoga practice is more than just a workout—it’s a pathway to a healthier, more balanced life. Whether you practice at home or join a structured course, consistency is key.

For those looking to deepen their practice or start a teaching career, the Best Yoga Teacher Training in Rishikesh at Gurukul Yogashala offers the perfect environment for growth.

Embrace yoga, transform your life, and experience the true essence of well-being!