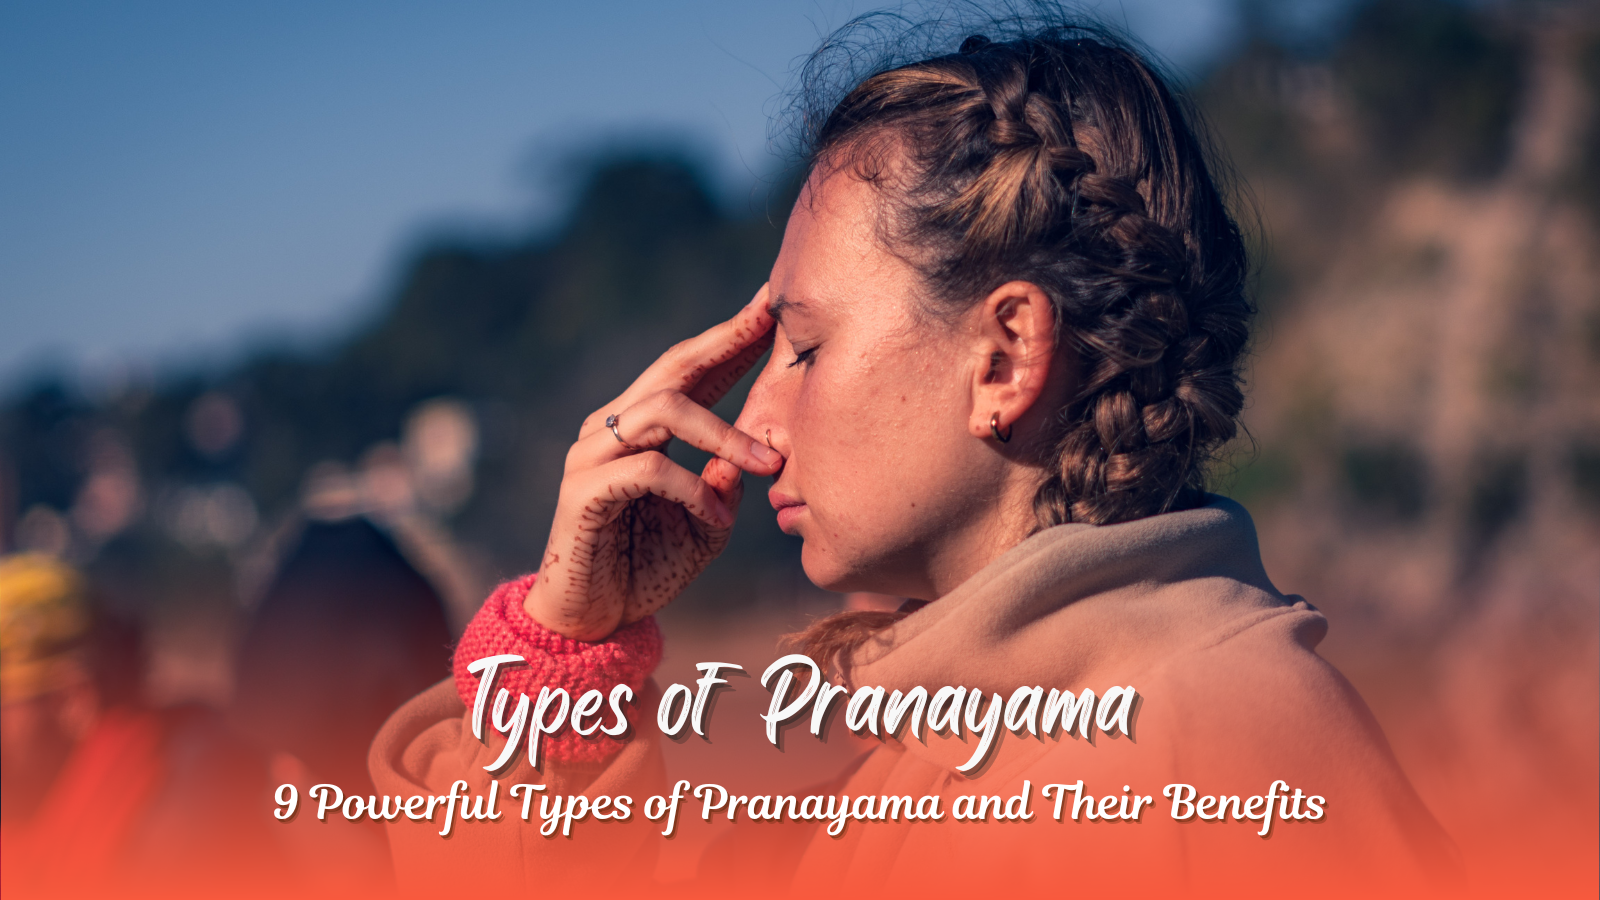
Pranayama, derived from the Sanskrit words “Prana” (life force) and “Ayama” (extension or control), is a yogic breathing practice that enhances physical, mental, and spiritual well-being. It is an essential part of Hatha Yoga and is often practiced to cleanse the body, improve lung capacity, and balance the mind.
There are different types of Pranayama, each offering unique benefits. Whether you are a beginner or an advanced yoga practitioner, understanding the classification of pranayama and practicing it correctly can transform your health.
In this article, we will explore 9 powerful types of pranayama, pranayama benefits and how they can improve your overall well-being.
What is Pranayama? Definition and Importance
Pranayama Definition
Pranayama is the conscious regulation of breath through specific techniques that involve inhalation (Puraka), retention (Kumbhaka), and exhalation (Rechaka). It is an essential practice in yoga, helping to control the flow of prana (vital energy) in the body.
Many yoga practitioners at the Best Yoga School in Rishikesh learn pranayama techniques to enhance their meditation and asana practice.
How Many Types of Pranayama Are There?
The number of types of pranayam varies based on different schools of thought. However, in traditional yoga, there are 9 main types of pranayama, each serving a different purpose.
Many pranayama techniques, such as Bhramari Pranayama and Chandra Bhedana Pranayama, are beneficial for those suffering from hypertension. They help regulate blood pressure, improve circulation, and promote overall well-being.
Practicing these benefits of pranayama yoga types daily can significantly reduce stress and lower high blood pressure naturally.
Who Should Avoid Pranayama?
While pranayama and its types are beneficial, there are certain precautions to consider:
-People with respiratory disorders should consult a yoga expert before practicing intense pranayama like Bhastrika. -Pregnant women should avoid practices that involve breath retention. -Those with severe hypertension should avoid forceful breathing exercises. -People with vertigo or migraines should practice with caution.
To learn more, you can enroll in a 200 Hour Yoga Teacher Training in Rishikesh to understand the correct techniques of pranayama for high blood pressure and other health conditions.
FAQs About Pranayama
1. What Do You Mean by Pranayam?
Pranayama is the practice of controlled breathing to regulate prana (life energy) in the body. It enhances physical, mental, and spiritual well-being.
2. What is the Meaning of Pranayam?
The word “Pranayama” comes from Sanskrit:
Prana = Life force or energy
Ayama = Expansion or control
Thus, pranayama means the expansion and control of breath.
3. Which Pranayam is Good for the Heart?
Anulom Vilom Pranayama
Bhramari Pranayama
Ujjayi Pranayama
These techniques help regulate heart rate and improve cardiovascular health.
4. Can We Do Pranayam During Periods?
Yes, but avoid intense pranayama like Kapalabhati or Bhastrika. Instead, practice Nadi Shodhana and Bhramari Pranayama for relaxation.
Final Thoughts: The Power of Pranayama
The types of pranayama provide numerous health benefits, from improving lung capacity to reducing stress and enhancing heart health. Whether you are a beginner or an experienced practitioner, incorporating pranayama yoga types into your daily routine can transform your physical and mental well-being.
10 Vrikshasana Benefits, Steps & Common Mistakes to Avoid
Introduction to Tree Pose (Vrikshasana)
The yoga posture named Vrikshasana in Sanskrit translates to The Tree Pose while demonstrating both body balance together with mental focus alongside inner stability. This yoga tree pose duplicates the calm posture of woods by asking practitioners to root themselves through one anchoring leg while reaching their torso and limbs towards the sky. The tree pose helps advanced as well as beginning yoga students to achieve better physical alignment and mental clarity and spiritual grounding. Tree pose meaning in yoga is a tree pose an internal rotation.
This detailed instruction thoroughly examines vrikshasana benefits together with a step-by-step tutorial regarding the proper execution and guidance for avoiding typical errors followed by modifications for beginners and experts. Furthermore, this review explores the tree pose through history and body structure as well as its connection to the larger yoga practice, is a tree pose an internal rotation.
Students who learn Tree Pose at this yoga school in Rishikesh will have the opportunity to enroll at a renowned yoga teacher training facility which Rishikesh holds the title of best yoga school in Rishikesh. You can learn about the Vrikshasana tree pose benefits, precautions of vrikshasana, what is vrikshasana and its benefits, contraindications of vrikshasana through the best yoga school in rishikesh.
Vrikshasana Meaning and Symbolism of Tree Pose
In Sanskrit, vrikshasana meaning blends two words which translate to tree and pose. The yoga tree pose features three key aspects: grounding like trees, growth through plant evolution, and the ability to persevere which trees display. Tree pose meaning stability develops through one-legged standing because it mirrors root behaviour and your extended arms become tree-reach branches that is a tree pose an internal rotation. Additionally, tree pose yoga reaches its perfect balance between physical work and effortless relaxation. This defines the practice as moving meditation for Vrikshasana tree pose benefits.
Indian yogic literature from the past views trees as sacred representations of linking elements and their ability to withstand challenges. When practicing Vrikshasana tree pose you gain alignment with the qualities of the tree which creates a balance between your physical self and your mental self and with your surroundings.
One-Handed Tree Pose (Eka Hasta Vrksasana) is an adjusting yoga pose that reinforces legs, further develops the centre, and develops dependability. Along with that, beginning in Mountain Pose, shift your weight to one foot and spot the bottom of the other foot on your inward thigh, calf, or lower leg (keeping away from the knee). Along with that, One-Handed Tree Pose cancarry your hands to petition for heaven’s position at your chest.
For the one-gave variety, broaden one arm above, palm confronting internal. Keep up with balance by drawing in your centre, squeezing your standing foot into the ground, and focusing in on a decent point, that is the practice of one-handed tree pose. Hold for a few breaths and rehash on the opposite side. This posture improves equilibrium, coordination and mental clearness in practicing the one-handed tree pose.
Step-by-Step Guide to Tree Pose
How to do tree pose, the following detailed instructions enable safe and effective practice of Vrikshasana steps and benefits:
Start in Mountain Pose (Tadasana):
Overstand the yoga tree poses while maintaining your feet separated at hip width with toes spread out while your weight stays balanced equally between them.
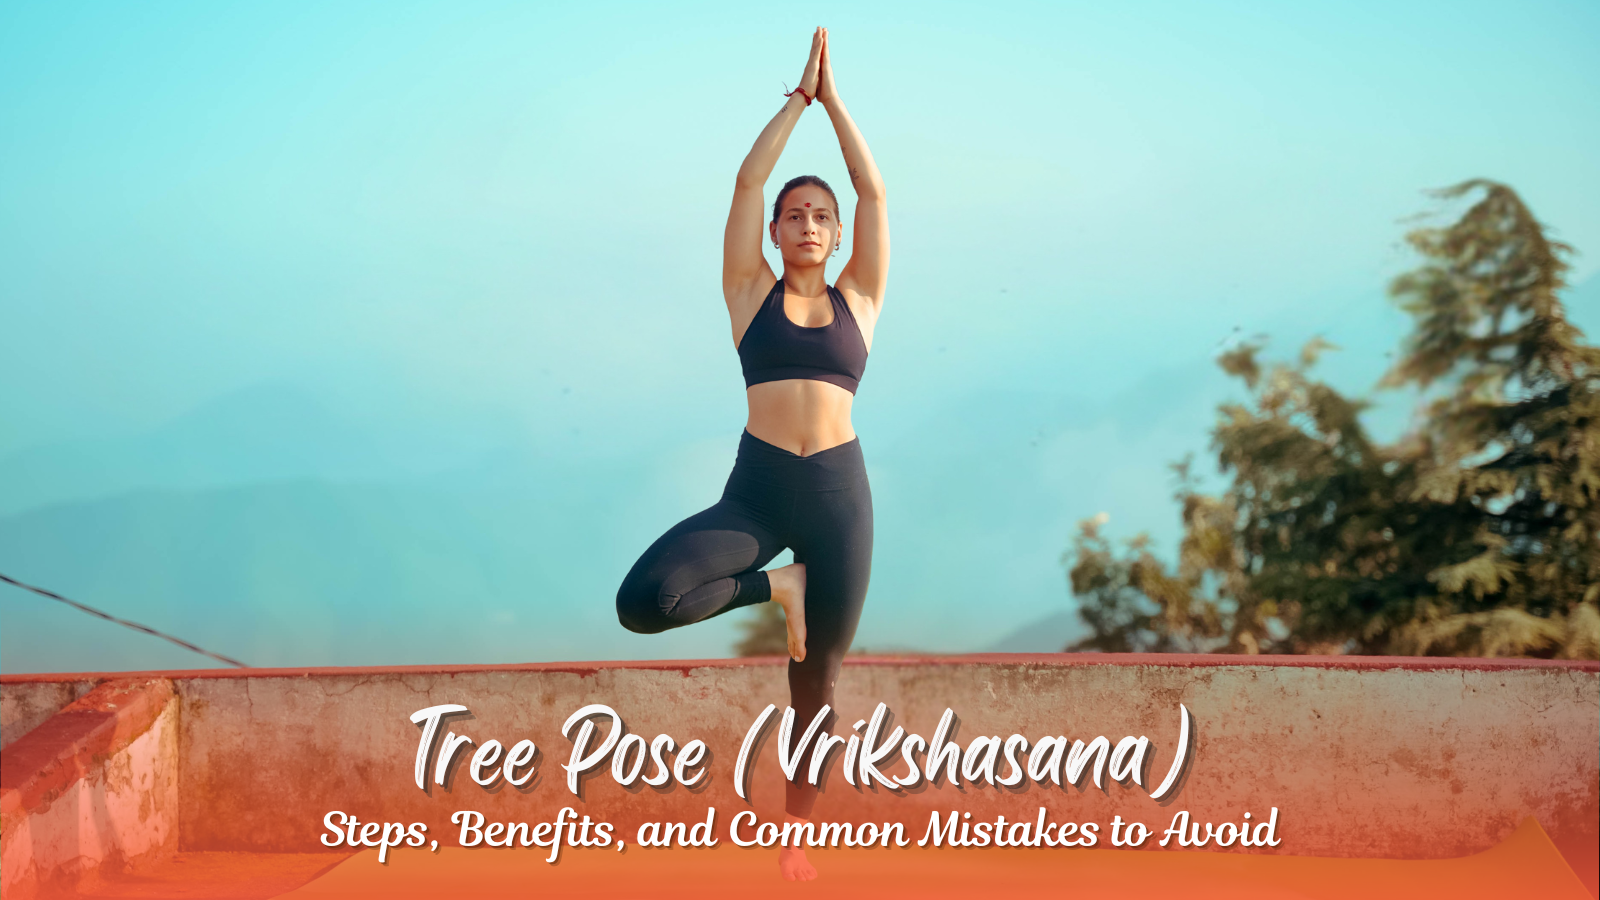
Use quadricep engagement in Vrikshasana tree pose as you pull your navel toward the spine while keeping your shoulders relaxed, see in image of vrikshasana.
Shift Weight to One Leg:
Tree pose meaning bring your right foot up to place your right foot sole on your left inner thigh or calf without resting it on your knee. Position the knee below the level of the joint to protect the joint structures.
In answering how to do tree pose, the step should be performed by applying full body pressure to the thigh and maintaining resistance against the standing leg to establish stability.
Find Balance:
Review a single static point with your eyes to achieve mental control while practicing Vrikshasana tree pose.
The core muscles must activate to hold the torso still while maintaining hip position stability in searching for how to do tree pose.
Raise Your Arms:
Tree pose meaning creating Anjali Mudra by bringing hands to the centre of your heart offers a stable tree pose variation.
As a challenge you can extend your arms above while maintaining relaxed shoulders.
Hold and Breathe:
How to do tree pose and the proper way to practice the breathing technique, look pictures of vrikshasana during this tree pose are discussed below.
Your breathing should be through the nose while maintaining this pose between 30 seconds to 1 minute.
Perform the movement from beginning to end two times on the other side.
Vrikshasana Contraindications & Modifications for All Levels:
Beginning practitioners should position their foot on the ankle when supported by a wall.
Among advanced individuals the tree pose variations involve one-handed execution reaching the arm toward the ceiling along with chest rotation.
The injured population should do a yoga tree pose in a seated position using a chair while paying attention to the upper-body position.
10 Benefits of Vrikshasana or Benefits of Tree Pose
Tree Pose yoga, vrksasana benefits delivers more advantages than simply maintaining equilibrium, that is a tree pose an internal rotation. The following section provides detailed information about Tree Pose’s rewards which span across physical body systems psychological states and emotional well-being.
The benefits of tree pose are discussed below.
1. Improves Balance and Focus
The lower body muscles including ankles and calves along with the core function in conjunction to maintain equilibrium through tree pose yoga practices. In discussing the benefits of tree pose, scientific evidence demonstrates that performing Vrikshasana Yoga tree pose as a balance exercise improves body awareness in the aging population and minimizes their chances of falling.
2. Strengthens Legs and Core
The standing leg performs continuous work as it develops strength in both the quadriceps and hamstrings as well as glutes. The benefits of tree pose are Core muscles activate while the body remains aligned which leads to enhanced physical strength for conducting regular daily tasks.
3. Enhances Posture
When practiced Vrikshasana realigns the spinal column and expands the chest cavity thereby combating bad posture and forward neck posture. Wearing Vrikshasana protects the cervical and lumbar spinal areas from discomfort.
4. Calms the Mind
The meditative part of balancing practice stops unnecessary mental activity which leads to activation of the parasympathetic nervous system. A reduction of cortisol occurs simultaneously with an improvement in emotional resilience.
5. Prepare for Advanced Poses
Learning different tree pose yoga techniques will help you develop the required stability you need for poses including Eagle Pose (Garudasana) and Dancer Pose (Natarajasana) and inverted poses like Headstand.
6. Boosts Confidence
The procedure of vrikshasana executing a demanding body pose known as Vrikshasana tree pose develops inner confidence which extends to daily life.
Vrikshasana Procedure Benefits and Contraindications
Regular practitioners of yoga tree pose are just as prone to making such mistakes. Two effective steps to improve practice safety along with better results include the following sequence as shown in picture of vrikshasana:
1. Placing the Foot on the Knee
Placing the foot in contact with the standing knee makes the joint unstable and creates a risk of damaging this area. It is always safer to position your foot on the inner thigh rather than the calf.
2. Collapsing the Hip
Your pelvis will become improperly aligned whenever you extend your lifted leg hip outward beyond the normal position. Draw your stomach muscles tight while using your foot to push against your thigh to maintain equal hip positions.
3. Holding Your Breath
Breathing with small chest movements produces nervous tension together with an unbalanced posture. Routine deep and regulated breathing will help your nervous system reach a state of rest.
4. Overarching the Lower Back
The lumbar spine becomes unstable when you extend your ribs forward. The position of the tailbone should be slightly tucked while extending your head through its crown.
5. Locking the Standing Knee
Vrikshasana Precautions, When your knee extends beyond its normal range the joints become under stress. A small bend in your standing leg knee joint will prevent joint injuries.
How to do Vrikshasana, Tree Pose Variations for All Levels
Several unique versions of tree pose in yoga practice will help you adapt the pose. There are several tree pose variations and steps of vrikshasana these are as follows:
1. One-Handed Tree Pose
Stretch your upper arm overhead with your second arm always resting against your chest. A minimal torso rotation allows you to activate obliques while in this pose.
2. Dancing Tree Pose
Move your body lenticularly from side to side or forward and back to achieve the effect of wind blowing through tree branches. The dynamic movement enhances how your body reacts to changes in the balance position.
3. Chair-Assisted Tree Pose
A supportive chair should be placed next to you when standing balance requires additional support. The key focus should be alignment while you transition to using less support from the prop. Thebest Yoga teacher training school in Rishikesh helps you in your better practice.
4. Closed-Eye Tree Pose
In focusing on tree pose variations or vrikshasana pose, one should close eyes to increase their awareness of proprioception and to sharpen their mental focus. Experienced practitioners especially appreciate this elaborate version of the exercise.
5. Partner Tree Pose
You should use Vrikshasana or brikhasana while facing your partner to support each other through balance exercises and enhanced stretching. You can understand the Vrikshasana tree pose benefits through the 200 hour yoga teacher training school in Rishikesh.
6. Revolved Tree Pose
The spinal twist comes from extending the opposite elbow outside of the lifted knee position. The diversified stance improves body movements together with intestinal digestion.
Anatomy of Tree Pose or Vrikshasana Pose: Muscles and Joints Engaged
Learning the anatomical structure of vrikshasana images or vrikshasana photo teaches students to improve their practice skills.
The quadriceps together with the calves and ankle stabilizers receive strengthening benefits when performing this pose.
The lifted leg position extends both the adductors of the thighs and the hip flexor muscles.
Vrikshasana connects transverse abdominis to obliques along with spinal alignment.
Upper Body: Opens the chest (pectorals) and shoulders (deltoids).
Postures that involve the Vrikshasana tree pose activate the vestibular system which boosts your spatial orientation while improving motor coordination.
By understanding the anatomy of Vrikshasana tree pose you can modify your yoga practice. These are as follows:
Standing Leg: Reinforces quadriceps, calves, and lower leg stabilizers.
Lifted Leg: Stretches the internal thigh (adductors) and hip flexors.
Core: Connects with cross-over abdominis and obliques for spinal arrangement.
Upper Body: Opens the chest (pectorals) and shoulders (deltoids).
This pose can also stimulate the vestibular system, and also enhance coordination and spatial awareness. You can contact the best yoga school in rishikeshfor your better practice.
FAQs About Tree Pose
1. What are the disadvantages of Tree Pose?
The incorrect method of practicing the tree pose leads to ankle and knee strain. Modification should always include foot-knee separation because dangerous situations may occur. People who have severe balance problems along with vertigo should use supports as well as do the pose while seated.
2. How long should I hold a Tree Pose?
Each side of Tree Pose should be maintained between 30 seconds and 1 minute. Advance time spent in this position whenever you notice better balance. During meditation, you should maintain this pose for between three and five minutes while focusing on your breathing.
3. Is Tree Pose good for knees?
Yes, when aligned properly! The joint gets protection from strengthening muscles that surround the knee (quads and hamstrings). The standing knee should move smoothly over the ankle while you avoid stiffening the leg.
4. Why is Tree Pose so hard?
Success in balancing requires your muscles to function correctly while maintaining steady focus together with patience. The tree pose becomes challenging because of restrictions in the hip area combined with unstable ankle joints together with problems in the inner canal of the ear. Practice makes balance easier while Butterfly Pose (Baddha Konasana) along with other hip-opening postures help increase results.
5. Can Tree Pose help with sciatica?
Yes! The carefully controlled hip and gluteal stretching functions to reduce tension in the sciatic nerve. The combination of the Tree Pose in yoga together with Pigeon Pose (Kapotasana) creates the most optimal outcome.
Integrating Tree Pose into Your Yoga Practice
Tree pose in yoga suits various yoga sequences because it remains flexible according to different practice needs.
The body receives energetic stimulation through the practice of Sun Salutations together with the Morning Routine.
Balance Flow consists of Eagle Pose and Warrior III poses designed to create a stable sequence.
Use Vrikshasana as a mobile contemplative practice by maintaining attention to your breath and maintaining a state of quietness.
Deepen Your Practice with 200 Hour Yoga Teacher Training in Rishikesh
People who want to learn Vrikshasana and other transformative poses shouldchoose a yoga teacher training school in Rishikesh. Students can find the best yoga school located in Rishikesh where they pursue a combination of ancient knowledge and modern anatomical principles within the tranquil Himalayan setting. The training programs teach alignment guidelines as well as modification techniques and protective philosophy which helps students prepare for teaching classes by enhancing their confidence.
Tree Pose grants more than balance capabilities since it symbolizes personal growth with mental strength and physical equilibrium. Many people achieve total effectiveness of Tree Pose in yoga when they abstain from errors while trying different variations and practicing it regularly. The ultimate Rishikesh yoga school provides students with tools that lead to advancement no matter if their goal is reaching superior alignment practices as a yogi or training for teacher certification.
For more balance in asanas and yoga, you can visit our page for better guidance regarding yoga and its practice.
Cow Face Pose (Gomukhasana) – Benefits, Variations & Step-by-Step Guide
What is Gomukhasana?
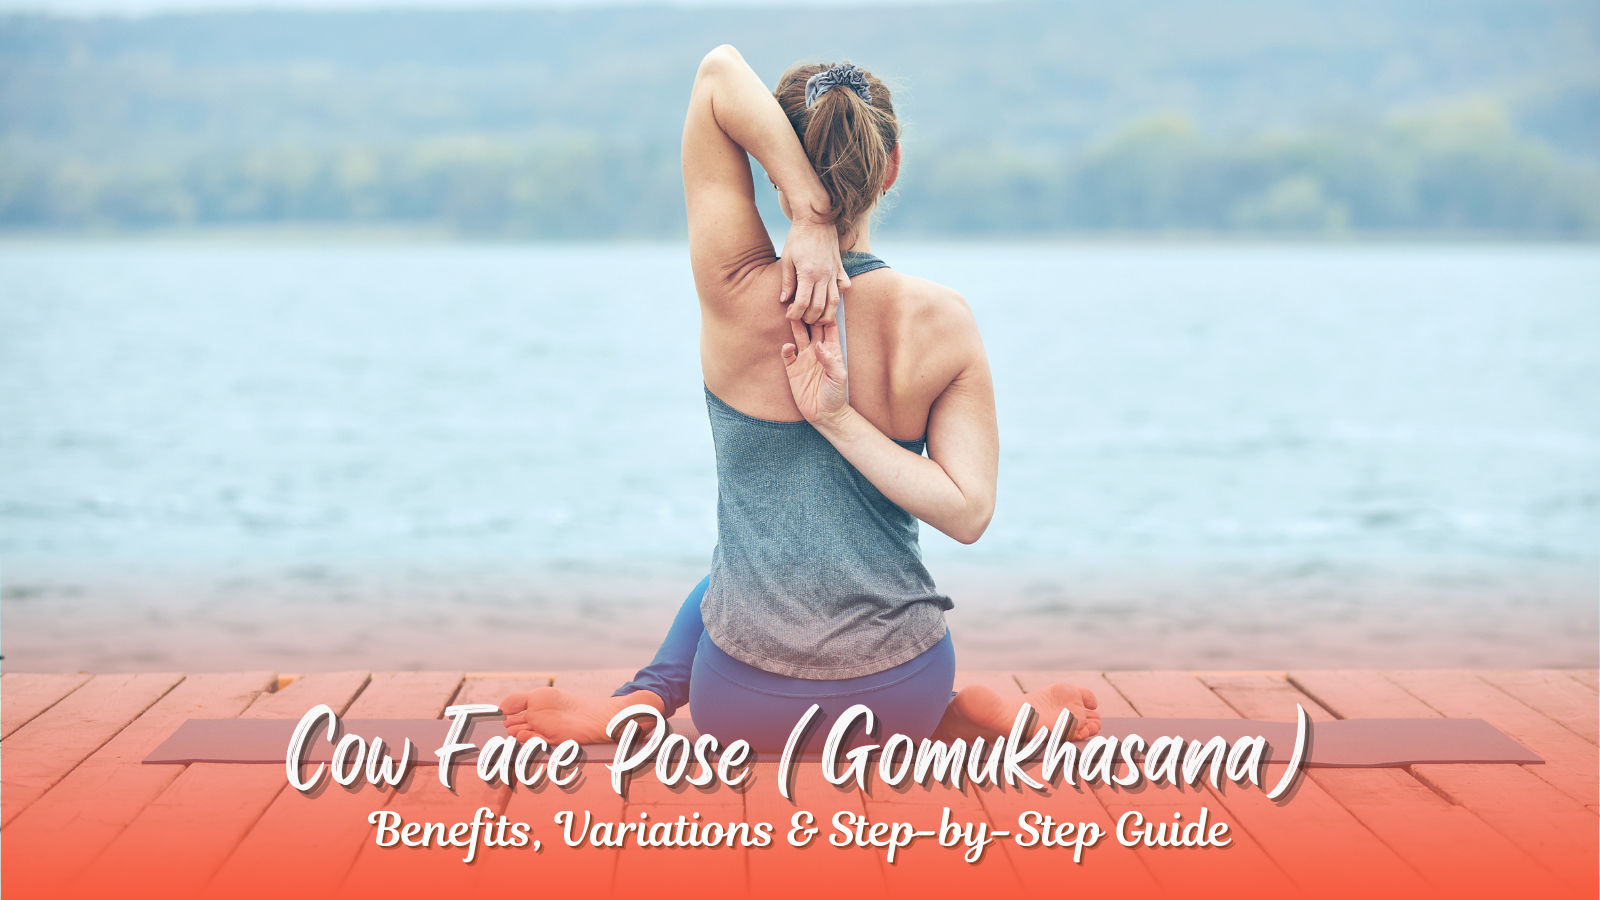
To understand how to do cow face pose, it is necessary to know the cow face pose benefits and why is it called cow face pose. The Cow Face Pose, known as Gomukhasana in Sanskrit, is a ground-breaking yoga pose celebrated for further developing shoulder and hip adaptability. Its name begins from the cow face pose yoga’s similarity to a cow’s face, with the knees and elbows framing the state of a cow’s mouth and ears. A foundation of yoga practice, cow pose asana offers significant physical and mental advantages, making it number one among yogis, everything being equal.
In search of what is cow face pose, gomukh aasan is a seated yoga posture that offers a deep stretch to the thighs, hips, shoulders and chest. At the point why is it called cow face pose, when you fold your legs in the posture, with one knee stacked on top of the other, the shape framed by your thighs and calves is said to look like the wide piece of a cow’s face, tightening towards the “mouth” where the feet are. The benefits of cow face yoga pose are mental and physical strength, and developing muscles’ flexibility and proper adjustment.
In this extensive guide, we will dig into the advantages of Cow Face Pose, investigate its varieties, and address normal difficulties. We will likewise feature how dominating this cow pose can upgrade your journey toward advanced training, for example, a 300 hour yoga teacher training course in rishikesh, presented by the best yoga school in Rishikesh.
Why is it called Cow Face Pose?
In finding why is it called cow face pose, we need to understand what is cow face pose actually is. The Sanskrit expression Gomukhasana joins “go” (cow) and “mukha” (face), and this represents cow face pose yoga. When seen from the side, the stacked knees and interlocked arms mirror the forms of a cow’s face. This cow face yoga pose arrangement remarkably focuses on the shoulders, hips, and spine, making it a powerful hip opener and shoulder stretch.
Knowing cow pose yoga and benefits of cow face yoga pose can enhance your muscle activities with the best hip adjustment in practicing cow face yoga pose. Moreover, cows are venerated in Indian culture for their sustaining characteristics, and nurturing qualities, and this face pose epitomizes an equilibrium between effort and surrender.
The yoga teacher training school in Rishikesh can help you to practice this face pose and cow face pose benefits. Along with this, 300 hour yoga teacher training course in rishikesh can also guide you how to do cow face pose, and give ideas about what is cow face pose, is and the benefits of cow face yoga pose.
Benefits of Cow Face Pose & Benefits of Gomukhasana
The Cow Face Pose benefits and gomukhasana benefits are huge, influencing both physical and mental prosperity. We should separate them to understand benefits of cow face yoga pose:
1. Enhances Shoulder Mobility and Flexibility
Present-day ways of life frequently lead to tight shoulders because of delayed sitting or screen use. Cow Face Pose extends the deltoids, rear arm muscles and rotator sleeves, lightening firmness. The arm position likewise further develops the scope of movement, making it ideal for competitors, swimmers, or anybody looking for better chest area portability in practicing cow pose.
2. Releases Hip Tension
As a profound hip opener to practice face pose, Gomukhasana focuses on the glutes, piriformis, and external hips. These cow face pose benefits particularly are valuable for sprinters, cyclists, or people who sit for extended periods. The standard practice of cow face pose yoga can decrease lower back torment and work on the pelvic arrangement is considered as benefits of cow face yoga pose.
3. Corrects Postural Imbalances
By extending the chest and prolonging the spine, Cow Face Pose yoga neutralizes slumping and adjusted shoulders. Cow face pose benefits from advancing an upstanding stance, lessening the burden on the neck and lower back.
4. Calms the Nervous System
The engaged taking in this cow face pose yoga actuates the parasympathetic sensory system, bringing down pressure chemicals and encouraging mental clearness. Cow face pose benefits stance for tension or weakness.
Adhere to these guidelines to rehearse the procedure of gomukhasana securely, gomukhasana steps and successfully along with the benefits of cow face yoga pose:
Start Seated: Sit on the floor with your legs broadened. In the event that your hips are tight, place a collapsed cover under your sit bones.
Cross the Legs: in answering how to do cow face pose, twist your right knee and spot the right foot under the left hip. Get the left leg over the right, stacking the knees. Mean to bring the two heels equidistant from the hips.
Align the Arms: Broaden the right arm above, twist the elbow, and lower the hand between the shoulder bones. Arrive at the abandoned arm your back, bowing the elbow to catch the fingers. In the event that the hands don’t meet, utilize a yoga lash.
Refine the Posture: Sit tall, draw the shoulder bones together, and delicately press the knees together.
Hold and Breathe: Remain for 5-8 breaths, then deliver and switch sides.
Modifications
Cow face pose yoga utilizes a strap for the arms or a block under the hips.
Cow face yoga poses practice the reclined variation assuming that the situated stance strains the knees.
Cow Pose Variations and Steps of Gomukhasanafor EveryBody
Adjust Cow Face Pose yoga to your requirements with these varieties:
Seated Cow Face Pose with Props
Place a yoga block or support under the hips to diminish strain on the knees. This change is great for amateurs or those with restricted hip portability.
Reclined Gomukhasana
Lie on your back and fold the legs while extending the arms above in practicing cow pose. This form limits the burden on the hips and lower back while keeping up with the shoulder stretch and this indicates how to do cow face pose.
Dynamic Cow Face Flow
Move musically between Cow Face Pose and a forward overlay (twisting at the hips). This heats the muscles and improves dissemination.
Cow Face Arms in Sukhasana
Assuming the leg position is testing, sit in a Simple Posture (Sukhasana) and center exclusively around the arm stretch in cow pose.
Gomukhasana Procedure Benefits and Contraindications
Many practitioners struggle with Cow Face Pose variations, Gomukhasana Contraindications because of tight hips or shoulders. This is the way to investigate:
Tight Hips: Cow Face Pose variations props like covers or blocks to lift the hips. Bit by bit work on hip-opening stances like Butterfly Posture (Baddha Konasana) to assemble adaptability.
Shoulder Stiffness: To understand what is cow face pose, practice shoulder extends like Hawk Arms or Caught Hands Behind the Back in the case of cow pose. A lash can overcome any barrier between the hands.
Knee Discomfort: Try not to compel theknees to stack in gomukhasana yoga pose. All things being equal, keep the legs uncrossed and centre around the chest area in practicing cow face pose variations.
Consistency and tolerance are vital to progress to accompany time.
Deepen Your Practice with Yoga Teacher Training in Rishikesh
For those roused to dominate Cow Face Pose yoga, gomukhasana pose and other high-level asanas, consider signing up for a 300-hour yoga teacher training course in Rishikesh. Settled in the Himalayas, Rishikesh is home to thebest yoga school in Rishikesh, offering vivid projects that mix customary lessons with current life systems. These courses refine your work, showing approach, and comprehension of arrangement, and are ideal for hopeful teachers or committed experts.
This gomukhasana yoga pose strengthens shoulder and hip joints as well as proper posture while relaxing your mind. This face pose demonstrates healing power for conditions that affect both the sciatica and upper back tension and are considered as benefits of cow face yoga pose.
2. Why does Cow Pose feel so good?
In practicing cow pose, stretching at a deep level activates endorphin hormones which create feelings of contentment inside the body, and this is purely connected with the benefits of cow face yoga pose. Endorphins are released during the stretch also while the stretch eliminates physical tension that accumulates in hips and shoulders and that is the benefits of cow face pose.
3. Is Cow Face Pose a hip opener?
Yes! In the crossed-leg position, people effectively open their hips by exercising their outer hips and glutes muscles.
4. How often should I practice Cow Face Pose?
Aim for 3–4 sessions weekly. Other flexibility-stretching postures such as Pigeon Pose or Thread the Needle should be included for an optimal balance of flexibility along with the cow face pose yoga, and cow face yoga pose.
Conclusion
The practice of Cow Face Pose and understanding what is cow face pose can serve as a foundation for better flexibility together with increased strength and mind serenity. 300 hour yoga teacher training course in rishikesh, also known as the best yoga teacher training school in Rishikesh can sincerely guide you on how to do cow face pose, what is cow face pose, gomukhasana procedure, gomukhasana precautions, contraindications of gomukhasana and the benefits of cow face yoga pose.
Moreover, by embracing the different cow face pose variations and respecting your physical boundaries you can achieve its complete capabilities. Both experienced yogis and teaching aspirants will find Cow Face Pose a beneficial element in their practice. Future yoga professionals can find the best yoga teacher training school in Rishikesh the city where yoga originally began.
If you want to explore more hip opening techniques and guidelines please visit our page regarding yoga techniques and top hip opening poses for yogis.
Vakrasana, or Twisted Pose, is a seated yoga posture that twists the spine and engages muscles in the core. It is one of the foundational postures that have been proven to be very beneficial for spinal mobility, flexibility, and strength in the core. It improves digestion, relieves tension, and enhances balance. It is ideal for beginners and advanced practitioners.
We will practice the steps of Vakrasana, explore the Vakrasana benefits, Vakrasana steps, Vakrasana precautions, Vakrasana yoga sequences and Vakrasana variations. We will also pay attention to many variations of the Vakrasana pose like Kati Vakrasana, Meru Vakrasana, and Uttana Vakrasana, twisting yoga pose, spinal flexibility pose, and seated twist pose and describe how this asana impacts the whole body along with the mind.
What is Vakrasana?
Vakrasana is a word in the Sanskrit vocabulary meaning “twisted pose.” “Vakra” means twisted or curved, and “Asana” means posture. The twist happens in the spine while keeping the legs in seated position. Vakrasana is one of those dynamic asanas, which demands flexibility in the spine, hips, and shoulders. It is often practiced in a series of yogas to increase body flexibility and straighten out the postures.
This asana can be practiced in various versions, namely Kati Vakrasana, Meru Vakrasana, and Uttana Vakrasana, each having its specific challenge and advantage.
Vakrasana Benefits: Why You Should Include It in Your Yoga Practice
Health Benefits of Vakrasana:
Vakrasana offers many physical and mental benefits. It is one of the best stretchings for flexibility that strengthens the core and develops the health of the spine. The following are the major vakrasana procedure benefits and contraindications:
1. Improves Spinal Flexibility:
The greatest advantage of Vakrasana is that it makes the spine more flexible. The twisting action in the pose frees the tension of the back and facilitates the movement of the vertebrae. Gradually, the stiffness in the spine is relieved, and posture improves through regular practice of Vakrasana.
2. Strengthens the Core Muscles:
Vakrasana works on the abdominal and oblique muscles. It activates these muscles by giving them tone and strength and thus assists with posture, all activities of daily life and provides for an easier balance or stability in the other asanas.
3. Enhances Digestion:
The gentle pressure on the abdomen while twisting in Vakrasana helps massage the digestive organs, and hence, increases the efficiency of the digestive system. It may also help prevent bloating and constipation due to the stimulation of the digestive process and easy bowel movements.
4. Reduces Stress and Tension:
For instance, the twisting postures, such as Vakrasana, are an excellent method of unstressing and de-tensioning the body. The proper turn of the spine really stimulates the nerve system, which in turn relieves the tension of the mind. That is why it has acted effectively in keeping away anxiety and mental fatigue.
5. Increases Blood Circulation:
This distorted movement in kativakrasana enables enhanced blood circulation inside the spinal cord and internal organs. Blood circulation is enhanced when cells become full of oxygen and nutrients and remove the waste products. It can thus boost energy levels and vigor.
6. Improved Posture
The correct posture is substantially improved by practicing Vakrasana regularly. In fact, even the twisting movement itself helps align the spine and strengthen the posterior muscles, while it also is an antidote to long periods of sitting hours.
7. Relieves Lower Back Pain:
This could be a remedial asana for people having pain in their lower back since the twisting, in a slow and gentle motion, loosens up the areas in the back that tend to become stiff by tension and pressure.
How to do Vakrasana: Step-by-Step Guide
Vakrasana Steps
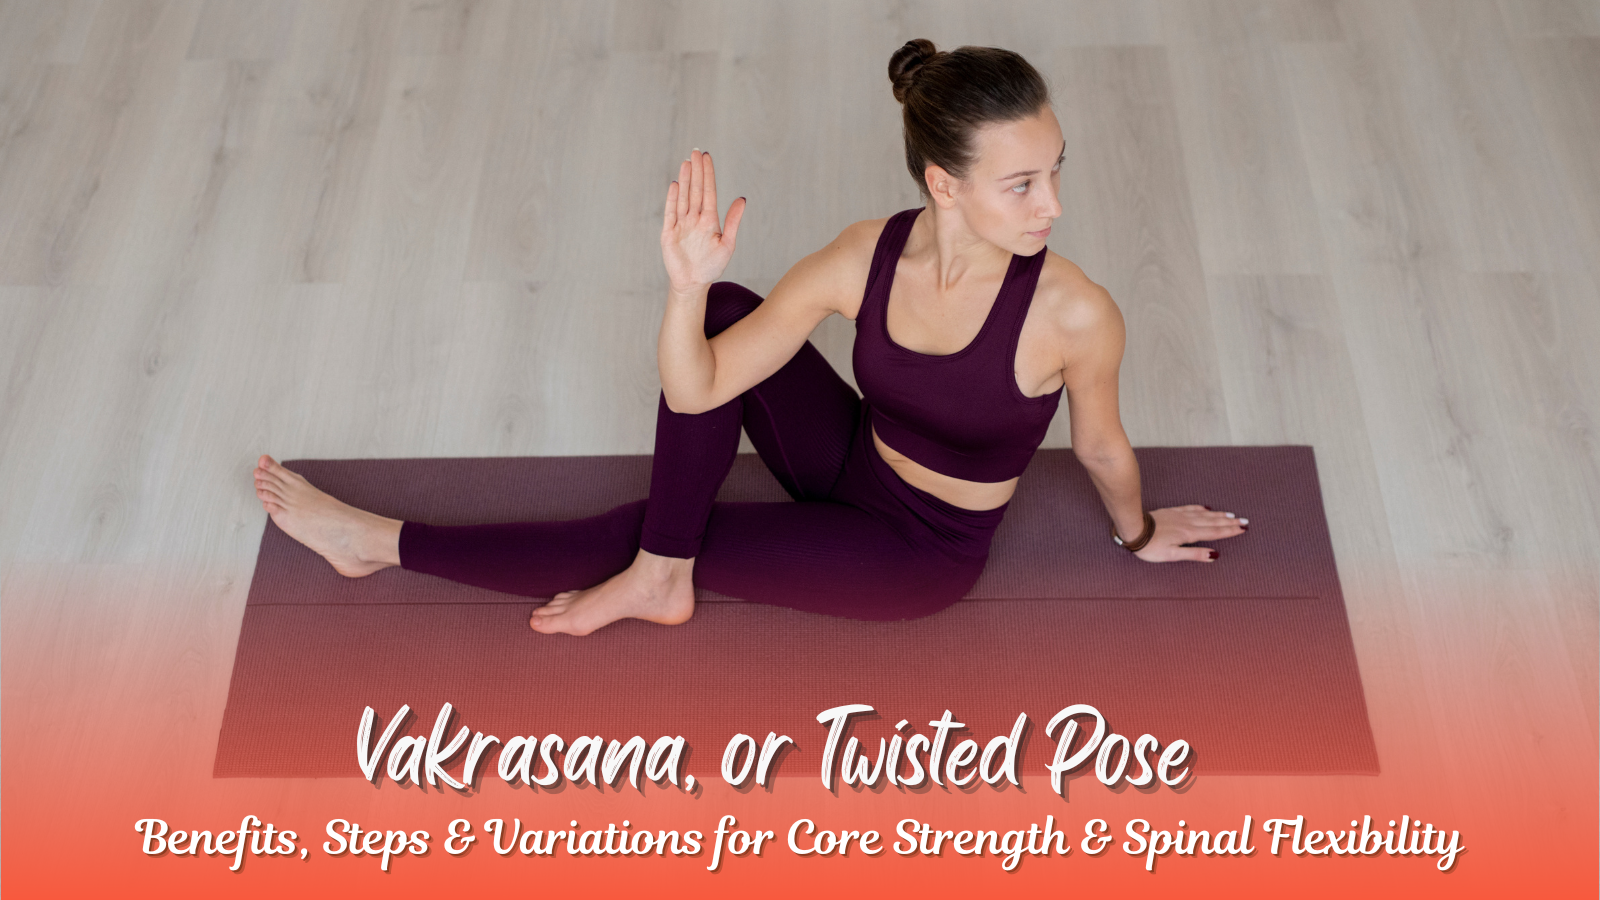
The Vakrasana is a relatively simple posture to perform, but, as with any yoga pose, patience and practice are essential. The steps for mastering the full benefit of the vakrasana images are given below:
Step-by-Step Procedure of Vakrasana:
Step- 1 Sit on the floor by extending your legs straight before you. Ensure your spine remains straight and activate your core muscles. Place your palms flat on the ground next to your hips to support you.
Step- 2 Fold Your Right Leg: Fold your right knee and bring it close to the chest, right foot on the floor, flat. The right knee will now point upwards while the foot remains near the left thigh.
Step- 3 Twist Your Upper Body: Inhale, and extend your spine. As you exhale, twist your torso to the right, taking your left elbow across to the outer side of your right knee. Keep your spine straight; avoid collapsing into the twist.
Step- 4 Engage Your Core: In any twist, you want to engage your core to allow for the most depth into the twist that stabilizes you. You can place your right hand on the floor behind you or on your right knee to add stabilization.
Step- 5 Hold the Twist: Hold the twist for 20-30 seconds, breathing deeply and steadily. Your shoulders should remain relaxed, and your chest open. Twist from the spine, not from the shoulders.
Step- 6 Release and Repeat on the Other Side: Slowly release the twist and return to the starting position. Repeat the same steps on the left side. Keep your spine straight throughout the movement.
Precautions and Contraindications of Vakrasana:
Although Vakrasana is safe and helpful for most, here are a few precautions and vakrasana contraindications to consider:
•Avoid if You Have a Spine Injury: If you have any injuries or conditions related to the spine, such as herniated discs or sciatica, it is best to avoid twisting poses like Vakrasana unless you are assisted by a qualified yoga instructor.
• Pregnancy: Pregnant women should take permission from their doctor before practicing Vakrasana or any twisting poses since it may not be safe in pregnancy, especially towards the later periods.
• Severe Lower Back Pain: People with severe lower back pain should avoid deep twists in Vakrasana until such time as their pain is under control. A gentle variation of the twist can be maintained by keeping the twist shallow.
•Knee or Hip Injuries: It is primarily good to be cautious when practicing this pose in case you have knee or hip injuries. Make all your movements gentle and avoid any deep twisting motions that may strain those areas.
Vakrasana Steps: Mastering the Twisting Yoga Pose
Vakrasana Variations:
Kati Vakrasana (Hip Twist Pose):
Kati Vakrasana – It is a variation of standing vakrasana in which the body twist is taken such that one hand reaches back behind to grab for the opposite knee. It would be much more of a spine twist along with opening up of the hip and lower back so that more flexibility is developed.
Meru Vakrasana (Twisted Half Moon Pose):
Meru Vakrasana is another advanced variation of Vakrasana. In this pose, one raises one leg while twisting the upper body with that leg forward to reach out to the toes of the leg which is lifted up. This posture gives more extension in the spine and is very engaging.
Uttana Vakrasana or Extended Twisted Pose
You are reaching forward to stretch the torso more and lengthen the spine in Uttana Vakrasana. It will stretch your lower back, hips, and shoulders.
Supta Vakrasana is also called Reclined Twisted Pose.
Supta Vakrasana is a lyingvariation of the posture. In it, one offers forward bends to the lower part of the body with grounded shoulders; the twist in the lower part would be very smooth and gentle for the spine and lower back.
Ardha Vakrasana (Half Twisted Pose):
In Ardha Vakrasana, only part of the body is twisted. That could either be an upper or a lower part of the body. It is hence relatively the milder form of the classic Vakrasana.
Vakrasana Yoga Teacher Training
It is in such a beautiful and serene environment that you can go for further knowledge of Vakrasana, as well as any number of other yoga poses, by studying a 200-hour yoga teacher training course in Rishikesh. The good thing is that most yoga teacher training schools in Rishikesh offer full-scale training for the theory and practice of Vakrasana and other asanas, including modifications and variations.
Some of the very best yoga schools in Rishikesh specialize in particular subjects, like theSound Healing Yoga Teacher Trainingthat combines physical asana practice and sound healing in a holistic, deepened sense of understanding through yoga as lifestyle and practice way beyond the mat.
Vakrasana is a great asana that creates flexibility while strengthening the core and overall benefit to the being. Some of the other benefits associated with this asana are improved mobility in the spine, improved digestion, and less stressfulness. Regular practice will build up a sound foundation for coming difficult practices. Simultaneously, you will also get the maximum benefit of increased flexibility and balancing consciousness.
With proper learning of the steps of Vakrasana, you can easily include it in your practice and experience all the benefits of this pose. It could be Kati Vakrasana or Uttana Vakrasana, or any other variation of this asana. All you have to do is listen to your body and modify the pose as you feel is required. If you want to enhance your skills further, explore a 200-hour yoga teacher training in Rishikesh.
Frequently Asked Questions (FAQS)
What is Vakrasana in Sanskrit?
Vakrasana (Twisted Pose) comes from the Sanskrit words “Vakra” (twist) and “Asana” (posture). This seated yoga pose involves twisting the spine, creating a deep stretch for the back, improving spinal flexibility, strengthening the core, and aiding digestion. It is a foundational pose in many yoga sequences and offers numerous benefits for both beginners and advanced practitioners.
Is Vajrasana Good for Diabetes?
Yes, Vajrasana (Diamond Pose) can benefit people with diabetes by improving digestion and metabolism. This posture stimulates the digestive organs, enhances blood circulation, and helps regulate blood sugar levels to some extent. However, it should be practiced regularly and combined with a balanced lifestyle for maximum benefits.
What are the Benefits of Vajrasana for Diabetes?
Improves Digestion – Sitting in Vajrasana after meals helps improve digestion, indirectly supporting better blood sugar control.
Stimulates the Pancreas – The posture gently massages the pancreas, encouraging insulin production, which is crucial for diabetes management.
Reduces Stress – Since stress can negatively impact blood sugar levels, Vajrasana helps calm the nervous system and lower stress.
Note: If you have diabetes or any health concerns, consult a healthcare professional or a certified yoga instructor before practicing Vajrasana regularly.
Who Should Avoid Vajrasana?
While Vajrasana is generally safe, certain individuals should avoid or modify the pose:
People with Knee Injuries – If you have knee pain, arthritis, or ligament damage, avoid prolonged sitting in Vajrasana as it puts pressure on the knee joints.
Those with Severe Back Pain – Individuals with lower back issues may find it uncomfortable. If practiced, ensure your spine remains straight and avoid prolonged sitting.
Pregnant Women – Sitting in Vajrasana for too long can add pressure to the pelvic region. Pregnant women should only practice it under expert supervision.
People with Severe Digestive Issues – If you have conditions like hernia or chronic gastric problems, Vajrasana may increase intra-abdominal pressure and should be avoided.
Tip: If you experience discomfort, practice Vajrasana for shorter durations or use props like cushions to reduce strain.
Can Vajrasana Be Done on a Bed?
Yes, Vajrasana can be done on a bed, but it may not be as effective as practicing on a solid surface.
Advantages of Doing Vajrasana on a Bed:
Comfortable for Seniors & Injured Individuals – Practicing on a softer surface can be easier on the knees and back.
Stress Relief – Sitting in Vajrasana on a bed before sleep can help relax the mind and body.
Disadvantages of Doing Vajrasana on a Bed:
Lack of Stability – A soft surface reduces stability, making it harder to maintain proper posture.
Reduced Effectiveness – Vajrasana is more beneficial on the floor as it provides better grounding and alignment.
Recommendation: If practicing on a bed, use a firm mattress and maintain correct posture to avoid unnecessary strain.
If you prefer to do the Vajrasana on your bed, still keeping your body posture straight and using some cushions or a blanket for extra support.
Conclusion
If you really want to dive deeply into the transformative power of yoga, consider attending a 200 Hour Yoga Teacher Training at an established Yoga Gurukul in Rishikesh. The program will give you the best yoga and meditation training but teaches you to live a more centered, mindful life. You shall discover the depth of your practice in a truthful and nurturing environment, be given the confidence and tools to succeed in all aspects of your life.
What is Janu Sirsasana (Head-to-Knee Forward Bend)?
Janu Sirsasana or Head-to-Knee Pose is a seated asana that provides stretching, flexibility, and a lot of awareness. The Sanskrit name, “Janu Sirsasana“, can be divided into two parts where “Janu” is an abbreviation of “knee”, and “Sirsasana” refers to head or the head-to-knee pose. It is forward bend as the one leg stretched straight in which the other folded back, resting the foot near the inner thigh of the outstretched leg. In this asana, the body folds forward, bringing the head toward the knee, hence the name.
Sanskrit Meaning:
“Janu” = Knee
“Sirsa” = Head
“Asana” = Pose/Posture
Janu Sirsasana, or the head-to-knee posture, is performed with great frequency in hatha yoga sequences. These sequences stretch the hamstrings, groin, and lower back, ensuring one feels good overall, improving their flexibilityand even creating an element of relaxation. This asana proves very beneficial to those who wish to enhance their physical well-being. Thus, let’s uncover the step-by-step procedure for Janu Sirsasana, benefits of janushirasana, janu sirsasana steps, janu sirsasana sequence and what precautions one needs to exercise while doing it.
How to Do Janu Sirsasana (Step-by-Step Guide)
Step 1: Pre-warming the Body
Start by ensuring that your body is ready. Warm up the muscles with stretching the hamstrings, hips, and back. This is especially useful for those poses, Downward Dog, Forward Fold or Cat-Cow.
Step 2: Initial Position
Sit down on the floor with your straight legs extended in front of you. Your spine is lengthened and open, and your shoulders are pressed back. Then engage your thighs to press down using your feet so that your legs are engaged.
Step 3: Fold One Leg IN
Bend your right leg, bringing the sole of your right foot toward your left inner thigh. The heel of the bent leg should be close to the groin area and the foot flexed. Make sure your right knee points out toward the floor, and your left leg stays straight on the mat.
Step 4: Extend the Spine
Inhale and lengthen your spine up to sitting upright. Reach your arms up over your head and engage your inner core.
Step 5: Fold Forward
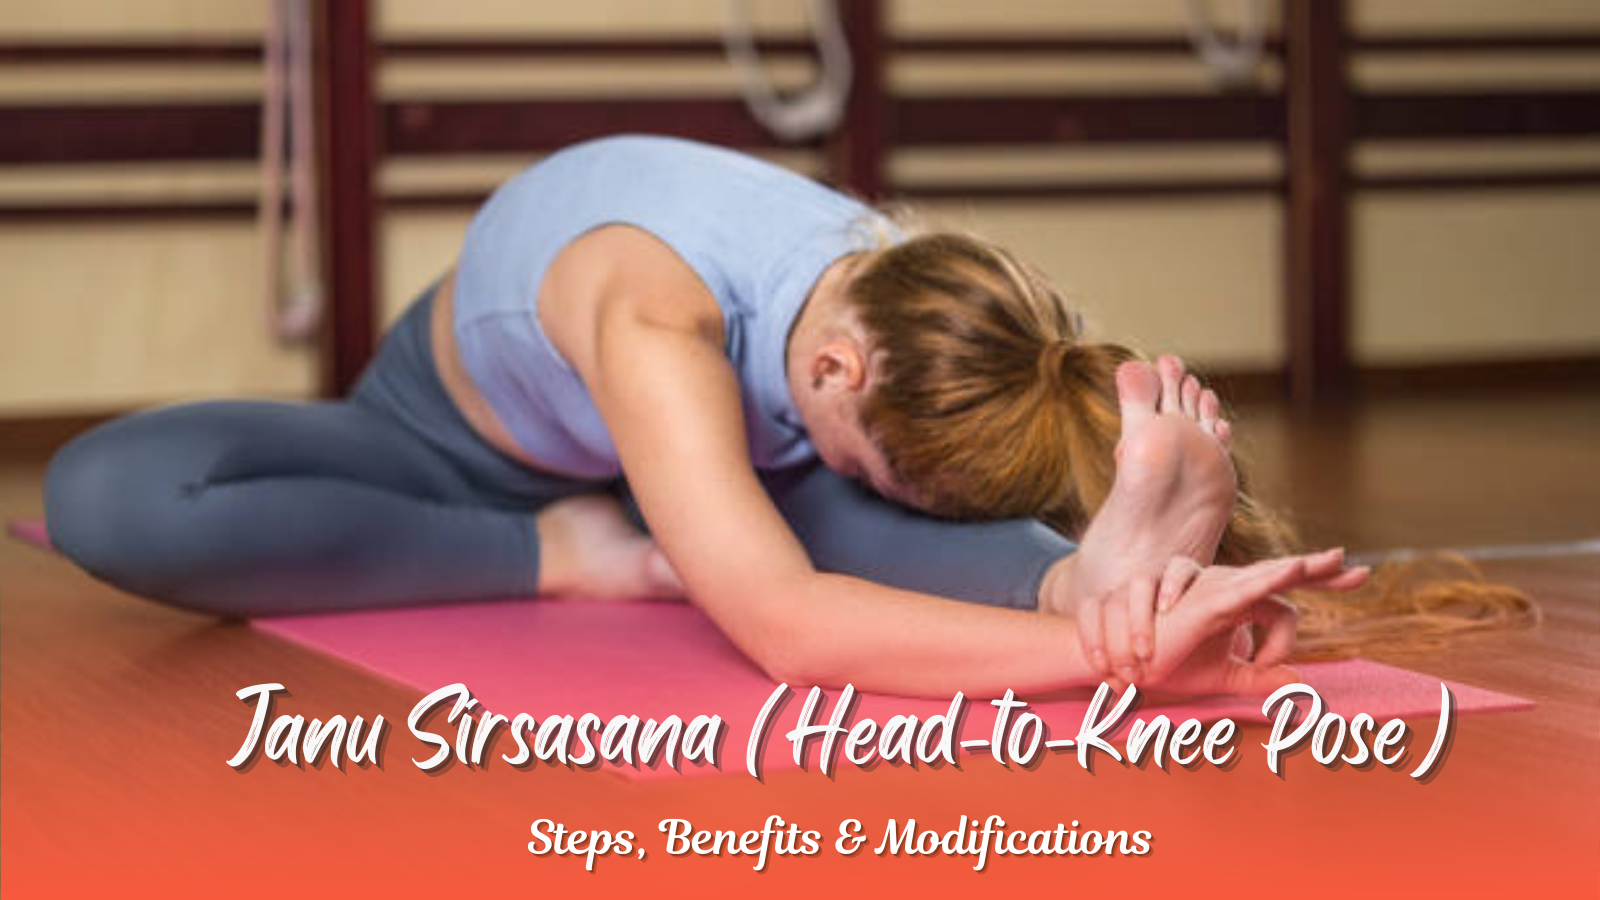
Fold forward from the hips as you exhale, keeping your spine long and straight. Reach your hands toward the toes of your extended leg. You will want to draw your head toward the knee.
If you cannot touch your foot, do not worry. Enclose your arms around the leg as far as possible – even the shin, ankle or foot – and expand your chest without allowing your upper body to sink in.
Step 6: Hold the Stretch
Hold for 30 seconds to 1 minute, breathing deeply. Be careful not to over-stretch and strive to deepen the stretch as you breathe out slowly bringing your chest toward your thigh.
Step 7: Come out of the Pose
Straighten your arms slowly and breathe inwards when getting up as you stretch your backbone. Your leg should straighten also as you go back to the sitting posture.
Step 8: Side Repetition
Do it on the opposite side also. This way it will be helpful for both the sides to become balanced.
Advantages of Janu Sirsasana or Key Benefits of Janu Sirsasana
Janushirshasana has many physical, mental and emotional benefits. Let’s break janusirsasana benefits or janushirasana benefits down:
1. Stretches the Hamstrings and Back
It mainly stretches the hamstrings, which are tight from sitting or lack of flexibility. The forward fold also stretches the lower back and spine. With regular practice, this pose will improve your overall flexibility and mobility.
2. Relieves Tension in the Lower Back
The deep forward bend in Janu Sirsasana loosens thelower back pain, which is usually caused by a long period of sitting or improper posture. It is a mild relief to the lumbar spine and promotes healthy spines.
3. Aids Digestion
The soft compression on the abdomen while folding forward in Janu Sirsasana stimulates the digestive organs. It facilitates better digestion and can help to relieve constipation.
4. Calms the Mind and Reduces Stress
It is also known as forward fold. Forward folding calms the nervous system. The forward bend reduces stress and anxiety since it places compulsion on relaxation and deep breath. This asana establishes mental clarity and awareness.
5. Reduces flexibility and mobility
Regular practice of Janu Sirsasana helps to enhance flexibility, particularly in the hamstrings, groins and lower back. It also facilitates hip mobility, which is very helpful in everyday activities and other yoga postures.
6. Stretches the Inner Thighs
Deep stretch to the inner thighs or adductors by bending one leg gives flexibility in these areas. This is essential for maintaining the health of the hip and the general movement of the lower body, respectively.
7. Stretches the Kidneys and Liver
The anterior flexion of the asana stretches the abdominal organs, particularly the kidneys and the liver. Such stretching enhances the functionality of the organs and also detoxifies the body.
8. Improves Posture
Stretching the vertebral column makes one’s posture improved and flexible at the back due to flexibility of the hamstring. Moreover, it provides a person with more erect and confident stance while sitting or standing.
9. Improves Mental Focus and Clarity
This pose can be used to focus on the breath and balance, which can improve mental clarity and concentration. Folding forward requires mental focus, which improves concentration and mental discipline.
10. Relieves Menstrual Discomfort
It may ease out menstrual cramp and pain because of the gentle abdominal massage that will be applied by this pose. It may also give relaxation, which can alleviate pains during menstruation and might help adjust menstrual cycle.
Precautions during Janu Sirsasana
Even if it has various janu sirsasana benefits, this must be practiced well and with utmost care to avoid injury. Here are the janu sirsasana precautions in practicing this pose:
1. Avoid This Pose If You Have a Back Injury
In case you had ever had some problems with the back, or you have an issue in the back now, you should not practice this pose or do its modified version. Any style of yoga should be practiced only under the guidance of a healthcare provider if you are suffering from the back issue.
2. Long Spine
Maintain the entire length of your spine. Do not bend forward and arch your back. Attempt to bend forward from the hips, rather than the lower back.
3. Do Not Force the Forward Bend
Never force yourself while performing the forward bend. It is perfectly okay if you are unable to reach your feet. It is much more important that you maintain the length of the spine and gently sink into the stretch.
4. Pregnant Women Should Avoid This Pose
This pose requires a deep forward fold, and pregnant women should avoid it. It would put pressure on the abdomen and the baby. Always check with a healthcare professional to look for safe alternatives when pregnant.
5. Don’t Overstretch
Overstretching the muscles and ligaments can create tension if one stretches too much. Be sure to heed your body and stretch as far only as you feel safe without straining.
Janu Sirsasana Variations & Modifications for Beginners
There are many variations of Janu Sirsasana that can help you deepen the stretch, modify it for beginners, or hold it statically:
Parivrtta janu sirsasana benefits involves twisting on the torso while reaching for the foot. This helps in giving a bit deeper stretch to the spine, shoulders and hips; therefore, digestion is activated simultaneously.
Here you stand on one leg, doing the forward bend identical to the previous variation. This helps engage your core and balance better.
3. Janu Sirsasana with a Strap
For those who are beginners or not very flexible, a yoga strap can be used to help reach the foot. Wrap the strap around the foot and use it to guide your body into the fold.
4. Modified Janu Sirsasana for Beginners
For beginners, the posture may be modified by sitting on a blanket or block to elevate the hips and make it easier to fold forward. It can be practiced with a little bend in the extended leg to decrease the intensity as well.
5. Janu Sirsasana with Elevated Foot
You can also take it further and put a bolster or a pillow under the foot of the stretched leg. Janushirasana images enhances the stretch at the hip flexors and provides an enhanced folding forward.
Integrating Janu Sirsasana into Your Yoga Routine
Janu Sirsasana is a powerful, accessible yoga pose that offers several benefits for both the body and the mind. Improved flexibility, release of tension and a soothing effect on the nervous system are some of the ways it can improve your well-being in general. This requires care in practice, especially at the start, and a willingness to listen to your body. With time and consistency, Janu Sirsasana can become a powerful addition to your yoga practice.
Whether you’re a new yogi or an advanced practitioner, adding Janu Sirsasana to your practice will enhance flexibility, postural awareness and mental acuity. With all yoga, listen to your body and use mindful breathing as you’d do with any other asana to excel in this beautiful transformation.
Janu Sirsasana is a simple yet effective sequence that stretches your hamstrings, hips, and spine. Here’s a step-by-step breakdown of the pose:
Step 1: Begin seated
Sit on the floor with your legs extended straight in front of you. Keep your spine long, shoulders relaxed, and legs active.
Step 2: Bend one leg
Bend your right knee, bringing the sole of your right foot toward your left inner thigh. The right knee should point outward towards the floor, and the left leg remains straight.
Step 3: Lengthen the Spine
Inhale and extend your spine upwards, sitting tall and engaging your core muscles. Reach your arms overhead, and align your body with the extended leg.
Step 4: Fold Forward
Breathe out and fold forward from your hips, reaching your hands toward the toes of your extended leg. As you bring your chest toward your thigh, keep your spine long.
Step 5: Hold the Pose
Hold the pose for about 30 seconds to 1 minute, breathing deeply and maintaining a steady focus. Gradually deepen the stretch with each exhale.
Step 6: Release and Repeat
To release the pose, slowly return to the seated position. Repeat the same sequence on the opposite side.
This step-by-step approach helps you perform the pose effectively and safely while gaining all the benefits.
2. Who Should Not Do Janu Sirsasana?
While Janu Sirsasana is beneficial for most people, there are certain groups who should avoid this pose or practice it with caution. These include:
People with Back Injuries:
Any severe back issues or herniated disc should steer clear of this pose, forward fold. Anyone with a back injury should strictly consult a healthcare provider if they wish to try this pose.
Pregnancy:
Women in their late stages of pregnancy must avoid deep forward bends like Janu Sirsasana. It may tighten the pelvis area that presses the abdomen in an unnecessary way and is not conducive during pregnancy.
Individuals with Hamstring Injuries:
In case of hamstring injury or strain, it is advisable not to practice this asana or modify the asana if one needs to, because bending forward may trigger the injury.
Knee Injuries
One with a knee injury or who suffers from any other condition such as a ligament damage or arthritis, it is essential to practice the pose carefully because bending one knee so much will strain the knee joint.
Those with Little Flexibility:
While Janu Sirsasana is a great flexibility builder, if you have poor flexibility, proceed with the utmost caution. It is better to use blocks or straps for support instead of forcing the fold.
3. What is the Other Name for the Pose?
Other Names for Janu Sirsasana
Janu Sirsasana is commonly known as Head-to-Knee Pose in English because in this pose, one bends forward toward the extended leg’s knee, with the aim of bringing the head to the knee. Janu shirshasana information in marathi gives a simple description of the movement of the pose, where your head is aimed toward the knee of the extended leg.
4. What Are the Benefits of Janu Sirsasana?
Janu Sirsasana offers a variety of benefits for both the body and mind:
Stretches Hamstrings and Lower Back:
The major benefit of Janu Sirsasana is that it deeply stretches the hamstrings, lower back, and spine. With constant practice, one can achieve greater flexibility and lesser lower back pain.
Digestive Improvement:
Gentle compression of the abdomen helps stimulate the digestive organs and thus better digestion and less constipation.
The nervous system calms down through Janu Sirsasana. It provides relaxation and decreases stress. This pose is a good symptom relief for anxiety.
Helps with Good Posture:
This stretch of the spine improves flexibility. This asana lengthens the back, allowing a person to maintain an erect posture.
It calms down the mind. Being a head-to-knee forward bend, Janu Sirsasana can relieve a person of any form of stress or tension while at the same time improving their mental clarity in general.
5. How can I modify this pose for a beginner?
For a beginner or one with minimal flexibility, it can be slightly modified for easier performance. Here are some helpful modifications:
Use Props:
Put a yoga block or pad under your hips to raise them off the ground a bit and reduce the intensity of this forward bend.
Keep the Knee Bent:
If you cannot straighten the extended leg at first, bend it a little to make the stretch less intense and avoid over-stretching the muscles.
Use a Strap:
For those who cannot reach their toes, using a janu sirsasana yoga strap around the foot can help. Hold the strap with both hands and gently pull yourself forward.
FAQs on Janu Sirsasana
1. Which disease is cured by Janu Sirsasana?
Janu Sirsasana helps improve digestion, reduce anxiety, and relieve back pain. It also stimulates the kidneys and liver, promoting detoxification.
2. Who should avoid Janu Sirsasana?
Avoid this pose if you have severe knee, hip, or spinal injuries. Pregnant women should consult a yoga instructor before attempting forward bends.
3. What chakra is activated by Janu Sirsasana?
This pose activates the Root Chakra (Muladhara) and Sacral Chakra (Svadhisthana), improving grounding, stability, and energy balance.
4. Why is Janu Sirsasana important in yoga?
It enhances spinal flexibility, digestion, and mental clarity, making it an essential part of Hatha & Ashtanga yoga sequences.
Final Thoughts: Why Janu Sirsasana Should Be in Your Yoga Practice
If you really want to dive deeply into the transformative power of yoga, consider attending a 200 Hour Yoga Teacher Training at an established Yoga Gurukul in Rishikesh. The program will give you the best yoga and meditation training but teaches you to live a more centered, mindful life. You shall discover the depth of your practice in a truthful and nurturing environment, be given the confidence and tools to succeed in all aspects of your life.
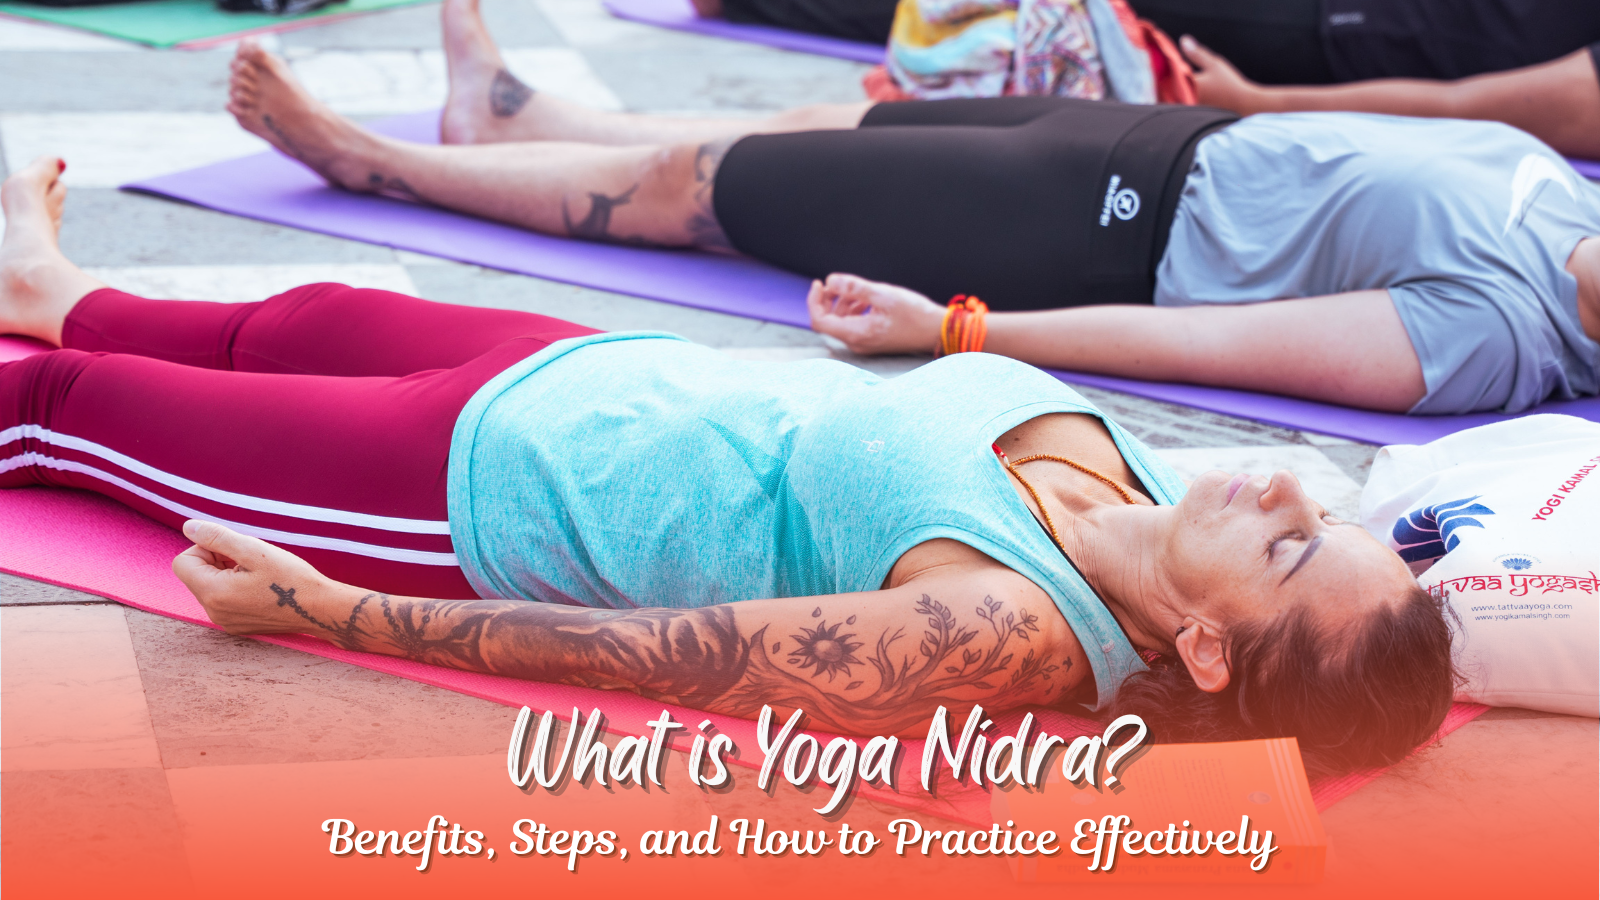
What is Yoga Nidra? Benefits, Steps and How to Practice Effectively
Yoga Nidra, which is literally known as “yogic sleep,” is a progressive approach towards meditation where the practitioner is led into a state of deep sleep with full consciousness. Practiced for centuries in the yogic tradition, Yoga Nidra is gaining immense popularity today, mainly because of its salutary effects upon one’s mental as well as physical health. This article aims to find out what Yoga Nidra is all about, what are its benefits, and how it can reduce stress, anxiety and sleep disorders.
What is Yoga Nidra?
Yoga Nidra is a systematic form of guided meditation that induces a state between wakefulness and sleep. Unlike traditional meditation, which requires intense concentration, Yoga Nidra guides practitioners into deep relaxation effortlessly.
Yoga Nidra is a form of meditation that evokes deep relaxation by taking the practitioner through a body scan, breath awareness, and visualizations while still remaining conscious. It’s a practice wherein the body rests while the mind is awake; thus, there can be a conscious sleep or “yogic sleep.” It is guided meditation that would take you through different stages of relaxation and therefore, let the practitioner feel a heightened awareness and deep release from tension.
The beauty of Yoga Nidra in India lies in its simplicity and accessibility. Unlike other meditation practices, Yoga Nidra can be practiced even by the very old and the very young, with or without any previous experience with yoga or meditation. It is generally done in a lying down position; therefore, the practice is accessible to people who may have mobility issues or possibly have difficulty staying seated for any length of time.
Yoga Nidra Techniques: How to Practice for Deep Relaxation
While the techniques may be different from one tradition or teacher to another, most forms of Yoga Nidra typically entail the following steps:
1. Setting an Intention (Sankalpa): This means that the practitioner sets up a positive intention or affirmation for the practice. This may indeed be a personal goal or maybe even a quality that he or she wants to cultivate. The Sankalpa serves as an anchorage throughout the session.
2. Body scan: He is guided to pay attention to every part of the body from the toes up to the crown of the head. This lets go of the physical tensions and develops a sense of relaxation.
3. Breath Awareness: It generally encompasses awareness about the breath itself, its normal rhythm, or calming the nervous system. Deep conscious breathing in this process helps in further relaxing and grounding of the mind.
4. Sensory Awareness and Visualization: One is guided to visualize images, sounds or sensations that promote peacefulness and serenity. This can include peaceful landscapes or gentle body sensations that bring a sense of relaxation deeper into the body.
5. Relaxation: After the body scan and breath awareness, one enters a deep relaxation state. The practitioner is asked to be relaxed yet alert. This is the magic of Yoga Nidra when the body is fully relaxed, the mind knows.
6. Wake Up: Then it brings the practitioner out of that deep relaxed state, with him slowly being re-awakened into using his senses once again, making the body get back into being aware of all its elements. Yoga Nidra for Sleep
One of the more commonly attributed benefits of Yoga Nidra is to assist with the remedy for sleep improvement. It can activate the parasympathetic nervous system, which controls rest and digest functions. Therefore, it can be a tool that triggers deep rest and sleep. It can be useful for a person who is suffering from problems with sleeping or disturbed sleep pattern.
Unlike the usual meditation that may sometimes require mental discipline and concentration, Yoga Nidra can be used to relax without needing to silence the mind first, making it perfect for people who have been having a hard time quieting their minds at bedtime. One is likely to fall asleep faster, experience deeper sleep and wake up fresher using Yoga Nidra for sleep.
Yoga Nidra Benefits: Why You Should Try It
7 Benefits of Yoga Nidra
Yoga Nidra is extremely beneficial to the body, mind, and spirit. Seven main benefits of practicing Yoga Nidra include the following.
1. Enhances Deep Relaxation & Reduces Stress
This is one method of deep relaxation for both the body and mind. Stress is reduced with such regular practice. Mental clarity increases, which results from having lower levels of the hormone responsible for causing stress-the cortisol.
2. Improves Sleep & Helps with Insomnia
The most requested benefit of the practice of Yoga Nidra is quality sleep. Deep relaxation has the capability to make both the body and mind ease out into a sleeping state. Moreover, it was also used naturally for those experiencing insomnia and not having good sleep quality. Various researches prove that those individuals who practice Yoga Nidra sleep much more quickly and also spend more time in the deeper, restorative phases of sleep.
3. Boosts Mental Clarity & Emotional Balance
Another common practice of Yoga Nidra is through anxiety yoga. The calming impact of Yoga Nidra overcomes the signs of anxiety and brings about emotional serenity. Therefore, with the aid of breath and body awareness as the anchor, anxious thoughts and feelings can be brought to stillness.
4. Supports Spiritual Growth & Self-Awareness
Regular practice of Yoga Nidra has been proven to enhance cognitive functions and mental clarity. It enhances focus and concentration, useful for work, studies and daily activities. In fact, research has suggested that Yoga Nidra can enhance learning and memory retention.
5. Emotional Healing
It produces emotional relaxation due to the ability of Yoga Nidra that enables the participants to enter into a state from where sub-conscious emotions emerge up and consequently, it gives a scope to emotional healing. It allows human beings to transcend through their traumatic past, frights and other negative feelings.
6. Physical Relaxation
Yoga Nidra is an effect that sends one into deep physical relaxation. It helps in body rebalancing and healing. It can really benefit people suffering from chronic pain, tension or fibromyalgia; it can help greatly with back pain.
7. Increased Self-Awareness
Through continuous practice, Yoga Nidra allows individuals to become more aware of themselves. It helps transcend the mind and emotions so that one may find out about his true self, desires and intentions and hence spiritual growth and transformation.
How to Practice Yoga Nidra: Step-by-Step Guide
Yoga Nidra is an easy and highly relaxing practice for anyone, including beginners. Here’s how to practice Yoga Nidra in clear, step-by-step pointers:
1. Prepare Your Space
•Find a quiet, comfortable space free of distractions.
•Lie on your back with your body relaxed. One can use a yoga mat or soft surface but ensure you are well supported by your body.
•Put your arms alongside your body with palms facing upwards. The legs can be a little apart.
2. Set an Intention (Sankalpa)
• Set a positive, affirming intention or goal for your practice (this is referred to as a Sankalpa) prior to starting
• This may be something such as “I am calm and peaceful,” or “I trust my abilities.“
• Repeat the intention silently to yourself, allowing it to vibrate in the mind
3. Body Scan (Rotation of Consciousness)
• Scan the body starting at the toe and moving up through to the head.
•Consciously focus on relaxing the part of your body. Example: “I relax my toes… my feet… my ankles…” and so on.
•Focus on letting go of the tension in all parts of your body. Let the tension go with every breath.
4. Breath Awareness
•Switch to your breath. Notice how your breathing occurs naturally without trying to control your breath.
•Feel your body rise and fall with each breath.
•If your mind wanders, just gently bring your focus back to your breath.
5. Sensory Awareness
•Now, focus your attention on the senses. Take cognizance of the sounds that surround you, the sensations in your skin, the air on your body, and anything else.
•Just be aware of those sensations without judgment; let them deepen your state of relaxation.
6. Visualizations
•You are invited to imagine very peaceful, relaxing imagery. That could be a beach, some beautiful landscape, or something else that makes you feel relaxed.
•Engage all your senses with the imagery-see what you see, hear what you hear, feel what you feel, and smell what you smell in this peaceful setting.
7. Deep Relaxation (Effortless Awareness)
•Let yourself be in a state of deep relaxation, without needing to focus on or control anything.
•Aware of the quiet and serenity around you, let go of any thoughts or distractions. Simply experience the moment.
8. Return to Sankalpa
•At this point, go back to your Sankalpa (intention). Say it again, this time with complete faith and conviction, as if it were already happening.
•Allow this mantra to sink in.
9. Gradual Awakening
•Start slowly bringing your attention back to the present.
•Know your body, the sensations around you and the room.
•Begin by gently wiggling your fingers and toes and stretch your body; when you feel ready, open your eyes slowly.
•Take a few moments to return from this deep relaxation to your waking life.
•Pause for a moment and assess how you feel. You might feel lighter, more centered, or peaceful.
•Be aware of it throughout your day.
Yoga Nidra vs. Meditation: What’s the Difference?
This meditation integrates the physical relaxation of yoga with theclarity of meditation. Through the concentration on each part of the body, breath and visualization techniques, this meditative practice can bring the practitioner into a deeply relaxed yet fully aware state. It is through this meditation aspect that practitioners can then observe their thoughts and emotions in a nonattached manner, enhancing mindfulness and emotional balance.
Yoga Nidra Teacher Training and Certification
If you’re interested in becoming a Yoga Nidra instructor, pursuing Yoga Nidra teacher training or certification is an excellent path. Yoga Nidra teacher training courses are offered worldwide, with many yoga schools offering specialized training in the practice. The training focuses on the principles of Yoga Nidra, its therapeutic benefits and how to guide others into a deep state of relaxation.
Yoga Nidra certification is the formal recognition of your ability to lead people through this practice. A Yoga Nidra teacher who is certified is a person best aware of techniques, benefits and philosophical background that serve well in teaching to students.
Yoga Nidra Books and Resources
For those interested in diving deeper into the practice of Yoga Nidra, there are many books that delve into its techniques and benefits in-depth. Some popular titles include “Yoga Nidra: The Art of Transformational Sleep” by Richard Miller and “The Yoga Nidra Workbook” by Dr. Sonia A. Bera. These resources can offer insights into the theory behind Yoga Nidra and provide practical guidance for your personal practice.
YTT School in Rishikesh
If you want to take a much deeper journey into yoga, then Rishikesh is considered to be the spiritual capital of India and houses many great yoga teacher training schools. It is the perfect destination for a Yoga Nidra teacher training course where the students can learn the ancient practices amidst the peaceful Himalayan foothills.
Choosing the right school of Yoga in Rishikesh for Yoga Nidra training will provide you with a qualified instructor, a rich curriculum, and a genuine yogic experience. Many schools as part of their teacher training courses include Yoga Nidra and allow students to practice teaching it.
FAQs
1. What are the effects of Yoga Nidra?
The more you practice Yoga Nidra, the more your body relaxes into a deep state and your mind remains conscious, and so it allows one to deeply rest and rejuvenate just like a deep sleep without losing consciousness. Some even say that it helps improve mental clarity, reduces stress, and heals the body.
2. Why do I cry in Yoga Nidra?
Crying in Yoga Nidra may serve as an emotional release. Because in deeper relaxation and contact with the subconscious mind, unresolved emotions, memories or traumas begin to surface in the process of healing. It can ultimately lead to higher emotional well-being.
3. Who is the god of Yoga Nidra?
In the yogic tradition, Savitri is often quoted as the goddess of Yoga Nidra, but being a manifestation of divine feminine energy, the practice transcends specific deities and is just a spiritual instrument for deep relaxation and self-realization.
4. Why is Yoga Nidra so powerful?
Yoga Nidra is powerful because it activates both the physical and mental aspects of relaxation. It allows practitioners to reach a deep state of consciousness in which the body heals, the mind rests and emotional balance is restored. The practice also encourages self-awareness and spiritual growth, making it a transformative experience.
Yoga Nidra is a profound practice that offers various benefits for those seeking to ease stress, anxiety and sleep disorders. Whether for relaxation, emotional healing or self-discovery, practicing Yoga Nidra is excellent for overall development. By getting into this discipline, you’re going to end up with real deep relaxation along with mental lucidity and also emotional balance. If you consider teaching others this path to recovery and transformation, you may join a Yoga Nidra teacher training or take certification.
If you really want to dive deeply into the transformative power of yoga, consider attending a200 Hour Yoga Teacher Trainingat an established Yoga Gurukul in Rishikesh. The program will give you the best yoga and meditation training but teaches you to live a more centered, mindful life. You shall discover the depth of your practice in a truthful and nurturing environment, be given the confidence and tools to succeed in all aspects of your life.
Ujjayi Breathing: 5 Benefits, Steps, and How to Do Use It for Relaxation
In yoga practice, Ujjayi Breathing functions as a vital pranayama method because practitioners call it the “Victorious Breath”. During yogic breathing through Ujjayi practice, participants redirect air through their throat to produce a quiet hissing sound.
The practice of Ujjayi breathing stands as an essential fundamental of numerous contemporary yoga styles primarily found within Ashtanga and Vinyasa teachings. Practicing Ujjayi Breathing creates body heat while stabilizing mental clarity along with sharpened focus thus making it an essential practice for the practice room and everyday life. The best yoga school in rishikesh provides great ideas regarding yogic breathing, yoga and breathing techniques, and that is also part of a 200 hour Yoga teacher training course in rishikesh.
The following article presents a complete guide to Ujjayi Breathing which contains educational material about its benefits as well as training details and effective practice recommendations. Subsequently, we examine the scientific basis that supports Ujjayi breathing while clarifying several common queries regarding its usage, and the Yoga teacher training school in Rishikesh can help you to understand all these things.
What Is Ujjayi Breathing and Why Should You Practice It?
Ujjayi Breathing, or “Victorious Breath,” is a controlled breathing technique used in yoga that improves focus, calms the mind, and enhances lung capacity.
During natal Vida Ujjayi generates a subtle throat-restricting noise that people hear while inhaling and exhaling. To understand what is ujjayi, throat constriction measures a hissing noise that is produced whose sound resembles ocean waves and this is very important in maintaining Yogic Breathing.
The Sanskrit word “Ujjayi” holds dual meanings of victory or conquest and “Aham” defines “I”. In Sanskrit “Ujjayi” means “Victorious Breath”. So, it becomes Ujjayi Breathing.
Yoga and breathing techniques, or pranayama definition, are deeply intertwined. In this consequence, the Pranayama definition involves controlling the breath to enhance physical strength and mental well-being. After that, yoga and breathing techniques like Ujjayi, Nadi Shodhana, and Kapalabhati can offer different benefits that help to enhance energy levels while calming the mind.
A yoga teacher training school in Rishikesh can help you to involved in yoga and breathing techniques, and this will help you to get ideas regarding types of yoga breathing, ujjayi pranayama benefits, ujjayi breathing benefits, Ujjayi breath benefits, Ujjayi pranayama steps, Yoga breathing techniques, How to do Ujjayi breathing, what is ujjayi, and benefits of ujjayi pranayama, and more. Our 200 hour yoga teacher training course in rishikesh helps you to manage regular practices and can improve yoga and breathing techniques for individuals with more focus. This will result in reducing stress levels in the body and promoting overall health.
How Does Ujjayi Breathing Work?
As you inhale and exhale through Ujjayi pranayama the back part of your throat feels restricted. This resistance helps to:
Increasement of internal heat: The controlled throat opening produces mild airflow hindrance that activates internal body heat generation. Historically, this Yogic Breathing technique has shown advantages for muscle warming and joint fluid expansion and enhanced blood circulation and detoxification processes.
Steady the breath: Forward-based breathing with Ujjayi results in controlled breath regulation that produces decreased nervous system activity. Invaluable support is offered by Ujjayi Breathing in order to navigate difficult yoga postures as well as stress management situations.
Enhancement of focus: Through its soothing hissing sound Ujjayi Breathing provides mental anchoring that enhances concentration. People get advantages from practicing Ujjayi Breathing for their physical yoga sessions and their non-yoga routine activities like meditation and studying.
Yoga teacher training school in Rishikeshcan help you to get all the information regarding the steps and the way of doing Ujjayi pranayama and details about the benefits of Ujjayi pranayama.
How Ujjayi Breathing Helps in Yoga Practice
1. Deepens Your Yoga Flow
Ujjayi breathing synchronizes movement and breath, helping you flow seamlessly in practices like Vinyasa and Ashtanga yoga.
2. Aids in Holding Yoga Poses Longer
By regulating breath and oxygen flow, Ujjayi breathing reduces fatigue, allowing yogis to hold poses for extended durations.
3. Improves Meditation and Pranayama Practices
The rhythmic sound and steady breathing create a meditative state, enhancing focus and mindfulness during meditation sessions.
Ujjayi Breathing Benefits for Mind and Body
Ujjayi Breathing produces benefits embracing a spectrum of physical alongside mental advantages. Some of the key benefits include:
Improvement of Cardiovascular Health: Using Ujjayi Breath improves your heart rate variability and helps you lower your blood pressure.
Enhancement of Respiratory Function: Through the Ujjayi Breath technique, humans can enhance both lung volume and their ability to process oxygen.
Stress Reduction: Through Ujjayi Breath regularization the nervous system lowers its tension along with managing stress.
Improvement of Focus and Concentration: Through its soft hissing sound Ujjayi Breathing serves to establish mental clarity as well as enhance concentration abilities.
Increasement of Internal Heat: The Ujjayi Breath technique allows people to produce inner heat whereas the warmth helps warm muscles and joints while boosting circulation alongside detoxification.
How to Do Ujjayi Breathing (Step-by-Step Guide) & Ujjayi Breathing for Beginners
Newcomers to Ujjayi Breathing need a bit of practice before learning to master this technique. Here are some tips for beginners:
Begin with delicate practice:Practicing Ujjayi Breathing in short sessions is the starting point before stretching your practice time when comfort develops.
Focusing on the sensation: Maintain your awareness toward the breath sensation when it moves through your throat.
Try not to force it: Avoid forcing constriction and nature should determine the volume of your breath.
Daily Practice: A superior control over Ujjayi Breathing can be achieved through a commitment to regular practice. Daily practice sessions of no longer than a few minutes should become your target.
Ujjayi Breathing Technique
Find a comfortable seated position: Your spine needs to remain straight while you assume an upright position. Club your legs while seated for meditation or relax on a chair or cushion.
Close your eyes tenderly: Slowly close your eyes to reduce distractions entering your field of vision.
Start to breathe: Saunter your breath by using your nose only for both inhaling and exhaling deeply.
Tighten the back of the throat: When you breathe out through your nose produce a soft hissing sound after gently pinching the back of your throat.
Maintaining the constriction: Hold the consistent throat constriction throughout all parts of your breathing cycle from inhalation through exhalation.
Continue breathing: Breathe through this mode for multiple minutes.
Tips for mastering Ujjayi Breathing
Practice with a mirror: Noticing yourself in a mirror can assist you with picturing and refining the choking toward the rear of your throat.
Stand by listening to the sound: Consider your breath and the sound must be delicate and predictable.
Practice with a qualified instructor: If conceivable, practice Ujjayi Breathing with a certified yoga educator. They can give customized direction and input.
Integrate Ujjayi Breathing into your yoga practice: Ujjayi Breathing is frequently integrated into yoga asanas that is poses.
Please work on during meditation: You can also rehearse Ujjayi Breathing during meditation to give your care and unwind.
The Science Behind Ujjayi Breathing
Ujjayi Breathing significantly affects the parasympathetic nervous system, answerable for the “rest and digest” reaction. Moreover, by slowing down the breath and making a delicate obstruction, Ujjayi Breathing assists with initiating the parasympathetic nervous system, advancing relaxation, and reducing stress.
Ujjayi Breathing also enhances oxygen supply to the brain and different organs of the body and this increased oxygenation helps to improve energy levels, boost cognitive function, and increase overall well-being.
When to Practice Ujjayi Breathing
Ujjayi Breathing can be effortlessly integrated into your day-to-day existence. The following are a couple of ways of rehearsing:
During your morning routine: Begin your day with a couple of moments of Ujjayi Breathing to quiet the brain and get ready for the day ahead.
Before meals: Practice Ujjayi Breathing before meals to help process and lessen pressure and that is the major of the benefits of ujjayi pranayama.
During stressful situations: While feeling restless or overpowered, go to Ujjayi Breathing to quiet the brain and restore balance.
Before sleep: Practice Ujjayi Breathing before bed to advance unwinding and further develop sleep quality.
FAQS
What is the science behind Ujjayi breathing?
Ujjayi Breathing can activate the parasympathetic nervous system that promotes relaxation and maintains stress levels. Ujjayi breathing benefits in enhancing the activity of cognitive function and manages the brain and other organs strongly along with overall well-being.
How do you breathe the Ujjayi?
To take in Ujjayi, tenderly constrict the back of your throat during both inward breath and exhalation, making a delicate hissing sound. Ujjayi breathing benefits in managing cognitive function while maintaining other organs more stable and stronger.
What is the mudra for Ujjayi?
There is no particular hand gesture or specific mudra to do Ujjayi breathing and a few specialists might find it supportive to tenderly press the tongue against the top of the mouth while practicing. Ujjayi pranayama benefits and these include reducing stress levels of the body and increasing relaxation with the best cognitive activities.
What is the duration of Ujjayi Pranayama?
The length of Ujjayi pranayama can fluctuate contingent on individual requirements and inclinations. Besides, beginners can begin with a couple of moments of training regarding types of yoga breathing and gradually increase the term as they become more comfortable with yoga and breathing techniques.
Conclusion
Ujjayi Breathing is a basic yet strong pranayama procedure that offers various advantages for both physical and emotional well-being. Moreover, by integrating Ujjayi Breathing into your everyday practice, you can encounter diminished stress, further developed focus, and improved by and large prosperity. The best yoga school in rishikesh can help you to get a better understanding of the pranayama definition, ujjayi pranayama benefits, ujjayi breathing benefits, types of yoga breathing, and benefits of ujjayi pranayama.
Make sure, to begin with the delicate practice of types of yoga breathing and progressively increment the length as you become more comfortable. On the concern that you have any worries or questions, talk with a certified yoga educator. Our 200 hour Yoga teacher training course in rishikesh will also help you to find the best way to find yogic breathing, yoga and breathing technique, ujjayi pranayama, and what is ujjayi.
We think our comprehensive guide about Ujjayi pranayama will be helpful for those who are trying to include their daily routine and manage their yoga schedule as per their time. If you have any questions regarding yoga and pranayama, you can contact us at Gururkul Yogashala, and You can also visit our website to better understand about 200 hour yoga teacher training course in rishikesh, a course of Yoga training and teaching for all.
12 Poses of Surya Namaskar: Surya Namaskar Steps and Benefits
The 12 poses of Surya Namaskar, also called Surya Namaskara, are a sequence of standing yoga asanas that serve as a complete body workout while offering numerous spiritual benefits. Rooted in ancient Vedic traditions, Surya Namaskar is a way to honor the Sun God (Surya) and align the body with the natural energy flow. This 75 Crore Surya Namaskar Challenge has encouraged millions to embrace this age-old practice.
If you’re looking to understand what are the 12 asanas of Surya Namaskar, 12 mantras of Surya Namaskar and how they benefit your body, this guide is for you!
What Is Surya Namaskar?
Surya Namaskar, or Sun Salutation, is a dynamic yoga practice that involves 12 poses of Surya Namaskar performed in a rhythmic flow. It integrates:
Asana Yoga Poses – Improve strength, flexibility, and posture. Pranayama – Control breath for better focus and energy. Mantras in Surya Namaskar – Recite sacred chants for spiritual harmony. Meditation – Enhance mindfulness and inner peace.
Each Surya Asana stimulates different organs and muscles, promoting overall well-being. The 12 Surya Namaskar poses work as a full-body exercise, making it a staple in many yoga traditions.
Benefits of Surya Namaskar:
Strengthens the back and balances metabolism.
Stimulates and balances all bodily systems (reproductive, circulatory, respiratory, digestive).
Benefits growing children by influencing endocrine glands.
Improves mental clarity by increasing oxygenated blood flow to the brain.
Best Time to Practice Surya Namaskar:
The ideal time for Surya Namaskar is at sunrise or sunset. Practice in the open air facing the rising sun if possible. It can be done anytime on an empty stomach.
Awareness:
Before starting, stand with feet together or slightly apart, arms at your sides. Close your eyes, become aware of your body and balance your weight. Feel gravity pulling you down and the earth’s energy surging upwards. Relax your body mentally, starting from the head down. Finally, focus on your heart or eyebrow center, visualizing the sun’s rays infusing your being.
12 Poses of Surya Namaskar and Their Steps
Here’s a step-by-step Surya Namaskar guide with asana names, poses and benefits
Pranamasana (Prayer Pose)
Stand straight, feet together, palms in Namaste position.
Keep your back straight and shoulders relaxed.
Mantra: Om Mitraya Namaha
Benefits: Enhances concentration, improves posture and cultivates mindfulness.
2. Hasta Uttanasana (Raised Arms Pose)
Inhale, stretch your arms overhead and gently arch your back.
Mantra: Om Ravaye Namaha
Benefits: Expands the chest, improves lung capacity and stretches the spine.
3. Padahastasana (Hand-to-Foot Pose)
Exhale, bend forward, and touch your toes while keeping knees straight.
Mantra: Om Suryaya Namaha
Benefits: Strengthens hamstrings, improves digestion and increases flexibility.
4. Ashwa Sanchalanasana (Equestrian Pose)
Inhale, stretch your right leg back, left knee bent, gaze forward.
Mantra: Om Bhanave Namaha
Benefits: Strengthens legs, opens the hips and improves balance.
5. Parvatasana (Mountain Pose)
Exhale, step back into an inverted ‘V’ shape, keeping heels on the ground.
Mantra: Om Khagaya Namaha
Benefits: Strengthens arms and legs, enhances circulation.
6. Ashtanga Namaskara (Salute with Eight Parts)
Lower your chest, knees, and chin to the mat, keeping hips elevated.
Mantra: Om Pushne Namaha
Benefits: Improves posture, strengthens arms and back muscles.
7. Bhujangasana (Cobra Pose)
Inhale, lift the chest, arch the spine and look upward.
11. Hasta Uttanasana (Raised Arms Pose – Repeat Step 2)
Inhale, lift arms back.
Mantra: Om Arkoya Namaha
12. Pranamasana (Prayer Pose – Repeat Step 1)
Exhale, bring palms together.
Mantra: Om Bhaskaraya Namaha
Each Surya Namaskar cycle consists of two rounds, switching leg movements in Ashwa Sanchalanasana.
Beeja Mantras:
Alternatively, six beeja mantras (seed syllables) can be used. These don’t have literal meanings but create powerful vibrations. They are repeated four times in a complete round:
Om Hraam
Om Hreem
Om Hroom
Om Hraim
Om Hraum
Om Hrah
Beeja mantras are used when Surya Namaskar is done quickly or to deepen the practice.
Surya Namaskar Steps and Benefits
The benefits of Surya Namaskar are numerous, affecting both physical and mental well-being. Regular practice of these Surya Namaskar asanas can lead to:
Physical Benefits of Surya Namaskar
Improves posture and flexibility. Enhances lung capacity and cardiovascular health. Strengthens muscles, bones, and joints. Aids weight loss (Yes! Does Surya Namaskar reduce belly fat? Absolutely!). Boosts metabolism and digestion.
Mental & Spiritual Benefits
Reduces stress, anxiety, and depression. Enhances focus, clarity, and mindfulness. Helps balance chakras and energy flow. Aligns body rhythms with nature.
Surya Namaskar for Weight Loss
Many ask, How many Surya Namaskars in a day to lose weight? Experts recommend 12-24 rounds daily for weight management. This practice engages all major muscle groups, making it a great workout!
At Top Yoga School in Rishikesh, instructors guide students through safe Surya Namaskar variations to suit their needs.
Surya Namaskar and the 75 Crore Challenge
The 75 Crore Surya Namaskar challenge has significantly boosted awareness of this ancient practice. It encourages people to incorporate Surya Namaskar into their daily routines, promoting both physical and mental well-being on a large scale. Participating in such a challenge can be a great motivator to establish a consistent practice and experience the numerous benefits of Surya Namaskar. You can often find Surya Namaskar registration details online or through local yoga studios.
Learning Resources for Surya Namaskar
Many resources are available to help you learn Surya Namaskar, including:
Surya Namaskar PDF: Downloadable pdf surya namaskar steps often provide step-by-step instructions and images of the poses helps you perform easily.
Surya Namaskar Video: Online videos can demonstrate the correct form and technique easily understandable and precticable.
Surya Namaskar Chart: Charts can serve as visual aids for remembering the sequence.
Surya Namaskar Images Step by Step with Names: These resources provide a clear visual guide to the poses.
Surya Namaskar Steps Images: Visual learners can benefit from step-by-step images.
Surya Namaskar Drawing: While not as common, some people find it helpful to draw the poses to better understand them.
Surya Namaskar in Hindi: Resources are available in Hindi for those who prefer learning in that language.
Surya Namaskar Step by Step: Detailed guides are available to walk you through each step.
12 Names of Surya Namaskar Asana: Knowing the Sanskrit names can deepen your connection to the practice.
Surya Namaskar Asana Names: Familiarize yourself with the Sanskrit names for each pose.
Surya Namaskar Names: Learning the different names associated with Surya Namaskar.
1. Can We Do Surya Namaskar During Periods? Yes, but it depends on personal comfort. Light variations and slow movements are advisable. Avoid intense stretching or inverted poses during the first few days. Always listen to your body and practice gently.
2. Can Surya Namaskar Increase Height? Yes, especially in growing individuals. The sequence stretches the spine, improves posture and enhances flexibility, which may contribute to height gain. Regular practice strengthens the back muscles and promotes better body alignment.
3. Can Surya Namaskar Reduce Belly Fat? Yes, when practiced regularly with proper breathing techniques and a balanced diet. It engages the core muscles, boosts metabolism and improves digestion, helping in weight loss and belly fat reduction over time.
4. What Are the 12 Asanas of Surya Namaskar? The 12 poses include Pranamasana, Hasta Uttanasana, Padahastasana, Ashwa Sanchalanasana, Parvatasana, Ashtanga Namaskara, Bhujangasana, followed by the reverse sequence. Each asana works on different muscle groups, improving flexibility and strength.
5. What Are the Mantras in Surya Namaskar? Each asana is associated with a mantra that enhances its spiritual benefits. Some examples include Om Mitraya Namaha (Salutations to the friend of all), Om Ravaye Namaha (Salutations to the shining one), and Om Suryaya Namaha (Salutations to the dispeller of darkness). Reciting these mantras deepens focus and energy flow.
Conclusion
Surya Namaskar is more than just an exercise—it’s a spiritual and physical powerhouse. By incorporating these 12 poses of Surya Namaskar, you can unlock numerous benefits, frombetter flexibilityand weight loss to mental clarity and spiritual upliftment. Whether you’re training at the Best Yoga School in Rishikesh or practicing at home, this ancient practice can transform your well-being.
Ready to begin? Start today, and embrace the power of Surya Namaskar!
What Are the 6 Shatkarmas? What Is Shatkarma in Yoga and Types of Shatkarma
If you are looking to deepen your understanding of Hatha Yoga, you might have come across the term Shatkarma or Shatkriya. But what is Shatkarma in yoga?
Shatkarma, derived from the Sanskrit words “Shat” (six) and “Karma” (actions), refers to six purification techniques that help cleanse the body, balance energy channels (Nadis) and prepare the mind for higher yogic practices. These techniques are fundamental in Hatha Yoga, focusing on detoxification, improving physical health and enhancing spiritual well-being.
By performing these Shatkarmas, practitioners can remove toxins, regulate prana (vital energy) and harmonize the three Doshas (Vata, Pitta and Kapha), according to Ayurveda. This article will provide a comprehensive guide to What is Shatkarma, including its meaning, types, Shatkarma benefits and practical applications in yogic kriyas class 11 and other levels of yoga practice.
What Is Shatkarma In Yoga? Meaning & Importance
Shatkarma Meaning & Definition
The word Shatkarma literally translates to “six actions” referring to six cleansing processes that remove toxins and blockages from the body. These practices are outlined in ancient yogic texts such as the Hatha Yoga Pradipika and Gheranda Samhita Shatkarma.
Shatkarmas play a vital role in balancing Ida and Pingala Nadis, ensuring the smooth flow of prana. Hatha Yoga emphasizes purification before engaging in advanced pranayama and meditation, making these techniques essential for a healthy yogic lifestyle.
Why Is Shatkriya Important?
Practicing Shatkarmas regularly can:
✔ Detoxify internal organs and purify the body ✔ Improve digestion, circulation, and respiration ✔ Balance the three doshas (Vata, Pitta, Kapha) ✔ Prepare the body for advanced yoga & meditation ✔ Boost mental clarity and emotional stability
Incorporating Shatkarmas into daily practice helps reduce stress, cleanse energy pathways, and enhance overall well-being.
While there are technically six main shatkarmas, each encompasses a variety of specific practices. This article will focus on the most commonly used and understood practices within each category:
The 6 Shatkarmas and Their Practices
Neti: This shatkarma focuses on cleansing and purifying the nasal passages. The primary practices within Neti are:
Jala Neti: Nasal cleansing using water. This involves a special neti pot and saline solution to flush out mucus, pollutants, and allergens from the nasal passages. It’s a common practice in a yogic kriyas class 11 curriculum.
Sutra Neti: Cleansing the nasal passages with a thread or a soft rubber catheter. This is a more advanced technique and should only be performed under the guidance of an experienced teacher.
Dhauti:Dhauti shatkarma encompasses a range of cleansing techniques targeting different parts of the body. It’s broadly classified into:
Antar Dhauti (Internal Cleansing): Focuses on cleansing the digestive tract. Practices include:
Shankhaprakshalana (Varisara Dhauti): Intestinal cleansing using a saline solution and specific movements. Laghoo Shankhaprakshalana is a lighter version.
Agnisar Kriya (Vahnisara Dhauti): Activating the digestive fire through abdominal contractions.
Kunjal (Vaman Dhauti): Cleansing the stomach by inducing vomiting.
Vatsara Dhauti: Intestinal cleansing using air.
Sirsha Dhauti (Head Cleansing): Cleansing the head region.
Hrid Dhauti (Thoracic Cleansing): Cleansing the thoracic region.
Nauli: This shatkarma involves massaging and strengthening the abdominal organs through specific movements and rotations of the abdominal muscles. It is a powerful technique for improving digestion and stimulating the internal organs.
Basti:Shatkarma basti refers to techniques for cleansing and toning the large intestine. It is considered similar to an enema.
Kapalbhati: Often categorized as a pranayama, kapalbhati shatkarma is a breathing technique that purifies the frontal region of the brain. It involves forceful exhalations followed by passive inhalations.
Trataka: This shatkarma involves intense gazing at a single point or object. It develops concentration and mental focus.
Benefits of Shatkarma
The benefits of shatkarma are extensive, contributing to both physical and mental well-being. These practices can:
Balance the doshas: These practices help to harmonize the three doshas, preventing and managing various health issues.
Improve digestion: Several shatkarma techniques, particularly those within Dhauti and Nauli, enhance digestive function and elimination.
Strengthen the respiratory system: Neti and Kapalbhati improve respiratory healthby clearing the nasal passages and purifying the frontal brain region.
Calm the mind: Trataka and other shatkarma practices promote mental clarity, reduce stress, and enhance concentration.
Prepare for higher yoga practices: By purifying the body and mind, shatkarma creates a strong foundation for pranayama and meditation.
Shatkarma in Modern Yoga Schools
Shatkarma in Ayurveda shares the same principles of balancing doshas and promoting health through purification. While some of the specific techniques might differ slightly, the underlying philosophy is consistent. Shatkarma in Tantra also emphasizes the importance of purification for spiritual development. The Gheranda Samhita Shatkarma is a classic text detailing these practices. The difference between Panchakarma and Shatkarma lies in their origin and application. Panchakarma, primarily an Ayurvedic practice, focuses on detoxification and rejuvenation using five therapeutic actions. Shatkarma, rooted in Hatha Yoga, emphasizes six cleansing techniques for internal and external purification, making it a vital practice at the best yoga school in Rishikesh.
FAQs about Shatkarma
1. What Are the 6 Shatkarmas? The six purification techniques in Hatha Yoga are Neti, Dhauti, Nauli, Basti, Kapalbhati, and Trataka. These cleansing practices help eliminate toxins, balance the Nadis (energy channels), and prepare the body for advanced yoga and meditation. They are essential for maintaining physical health, mental clarity, and energetic balance in the body.
2. What Is Kapalbhati Shatkarma? Kapalbhati is a powerful breathing technique that detoxifies the respiratory system and stimulates the frontal brain region. It involves rapid, forceful exhalations followed by passive inhalations. Practicing Kapalbhati regularly improves lung capacity, oxygen intake, digestion, and mental alertness, making it a vital part of yogic cleansing techniques.
3. Why Is Shatkriya Important? Shatkriya (another term for Shatkarma) is important because it removes toxins, clears blockages in the body’s energy channels, strengthens the immune system, and enhances overall well-being. These practices also help balance the three Doshas (Vata, Pitta, and Kapha), ensuring that the body functions optimally. Additionally, Shatkriya prepares the body for deep pranayama and meditation.
4. How Does Shatkarma Help Us to Live a Healthy Life? Shatkarma contributes to a healthier life by cleansing the digestive system, improving respiratory health, and enhancing blood circulation. It strengthens the immune system, boosts mental clarity, and increases energy levels. Regular practice of Shatkarma helps reduce stress, prevent illnesses, and improve focus and emotional stability, supporting a holistic and balanced lifestyle.
5. Can Anyone Practice Shatkarma? While some Shatkarmas like Neti and Kapalbhati can be practiced by beginners, others, such as Dhauti, Nauli, and Basti, require proper guidance from a trained yoga instructor. Incorrect practice may cause discomfort or health issues. It is always recommended to learn Shatkarma under expert supervision, especially for deep cleansing techniques.
Conclusion
Shatkarma is a fundamental part of Hatha Yoga, offering physical, mental, and spiritual benefits. Whether you are a yoga practitioner or someone seeking holistic well-being, understanding and incorporating these six purification techniques can enhance your overall health and energy balance.
12 Surya Mantras: Their Power & How to Use Them in Surya Namaskar
Surya Namaskar, or Sun Salutation, is a powerful yoga sequence that combines 12 asanas of Surya Namaskar with sacred mantras to create a spiritual and physical experience. The 12 Surya Mantras Namaskar are chanted with each movement, enhancing its benefits and deepening the connection with solar energy.
Whether you’re a beginner or an advanced practitioner, learning which 12 Surya mantras to chant while doing Surya Namaskar can elevate your yoga practice. If you’re looking to master Surya Namaskar and other traditional yoga techniques, joining a 200-hour yoga teacher training course in Rishikesh at a yoga teacher training school in Rishikesh can provide deeper insights.
In this article, we go through the meaning of the 12 Surya Mantras, how it makes the practice of Surya Namaskar more special, and ways to incorporate these mantras in your daily life for maximum impact.
What are the 12 Surya Mantras?
These mantras are for the Surya and comprise 12 divine invocations unto the Sun god, of whom each must be done alongside every stance for Surya Namaskar. Every stance here is directly connected to an appropriate Mantra, wherein not only connecting and linking are with the dearness of Suriya the one in power by which solar is worshipped here, but empowering energies associated in strength-healing and that boosts one’s consciousness while getting trained.
The 12 Surya Mantras are as follows:
Each step in Surya Namaskar is associated with a specific Surya Namaskar mantra, which aligns the body, breath, and energy with cosmic vibrations. Here are the 12 Surya mantras Namaskar and their significance:
1. Om Mitraya Namaha
Salutations to the friend of all, the Sun, who enlightens the whole world.
2. Om Ravaye Namaha
Salutations to the Sun, which gives birth to light and heat in everybody.
3. Om Suryaya Namaha
Salutations to the Sun, as he is one form of cosmic power and energies.
4. Om Bhanave Namaha
Salutations to the Sun, through which everybody breathes, live and obtain all forms of nutritions.
5. Om Khagaya Namaha
Aalas to the Sun, who move through the sky with brightness and powers
6. Om Pushne Namaha
Aalas to the Sun, who bestows and sustains life on the Earth.
7. Om Hiranyagarbhaya Namaha
Aalas to the Sun, golden womb of creation and all things.
8. Om Marichaye Namaha
Aalas to the Sun, who grants and nourishes all energies and forces of life with radiant energies.
9. Om Adityaya Namaha
Salutations to the Sun, son of Aditi, the universal mother.
10. Om Savitre Namaha
Salutations to the Sun who gives light on the path of knowledge and wisdom.
11. Om Arkaya Namaha
Salutations to the Sun who is revered and hailed by all creatures.
12. Om Bhaskaray Namaha
Salutations to the Sun who gives light and removes darkness. How do the 12 Surya Mantras Improve Your Surya Namaskar Practice?
When chanting 12 Surya Mantras during Surya Namaskar practice, it creates a deep influence on the body and mind. Here is how they enhance practice:
1. Connecting with Cosmic Energy
The 12 Surya Mantras serve as a link between personal and universal energy. Chanting every single one invokes cosmic power: the healing power of the vitality from the Sun. This cross-linked connection also elevates the importance of the practice, and gives it the impression of the deeply reverential, grateful experience that comes out to appreciate lively sun qualities.
2. Synchronize the Mind with the Body
The rhythmic chanting of mantras helps keep the body movement in rhythm with breathing. So, a mantra is associated with a specific asana, thus reminding you of maintaining the postures that relate to the respective mental focus. The mantra even has a soothing meditative ambience, which makes you all the more vigilant and alert for the practice.
3. Vibrations on the Higher Scale
The mantras, being sacred words that can build up the flow of prana in the body and thus break up the blockages and healings, are known to heighten the vibrational frequency of the practitioner. In the raising of the energy level, it further benefits the complex practices involved in Surya Namaskar, from the flexibility of the body to the condition of emotional balance.
4. Elevation of Spiritual Growth
The 12 Surya Mantras are not physical exercises; they are spiritual practices by themselves. Every mantra connects you to the several dimensions of Sun’s energy and, hence makes your spiritual journey more intense. Surya Namaskar with mantras is an expression of bhakti or devotion and mindfulness, which further develops the bond.
5. Balancing the Mind and Emotions
This Mantra that’s being chanted during Surya Namaskar calms the mind. The more sacred any sound is repeated, it has a better healing effect reducing stress, anxiety, and mental clutter so the results of practice can be achieved easily. There is a bringing within of emotional well-being by especially emotional balance and stability.
6. Raises Energy and Vigor
The Sun is a source of energizing energy, and by reciting those mantras, you are inviting that energizing power within your body. That infusion of energy would gradually create physiological stamina, enhance immunity, and bring your general vitality on high tide. The 12 Surya Mantras will activate the energy centers so you will feel reinvigorated after practicing them.
7. Strengthens Intention Setting
The power of intention, or Sankalpa, gets greatly enhanced with 12 Surya Mantras. Each of the mantras is an affirmation, strengthening the intentions for your practice. The mantras make your desires become manifest in every aspect: body, emotions, and spirit-in the practice-when you start aligning the thoughts, words, and deeds with your purpose.
Surya Namaskar Steps: Step-by-Step Guide
There are 12 Surya mantras refer each mantra, asanas in Surya Namaskar. Each of the asanas has a particular mantra which is recited with it. Each step in Surya Namaskar is synchronized with a specific mantra, making the practice a perfect blend of movement, breath, and devotion. Below is a step-by-step Surya Namaskar breakdown along with its associated mantras: Here are the mantras to be said along with the 12 Surya mantras, asanas of Surya Namaskar:
1. Pranamasana, or Prayer Pose
Mantra: Om Mitraya Namaha
Stand upright, hands together in prayer, accepting the force of the Sun.
2. Hasta Uttanasana, or Raised Arms Pose
Mantra: Om Ravaye Namaha
As you stretch your arms up to the sky, reach out to the Sun and fill yourself with his energy.
3. Padahastasana Standing Forward Bend
Mantra: Om Suryaya Namaha
Bow forward, touch the earth, and pay respect to the sun in all aspects.
4. Ashwa Sanchalanasana Equestrian Pose
Mantra: Om Bhanave Namaha
Bring one leg backward and bend the other knee. Bend forward in reverence to the sun’s light.
5. Dandasana Plank Pose
Mantra: Om Khagaya Namaha
In this strong pose, hold your body straight like a plank, channeling the Sun’s steady strength.
6. Ashtanga Namaskara Salute with Eight Parts
Mantra: Om Pushne Namaha
Lower your body down, keeping the eight parts of the body hands, feet, chest, chin, knees on the ground, honoring the Sun.
7. Bhujangasana Cobra Pose
Mantra: Om Hiranyagarbhaya Namaha
Raise your chest off the ground in a gentle backbend, symbolizing the Sun’s life-giving energy.
8. Adho Mukha Svanasana Downward Facing Dog
Mantra: Om Marichaye Namaha
Lift up your hips and form an inverted V shape with your body feeling the energy flowing through.
9. Ashwa Sanchalanasana Equestrian Pose
Mantra: Om Adityaya Namaha
Take one leg forward, bend the knee and extend the other leg backward and press it on the ground.
10. Padahastasana Standing Forward Bend
Mantra: Om Savitre Namaha
Fold forward again keeping the stretch and letting go of all tension.
11. Hasta Uttanasana Raised Arms Pose
Mantra: Om Arkhaya Namaha
Take a deep breath and extend forward once again, bringing your body into line with the power of the Sun.
12. Pranamasana Prayer Pose
Om Bhaskaray Namaha
Finalize the sequence by returning to the prayer pose and closing the circle of energy and appreciation.
By chanting the Surya Namaskar 12 Surya mantras with each pose, practitioners align their energy with the cosmic forces, enhancing both physical and mental well-being.
Benefits of Surya Namaskar with Mantras
Practicing Surya Namaskar regularly provides multiple benefits for the body, mind and soul. Some of the key benefits of Surya Namaskar include:
• The chanting of mantras in Surya Namaskar brings clarity and focus.
For those looking to deepen their practice, joining the best yoga school in Rishikeshoffers a structured way to learn traditional techniques under expert guidance.
Yoga Teacher Training and Surya Namaskar
If you want to intensify practice or teach Surya Namaskar with 12 Surya mantras, then coming to Rishikesh is the best 200-hour Yoga Teacher Training programme. Rishikesh comes to be widely known as “Yoga Capital of the world.” There can be a plenty of yoga teaching programs that engage traditional practices involving Surya Namaskar with mantras. Understanding what are the 12 Surya mantras Namaskar helps to elevate the experience.
If you want to master 12 Surya mantras with Surya Namaskar steps and its deeper spiritual significance, consider joining a yoga teacher training school in Rishikesh. The greatest yoga teacher training in Rishikesh is one that combines the physical and spiritual realms of yoga with a focus on teaching classes and creating transformations. The greatest schools will lead you through the most accurate ways of teaching Surya Namaskar, meditation, pranayama, and chanting mantras so that you can authentically feel confident in your teachings. At a top yoga school in Rishikesh, experienced teachers guide students through step-by-step Surya Namaskar, ensuring alignment, breath coordination and spiritual depth.
Frequently Asked Questions FAQs
1. What is the strong Surya mantra?
• Most powerful Surya mantra is said to be “Om Adityaya Namaha.”
O This mantra directly addresses the Sun energy and acknowledges him as the creator and sustainer of all beings. Covers 12 poses of Surya Namaskar with 12 Surya mantras, alignment, breathing techniques, and philosophy.
o Symbolic meaning: The word “Aditya” is synonymous with the Sun, and the word “Namaha” is synonymous with bow or offering reverence. By reciting this mantra, one becomes in harmony with the cosmic power of the Sun, which would cleanse and rejuvenate the body, mind, and soul.
O Benefits: By reciting this mantra, the user will reportedly be imbued with high levels of vitality, clarity, and strength because of the energies from the Sun, which are commonly used to stimulate health and spiritual development.
O Strong Connection: This is an energizing mantra that allows the user mental concentration and internal balance, giving him a deep connection with spirit in Surya Namaskar.
2. What are 3 benefits of Sun Salutations?
•Improves Flexibility and Strength:
Sun Salutations is a series of dynamic stretches and strength-building poses that work on the entire body.
Regular practice of Sun Salutations can, over time, dramatically improve flexibility in the spine, hips and shoulders while at the same time developing muscular strength, especially in the core, arms and legs.
•Increases Mental Clarity and Focus:
o As a flowing meditation, Surya Namaskar with 12 Surya mantras activates awareness and concentration. Synchronized breath with every movement purifies the mind and helps in reaching greater mental clarity.
o In the practice, it develops present-moment awareness that enhances focus and concentration both on and off the mat.
• Energizes and Life Force:
o Flowing movement in Surya Namaskar stimulates energy pathways in the body, hence assists in the circulation of life force or prana.
o The flow of Sun Salutation sparks circulation and metabolism to kick-start energy that will bring vitality and wellness. So, the best time to practice Surya Namaskar with is to begin your day.
3. How do we learn to remember Surya Namaskar with 12 Surya mantras?
• Consistency is the Key:
o Try to practice as much as you can. The more you practice, the more the mantras will get engraved inside your brain. But doing the postures with the 12 Surya mantras chanted, it is a very natural process that leads to memorizing the mantras.
Try to chant 12 Surya mantras aloud or mentally before every posture and listen to the pronunciation and vibrations; that will surely increase your interaction with the mantra.
• Break the Mantras Down:
O Divide 12 Surya mantras into pieces and end each line with a different Surya Namaskar Asana.
O For instance, one can say the mantra “Om Mitraya Namaha”, and then insert the first asana, known as Pranamasana Prayer Pose, and then all 12 asanas with 12 Surya mantras in the same fashion.
• Make use of Visualization Techniques:
O Connect the meaning of each mantra with its physical position. This way, one is sure to recall to pronounce the meaning of the mantra.
O With each mantra while reciting it during the asanas, visualize a sun rising in your mind. You are actually reminding yourself about your association with solar energy.
•Practice in the presence of an Instructor
O If memorization is difficult, practice with an instructor or listen to guided Surya Namaskar recordings with mantras. The repeated sound will be there in your subconscious mind while practicing on your own.
4. Is 12 Surya Namaskar enough?
•12 Rounds for Overall Health:
O 12 rounds of Surya Namaskar is taken as a full practice to keep the body in general physical fitness and health. This is an all-rounded exercise that works several muscles, enhances flexibility, provides energy and clarifies the mind.
• General Fitness: Good foundation for deeper practice
O 12 rounds are sufficient for beginners or general fitness. It is an all-rounded workout that strengthens, stretches, and energizes the body.
• According to the purpose:
O If you want to build endurance, muscular power or spiritual advancement, you can do more rounds. Though some practitioners do 24 rounds or more in their daily practice, they may specifically do so on special occasions such as Chandrayaan or Surya Jayanti.
•Mix with Other Practices:
O In case the benefits sought are more active in conjoining Surya Namaskar, pranayama breathwork, meditation or restorative yoga can be employed. The additional practices will add up to the effects of Surya Namaskar and complete a holistic wellness and healthcare approach on human body.
•Personal Preference and Limitation:
O Depends on the condition of health and fitness level along with the person’s objectives if 12 rounds are enough for him. Beginners or new persons to yoga practice a few rounds and gradually go up as per the body adjustment.
Never forget to hear your body. Practice according to your personal limit to avoid overexertion.
The 12 mantras of Surya Namaskar add immense power to an already transformative practice. By combining step-by-step Surya Namaskar with 12 Surya mantras in Surya Namaskar, practitioners experience a holistic blend of physical fitness, mental clarity and spiritual awakening.
If you’re ready to deepen your yoga journey, consider learning from the best yoga school in Rishikesh. Whether you seek self-transformation or aspire to become a certified instructor, a structured course in Surya Namaskar mantra practice will provide the perfect foundation.
If you really wish to dig deeper into the transformational power of yoga, join a 300 Hour Yoga Teacher Training at one of the esteemed Yoga Gurukul in Rishikesh. The best yoga and meditation training will come from the course, but learning how to live life more centered, mindful and purposeful is what one takes home from it. You will find the depth of your practice in a truthful and nurturing environment, given the confidence and tools to succeed in all aspects of your life.